After installation, Studio for InCopy will have added the following components to InCopy:
- Panels
- Tools
- Toolbars
- Menu items
- Workflow dialog boxes
- Frame icons
- Text variable brackets
- Preferences
- User color
- Keyboard shortcuts
Panels
- The Studio panel. This panel is the direct link to the files that are stored in Studio Server and is therefore the main panel that you will be working with. It is accessed through Window > Studio > Studio.

For more information about using the panel, see:
- Using the Studio panel in Studio for InDesign or InCopy
- Searching and locating files using Studio for InDesign and InCopy
- The Editions panel. A print publication such as a newspaper can have several Editions: a morning Edition and an evening Edition, or different Editions for different regions. The layout designer in InDesign can specify which components on a layout (such as adverts or news articles) belong to an Edition. The Editions panel can be used to show or hide these Edition specific components when viewing the layout in the Layout tab of InCopy. It is accessed through Window > Studio > Editions.
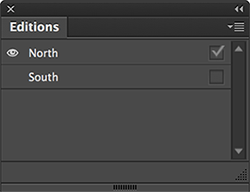
For more information about Editions, see Working with Editions in Studio for InCopy.
Tools
- The Sticky Note tool. When an article is placed on a layout, the Sticky Note tool can be used to place a Sticky Note — a short message or reminder — on the layout in the Layout tab.

For more information, see Working with Sticky Notes in Studio for InDesign and InCopy.
Toolbars
- The Studio toolbar. This toolbar holds buttons for easily accessing the often used options 'Send Article to Next', 'Update Geometry', and 'Send Message'. The toolbar is accessed through Window > Studio > Studio Toolbar.

For more information about using the Studio toolbar, see Using the Studio toolbar in Studio for InCopy.
- The Resize Text Frame toolbar. When an article is placed on a layout, the Resize Text Frame toolbar can be used to change the size or position of the text frame that holds the article. The toolbar is accessed through Window > Studio > Resize Text Frame Toolbar.

For more information about using the Resize Text Frame toolbar, see Using the Resize Text Frame toolbar in Studio for InCopy.
Menu items
Studio for InCopy makes changes to existing menus and adds a new menu.
InCopy menu (macOS) / Help menu (Windows)
A command named 'About WoodWing Plug-ins...' is added. Clicking it opens the About WoodWing dialog box which is used for verifying version numbers of installed WoodWing plug-ins (including Studio for InCopy) and activating these plug-ins or transferring the activation to another system.

Figure: The About WoodWing Plug-ins dialog box.
File menu
Some of the functionality added by Studio for InCopy conflicts with existing InCopy functionality.
As a result, the following commands from the File menu have been modified:
| Command | Modification |
|---|---|
| Browse... | Removed |
| Save All Content | Removed |
| Check Out | Removed |
| Check In All | Removed |
| Package | Removed |
| Save Content | Renamed to 'Save' |
| Save Content As... | Renamed to 'Save As...' |
| Save Content Copy... | Renamed to 'Save a Copy...' |
| Revert Content | Renamed to 'Revert' |
| Check In | Moved to the WoodWing Studio menu |
| Cancel Check Out | Moved to the WoodWing Studio menu |
| Update Content | Moved to the WoodWing Studio menu |
| Update Design | Moved to the WoodWing Studio menu |
Type menu
The Type > Text Variables > Insert Variable menu contains an additional list of Studio text variables. These can be used to insert variables into your text that are related to files stored in Studio Server.
Object menu
The Object menu contains a submenu named 'Smart Jump', containing commands for the Smart Jump feature (the ability to jump an article from one layout to another with automatic placement of Continued On... and Continued From... elements).
View menu
Two new commands are added to the View menu:
- Dim/Undim Non-editable Objects. For dimming all objects on the Layout View that are not checked-out.
- Sticky Notes. For showing or hiding Sticky Notes and their Pins.
WoodWing Studio menu
The WoodWing Studio menu is located between the View menu and the Window menu. Together with the Studio panel, it is your main tool for managing articles such as saving them in different ways.
Window menu
In the Window menu, various commands are added for accessing the Studio toolbars and panels:
- Window > Studio >
- Editions. For accessing the Editions panel.
- Resize Text Frame Toolbar. For accessing the Resize Text Frame toolbar.
- Studio. For accessing the Studio panel.
- Studio Toolbar. For accessing the Studio toolbar.
- [Studio panel name]. The name of each Studio panel that is manually created is added to the menu.
Library panel flyout menu
Studio for InCopy can be used to store InDesign libraries in Studio Server. It therefore adds various commands to the flyout menu of the Library panel. For more information, see Reusing objects using InDesign libraries with Studio for InDesign.
Context menu
When opening an article that is part of a Smart Jump story, the context menu of the text (accessed by right-clicking it) contains a submenu named Smart Jump. It contains options for using the Smart Jump functionality.
Quick Apply panel
Many commands for Studio for InCopy are also available via InCopy's Quick Apply panel for easy access.
Workflow dialog boxes
When performing a particular action such as save or copy, Studio for InCopy will bring up its own dialog box. This dialog box — referred to as a 'workflow dialog box' — can be used to set properties such as the name of the file, the location in Studio Server where it should be saved, the Workflow Status, and so on.
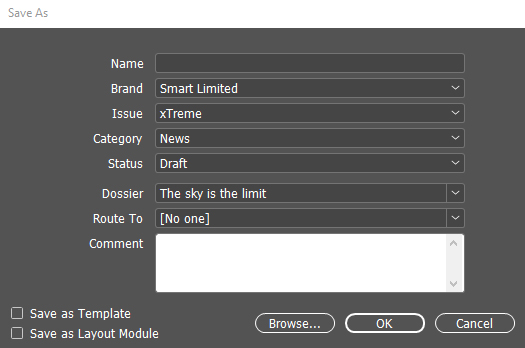
Figure: The dialog box for saving an article.
Frame icons
When viewing a layout in Layout View, various icons are used for identifying articles and images that are placed on that layout:
| Icon | Description |
|---|---|
| Slashed pencil. Shown for an article that is checked-in. | |
| Pencil. Shown for an article that is checked-out. | |
| Chain. Shown for images and Layout Modules. |
Note: To see these icons, choose View > Screen Mode > Normal.
Text variable brackets
Studio for InCopy contains features which make use of text variables:
- Studio Server Fields. Text variables holding Studio Server specific content such as the Brand name, Publication date and so on.
- Smart Jump. Linking articles on different pages and/or on different layouts can be done by using the Smart Jump feature. Text variables are used in the automatically created Continued On... and Continued From... text elements.
The text that is inserted by each feature is enclosed by orange brackets.

Figure: Text variables that are inserted by Studio for InCopy appear between orange brackets. Shown here are the text variable for the name of the Jump story (A) and the text variable for the page number reference (B).
Preferences
Studio for InCopy adds 2 new groups of preferences:
- Preferences for Smart Image
- Preferences for Studio for InCopy
For more information, see Using Smart Image and Studio for InDesign and InCopy Preferences.
User color
Your user profile that has been set up in Studio Server for you contains a User Color option. It is used to distinguish specific changes that have been made by you from other users (who typically have another color defined).
This color is used in the following areas:
- Sticky Notes The color is shown in front of the name of the user who created a Sticky Note or replied to a Sticky Note.
- Track Changes When tracked changes are turned on in InCopy, these changes are color-coded based on the user color.
Keyboard shortcuts
Studio for InCopy adds an additional set of keyboard shortcuts to InCopy with which you can control many features.
For more details, see Keyboard shortcuts for Studio for InCopy.
Comments
0 comments
Please sign in to leave a comment.