While working on a placed article in InDesign, you can:
- Open the article for editing (check-out)
- Close the article and save all made changes (check-in)
- Close the article without saving the changes (abort check-out)
Opening an article for editing (check-out)
An article that is stored in Studio Server and placed on the layout needs to be checked-out before it can be edited in InDesign. This unlocks the article for you and locks it for other users so that they cannot make any changes to the article until you have checked it in again.
Step 1. Select the article by:
- Selecting one of the frames of the article on the layout.
- Selecting the article or one of its components in the Elements panel.
- Right-clicking an article in the Studio panel or Dossier panel and choosing Go to Placement.1
- Left-clicking an article in the Studio panel or Dossier panel while holding down Ctrl+Shift (Windows) or Cmd+Shift (macOS) on the keyboard.1
1 This feature requires the following versions of Studio for InDesign (see How to check which version is installed):
- Version 16.x for Adobe 2021, or any higher version of Studio for InDesign and InCopy for any higher version of Adobe.
- Version 15.2.0 for Adobe 2020, or any higher version of version 15.
Step 2. Check-out the article by doing one of the following:
- From the menu, choose WoodWing Studio > Check Out Article.
- Click the Check Out Article button in the Elements panel.
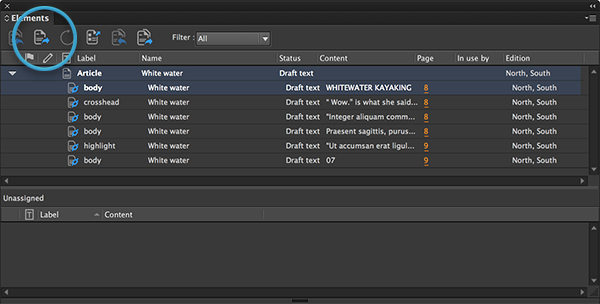
- From the flyout menu of the Elements panel, choose Check Out Article.
- Right-click an article or article component in the Elements panel and choose Check Out Article from the context menu.
- Right-click the text frame on the layout and choose Check Out Article.
Opening all articles simultaneously
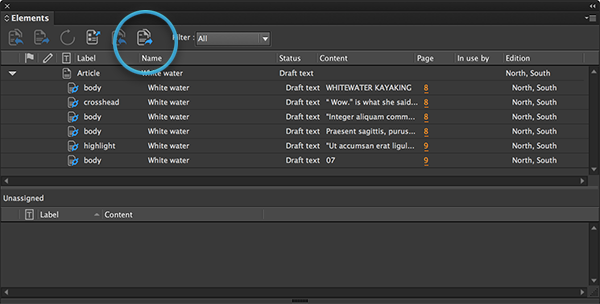
To open all placed articles in one action, click the 'Check Out All Articles' button in the Elements panel. No articles or frames need to be selected for this to work.
Closing an article and saving all made changes (check-in)
When finished working on the article, it needs to be saved to Studio Server and closed. This process is referred to as 'checking-in' the article and makes the article available to other users for editing.
Two methods exist: with and without the Check-in dialog box appearing.
Method #1: Check-in using the Check-in dialog box
Use this method if you want to change any of the properties of the article.
Step 1. Select one or more articles by:
- Selecting one of the frames of the article on the layout.
- Selecting the article or one of its components in the Elements panel.
- Right-clicking an article in the Studio panel or Dossier panel and choosing Go to Placement.1
- Left-clicking an article in the Studio panel or Dossier panel while holding down Ctrl+Shift (Windows) or Cmd+Shift (macOS) on the keyboard.1
1 This feature requires the following versions of Studio for InDesign (see How to check which version is installed):
- Version 16.x for Adobe 2021, or any higher version of Studio for InDesign and InCopy for any higher version of Adobe.
- Version 15.2.0 for Adobe 2020, or any higher version of version 15.
Step 2. Check-in the article by doing one of the following:
- From the menu, choose WoodWing Studio > Check In Article....
- Click the Check In Article... button in the Elements panel.
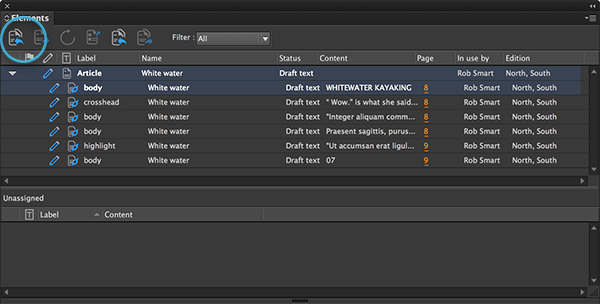
- From the flyout menu of the Elements panel, choose Check In Article....
- Right-click an article or article component in the Elements panel and choose Check In Article... from the context menu.
- Right-click the text frame on the layout and choose Check In Article....
The Check-in dialog box appears.
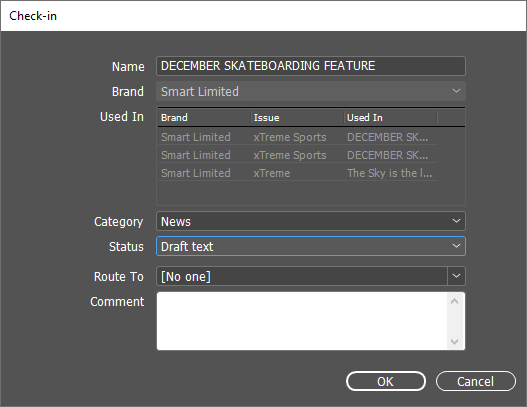
Step 3. (Optional) In the Name field, modify the article name or leave the original name.
Note: See also: Using duplicate file names in Studio Server and Invalid file name characters in Studio Server.
Step 4. (Optional) Change any of the remaining properties.
|
Notes:
|
Step 5. Click OK.
When multiple articles were selected, a Check-in dialog box for the next article is displayed until all articles are checked-in. Repeat steps 3 to 5 until no more dialog boxes appear.
Method #2: Check-in without using the Check-in dialog box
Use this method when you know that you don't want to change any of the properties of the article. During this process, the Check-in dialog box will not appear. This makes the process very quick, especially when checking-in multiple articles.
Note: This process checks-in all articles that have been opened for editing; it is not possible to check-in individual articles while leaving others open for editing.
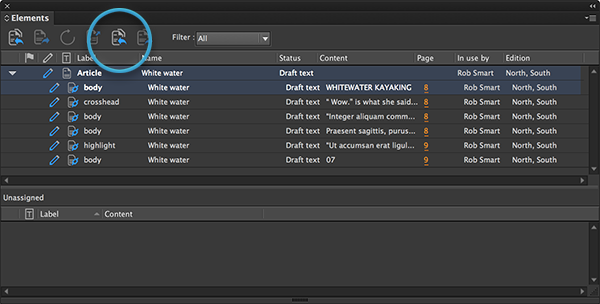
- Click the 'Check In All Articles' button in the Elements panel. No articles or frames need to be selected for this to work.
Closing an article without saving the changes (abort check-out)
Use this method when:
- You have opened the article for editing by mistake or decided that you do not want to work on it
- You want to close the article without saving any changes that you have made
This method is known as the 'abort check-out' action. It closes the article and returns it to the state it was in before it was checked-out.
Step 1. Select one or more articles by:
- Selecting one of the frames of the article on the layout.
- Selecting the article or one of its components in the Elements panel.
- Right-clicking an article in the Studio panel or Dossier panel and choosing Go to Placement.1
- Left-clicking an article in the Studio panel or Dossier panel while holding down Ctrl+Shift (Windows) or Cmd+Shift (macOS) on the keyboard.1
1 This feature requires the following versions of Studio for InDesign (see How to check which version is installed):
- Version 16.x for Adobe 2021, or any higher version of Studio for InDesign and InCopy for any higher version of Adobe.
- Version 15.2.0 for Adobe 2020, or any higher version of version 15.
Step 2. Abort Check-out the article by doing one of the following:
- From the menu, choose WoodWing Studio > Abort Check Out Article.
- From the flyout menu of the Elements panel, choose Abort Check Out.
- Right-click an article or article component in the Elements panel and choose Abort Check Out from the context menu.
- Right-click the text frame on the layout and choose Abort Check Out.
A message appears:
Are you sure you want to close this file without saving the made changes?

Step 3. Click Yes.
Comment
Do you have corrections or additional information about this article? Leave a comment! Do you have a question about what is described in this article? Please contact Support.
0 comments
Please sign in to leave a comment.