When working with articles and its components, the order in which the components appear is important for efficiently working on them.
The components in a multi-component article are ordered in a hierarchical way.

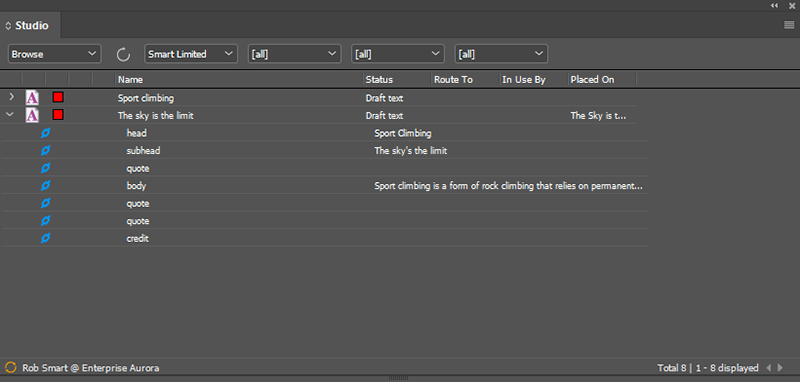
Figure: The components of an article shown in the Studio panel.
Why this order is important
This hierarchical order is especially important for users working in InCopy or Studio because they prefer to see this structured order when editing the article.
Example: It makes sense that when editing an article in Studio or InCopy that the header is displayed first, followed by the sub-header, intro, body and so on. Should this order be different for each article, locating the article component to work on becomes much more difficult and time consuming.

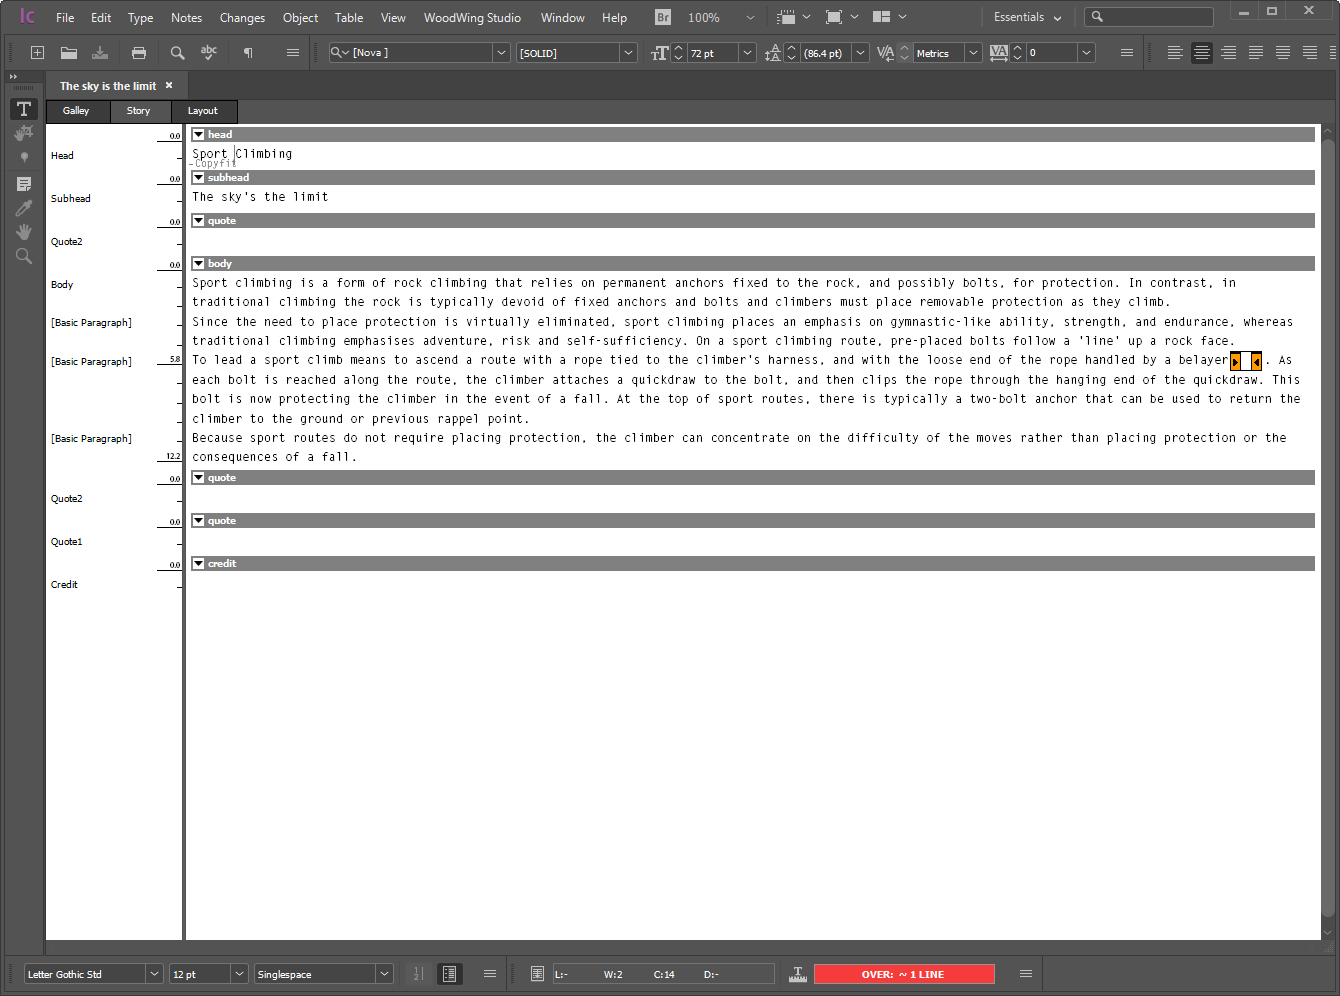
Figure: The same article as the one shown in the Studio panel above, but now opened for editing in InCopy. Note how the correct order of the article components helps locating each component.
How this order is controlled
When creating a new article or when adding components to an existing article, the order is based on the order of the following:
- The frames on the page (this is the default method)
- The Element Label preferences
|
Example: Suppose you want to convert the following frames that are labeled 'intro', 'body' and 'head' into an article:
When ordering is done based on the order of the frames on the layout, this will result in an article with the following structure: > Article name When ordering is done based on the order of the Element Label preferences and the labels are ordered by “head”, “intro” and “body”, this will result in an article with the following structure: > Article name |
Based on the order of the frames on the page
In this default method, the order is controlled by the order of the frames on the page starting from the top left position and ending at the bottom right position.
Based on the order of the Element Label preferences
Note: For this method to work, the feature named 'UseElementLabelOrder' needs to be enabled in Studio Server. For more information, see Letting the Element Label preferences of Studio for InDesign control the component order of articles.
Step 1. Access Preferences > Element Label....
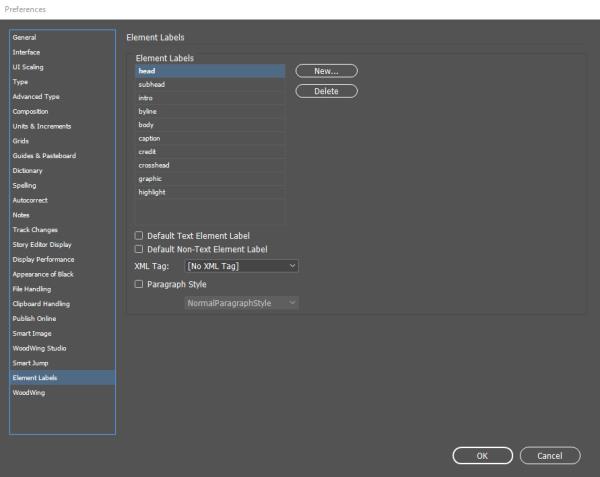
The Element Label preferences appear.

Step 2. In the list of Element Labels, drag the labels in the desired order.
Step 3. Click OK.
Notes: The order is also used when adding other components to an existing article (for instance when dropping a component onto an article in the Elements panel).
Troubleshooting
When creating a new article or adding components to an existing article, the newly added components are positioned at the bottom of the structure.
This happens when:
- The article contains Element Labels that are not part of the preferences.
- The order was changed manually in the Elements panel (for instance by dragging a component to another position).

Comment
Do you have corrections or additional information about this article? Leave a comment! Do you have a question about what is described in this article? Please contact Support.
0 comments
Please sign in to leave a comment.