When an article is created it consists of one or more components such as a 'head', 'intro' and 'body' component.
There may come a time when you want to add additional components to the article, such as a frame containing an image or other text frames.
This can be done by:
- Adding the frames when checking-in the article
- Using the Elements Panel
Adding the frames when checking-in the article
Step 1. Make sure that the article to which you want to add more frames is checked-out.
Step 2. Select at least one frame that is part of the article as well as the other frames that you want to add to the article.
Step 2. Check-in the article.
A message appears asking to confirm the action.

Step 3. Do one of the following:
- Click Yes to add all frames to the existing article.
- Click No to check-in only the existing article and to not add the other frames.
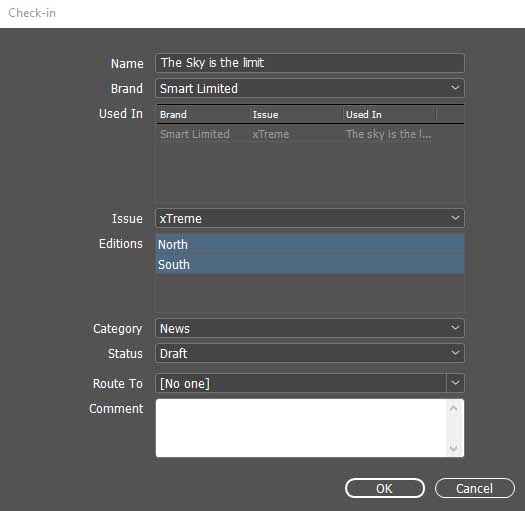
The Check-in dialog box appears.

Step 4. (Optional) Modify any of the properties as needed.
Step 5. Click OK.
The article is checked-in and the additional frames are made part of the article.
Using the Elements Panel
Step 1. Make sure that the article to which you want to add more frames is checked-out.
Step 2. Access the Elements panel by choosing Window > Studio > Elements.
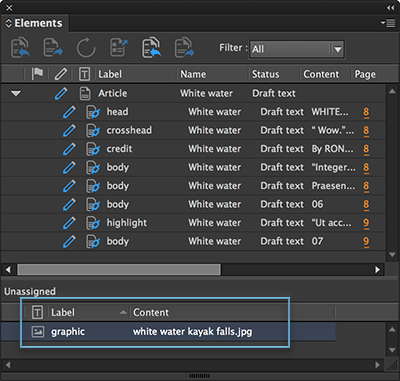
Step 3. On the layout, select the frames that you want to add to the article. They appear in the Unassigned Elements pane of the Elements panel.

Figure: An unassigned graphics frame in the Unassigned pane of the Elements panel.
Step 4. Drop the frames onto the article in the Elements pane above the Unassigned pane.
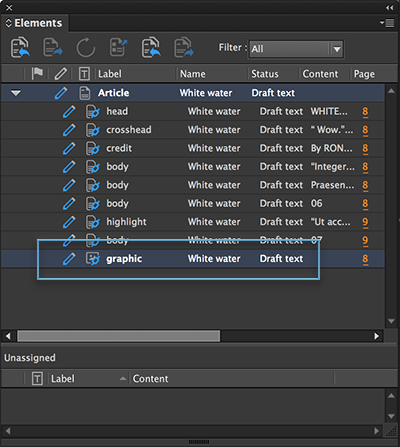
The frames are added to the article.

Figure: The graphics frame added to the article.
Troubleshooting
I am able to add text frames but not graphic frames.
To add graphic frames, Studio Server needs to be configured. Check with your system administrator about this.
Comment
Do you have corrections or additional information about this article? Leave a comment! Do you have a question about what is described in this article? Please contact Support.
0 comments
Please sign in to leave a comment.