When displaying pages in the Adobe Content Viewer in portrait orientation, you have the choice of presenting the story on such pages in the following ways:
- Static, based on a designed page: the page is based on a designed layout and exported as an image. As a result, the page is a true but static representation of the layout.
- Dynamic, based on HTML: the page is based on an article and shown in HTML form (together with the images of the story). The user is able to increase or decrease the font size of the article.
This article describes how to configure showing stories in HTML form, a method referred to as the 'Text View Mode'.
About Text View markup
Displaying text in Text View Mode is done by using the Text View Markup feature. This allows you to create articles which will display in fully marked up text, including:
- Font styles such as bold, italic, underlining and strike-through
- Vertical text alignment
- Drop caps
- Subscript, superscript and capitalization
- Left-to-right or right-to-left support
- Swatches (CMYK, Labs, and RGB)
- Bullets and numbering
- Tables
- Hyperlinks (but no cross-links)
- Footnotes (hyperlinked)
- No-breaks (text selections only)
Styling is done by using the XHTML 1.1 / CSS 2.1 format, thereby offering a vast amount of styling possibilities and features (such as applying background color, border styles, etc.). This can also be controlled down to Brand or Issue level.
Technical Process
The technical process of creating an issue containing a fully marked up article for Text View mode is as follows:
- An article is created using InDesign or InCopy and stored in the system as a .wcml file.
- Upon clicking the Publish, Update, Preview, or Export button in Content Station, the system converts the article to XHTML format and embeds it into the folio file, together with the required CSS styles taken from the style sheet.
Note: The converter exports CSS 2.1 features, but further customizations in CSS 3 can be made (but make sure that these are supported by the digital device).
Styling Methods
In order to set up the article so that its content is correctly converted into the correct style, InDesign or InCopy users can use one of the following methods:
- By assigning an Element label to an article component. The name of the Element label is mapped to the CSS style.
- By applying paragraph and character styles. The name of the paragraph or character style is mapped to the CSS style.
It is also possible to combine both methods simultaneously, and either method can be configured to be used on the following levels:
- System wide
- Per Brand
- Per Issue
Element Label Mapping
The Element Label Mapping method is a typical method for applying simple text mark-up and works by applying an Element label to each article component. The name of the Element label is mapped to the corresponding name in the style sheet. This way, different styling can be set up for each applied Element label.
When using this method, take note of the following:
- Paragraph and character styles are ignored/flattened (meaning that the formatting applied in InDesign/InCopy is lost) and Web styles (CSS) are used instead.
- Manually applied overrides to styles are respected. (For limitations concerning using overrides, see About overrides below.)
Styles Mapping
The Styles Mapping method is typically used for:
- Advanced and/or detailed text mark-up
- Situations in which strong house styling is required
- Applying specific styles unknown to InDesign/InCopy
The method works by applying paragraph styles, character styles, or table styles to the text or table. The names of the applied styles are mapped to the corresponding name in the style sheet.
When using this method, take note of the following:
- Manually applied overrides to styles are respected. (For limitations concerning using overrides, see About overrides below.)
- Unknown styles are flattened
- The use of special characters in the style name is supported
About overrides
When applying a manual override to a particular style, such as applying a bold style to a paragraph style which turns the paragraph into italic text, take note of the following:
- Font sizes must be defined in ems in the CSS style in order to support zooming on the digital device.
- Font colors cannot be overridden through CSS styles.
Using tables
One powerful advantage of the Text View Markup feature is the fact that it supports tables.
When including a table in an article, take note of the following:
- Table style definitions are not exported
- Table style names are exported and can be mapped to CSS styles
- Bodies, headers and footers are supported
- Table features such as merged cells and borders are not supported
Known limitations
The following are not supported by the Text View Markup feature:
- Font family mapping
- Inline images
- Shapes (including lines)
- Text indents
- Cross-references
- Text frame properties such as multiple columns
- Print-specific features such as tracking, kerning, scaling, baseline shift, and so on.
Style sheets
Enterprise converts the created article into the correct styling by making use of the following style sheets :
- TextViewBase.css. Used for mapping styling with applied Element labels, XHTML elements such as body, hyperlink, etc., and structural elements such as tables, lists, etc.
- TextViewStyles.css. Used for mapping styling with applied paragraph and/or character styles.
These files can be found in the following location:
[Enterprise server path]/config/dps-styles/textview
Note: When sharing files that are used more than once in the publication by storing them in the HTML Resources location, the files can optionally be located in the HTML Resources folder for that issue.
Use each file to familiarize yourself with the way the design components (such as Element labels, paragraph styles, and so on.) are mapped to CSS styles. Edit each CSS file so that it matches the required styling for your publication.
Keep fonts and colors on one level: either on the Element label level or paragraph/character style level.
|
Note: When the folio is previewed or published, all files that are stored in this location are moved to the following folder in the folio file: ../../../HTMLResources This location is shared by files extracted from the HTML Resources Dossier (see the Digital Publishing Tools User Guide, chapter 5, Managing and Publishing Content section Linking to HTML Resources). Because the Text View files are moved to this location after the HTML Resources files have been moved there, a potential risk exists of files with the same name being overwritten. To prevent this from happening, move all files from the textview folder to the HTML Resources Dossier when making use of the HTML Resources feature. |
Applying styling to a specific Brand or Issue level
By default, styling is applied to all exported issues that are stored within the same Enterprise Server instance.
In case a specific Brand needs specific styling, a dedicated set of style sheets can be set up. This is done by creating a separate folder containing the style sheets for each Brand and including the Brand ID in the folder name. When Enterprise Server encounters such a folder, it uses the style sheets located in that folder instead of the style sheets in the default folder.
In a similar manner, styling can be further specified down to Issue level.
Setting the styling on Brand level
Step 1. Access the Brand Maintenance page for which you want to set the styling.
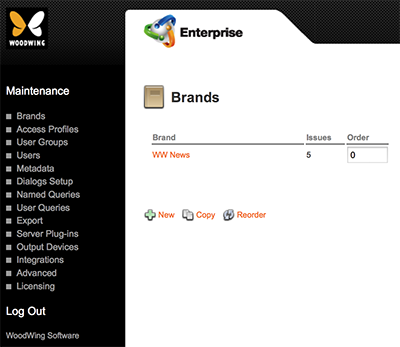
Step 1a. In the Maintenance menu or on the Home page, click Brands.
The Brands page appears.
Step 1b. Click the name of the Brand.
The Brand Maintenance page appears.
Step 2. Verify the ID for the Brand as shown in the address bar.
|
Example: In the following URL, the Brand ID = '1': http://localhostl/Enterprise/server/admin/hppublications.php?id=1 |
Step 3. Duplicate the following folder:
[Enterprise server path]/config/dps-styles/textview
Step 4. Rename the copied folder to:
textview_brand_[id]
where [id] stands for the Brand ID as found in Step 2.
Setting the styling on Issue level
Step 1. Access the Issue Maintenance page for which you want to set the styling.
Step 1a. In the Maintenance menu or on the Home page, click Brands.
A page showing all created Brands appears.

Figure: The Brands page.
Step 1b. Click the name of the Brand.
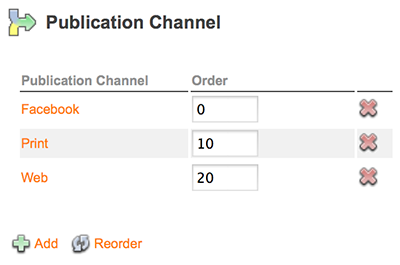
The Brand Maintenance page appears.

Figure: The Brand Maintenance page.
Step 1c. Locate the Publication Channel options.

Step 1d. Click the name of the Publication Channel.
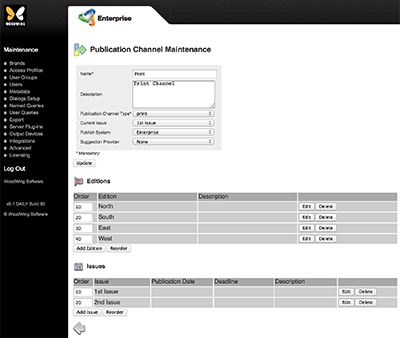
The Publication Channel Maintenance page appears.

Figure: The Publication Channel Maintenance page for a print channel.
Step 1e. Click the Edit button for the Issue. The Issue Maintenance page appears.
Step 2. Verify the ID for the Issue as shown in the address bar.
|
Example: In the following URL, the Issue ID = '16': http://localhostl/Enterprise/server/admin/hppublissues.php?id=16 |
Step 3. Duplicate the following folder:
[Enterprise server path]/config/dps-styles/textview
Step 4. Rename the copied folder to:
textview_issue_[id]
where [id] stands for the Issue ID as found in Step 2.
Note: When sharing files that are used more than once in the publication by storing them in the HTML Resources location (see the Digital Publishing Tools User Guide, chapter 5, Managing and Publishing Content – section Linking to HTML Resources), you can move the content of the textview_issue_[id] folder to the HTML Resources Dossier. To make sure that the refinement to the specific issue still works, create a folder with a similar name within the ZIP file.
Including images
One of the ways of configuring the CSS files is the inclusion of images. This can be used for instance to automatically include an icon anywhere in the text, or to create a background image/pattern.
Step 1. Place the images that need to be included in the article in the following location:
[Enterprise server path]/config/dps-styles/textview/assets
Any images placed in this location are embedded in the folio file during any of the publishing operations (Publish, Update, Preview or Export).
Note: Make sure that the user named 'www/inet' has access to these files.
Step 2. In the CSS file, add a reference to the image in the images folder.
|
Example: content: url(../../HTMLResources/logo.jpg); |
Note: Inside the folio file, each story has its own folder. Within that folder, the Text View article can be found in the StackResources/textview.html file, while the embedded assets can be found in the HTMLResources folder of the Issue. To refer from the textview.html file to one of the assets, a relative URL must be given, which explains the ../../ prefix shown above.
Reference Materials
Enterprise Server 9 documentation
About Enterprise 9 and Adobe DPS
Changing the Free/Paid status in Enterprise Server 9 of an issue that only exists on Adobe DPS
Changing the Public/Private status in Enterprise Server 9 of an issue that only exists on Adobe DPS
Removing an issue from Adobe DPS that does not exist in Enterprise Server 9
Overruling the folio creation behavior of Smart Connection 9
Tutorial for setting up Devices, Templates and Artboards in Enterprise 9 for Adobe DPS
Comment
Do you have corrections or additional information about this article? Leave a comment! Do you have a question about what is described in this article? Please contact Support.
0 comments
Please sign in to leave a comment.