Placing an image that is stored in Assets Server onto a layout in InDesign with Studio for InDesign installed is one of the ways of adding files from Assets Server to Studio Server.
When doing so, one of two actions can take place:
- The image is automatically added to Studio Server
- The image is not automatically added to Studio Server but can be added manually if needed
In addition, the image also needs to be made part of a Dossier.
This article describes these actions in more detail.
For details about how to control which action takes place, see Controlling the actions of placing files stored in Assets Server in InDesign with Studio installed.
Adding an image automatically
Method 1: Place the image on an InDesign layout stored in Studio Server
Note: In this scenario, the option to automatically add an image stored in Assets Server to Studio Server is enabled.
Step 1. Place an image stored in Assets Server onto an InDesign layout that is stored in Studio Server.
The image is automatically added to Studio Server.
Next, the image should typically also be made part of a Dossier. Studio for InDesign tries to do this automatically (see Rules for adding an image to a Dossier). When this is achieved, the process of adding an image is now completed.
When the image cannot be automatically added to a Dossier, a window appears to choose the Dossier from. A default Dossier is automatically selected.
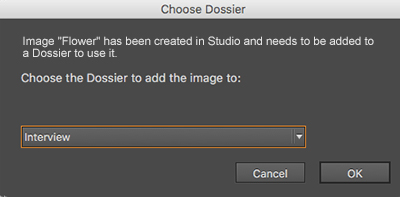
Step 2. From the list, choose a Dossier to which the image should be added and click OK.
Method 2: Place the image on an InDesign layout stored locally or in Assets Server
Note: In this scenario, the option to automatically add an image stored in Assets Server to Studio Server is enabled.
|
Info: This requires the following versions of Studio for InDesign:
|
Step 1. Place an image onto an InDesign layout that is stored locally or stored in Assets Server.
At this point the images are still linked to Assets Server.
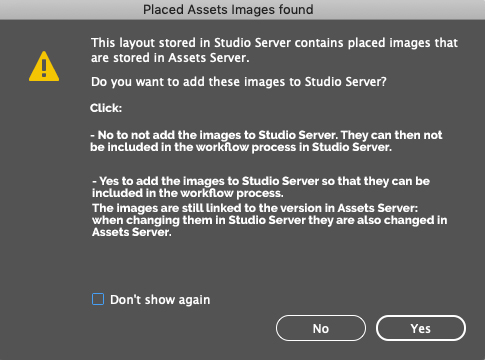
Step 2. Choose WoodWing Studio > Save As... or WoodWing Studio > Check In.... The Save As dialog appears for storing the layout in Studio Server. Next, a message appears asking if the Assets images need to be added to Studio Server. Click Yes to Add them to Studio Server.
Tip: When clicking No, the images are not added to Studio Server. To still add them while the layout is open (as is the case after choosing Save As), choose WoodWing Studio > Add Assets Images to Studio.
Method 3: Open an InDesign layout with a placed image stored in Assets Server
Note: In this scenario, the option to automatically add an image stored in Assets Server to Studio Server is enabled.
|
Info: This requires the following versions of Studio for InDesign:
|
Step 1. Open an InDesign layout that is stored in Studio Server and that already contains a placed image stored in Assets Server.
A message appears asking if the Assets images need to be added to Studio Server. Click Yes to Add them to Studio Server.
Tip: When clicking No, the images are not added to Studio Server. To still add them while the layout is open, choose WoodWing Studio > Add Assets Images to Studio. See also scenario 4.
Method 4: Make a placed image stored in Assets Server part of an article
Note: For the process of opening the layout and the steps that follow depending on how preferences are set and the version of Studio for InDesign used, see the above methods. It is assumed here that the opened layout is stored in Studio Server and that a placed image is stored in Assets Server.
Step 1. Add some text frames or check out an existing article.
Step 2. Select all frames of the article together with the frame holding the image and choose WoodWing Studio > Check In Article... or WoodWing Studio > Create Article... .
Studio Server will detect that an image is included that currently only exists in Assets Server and will ask you if it needs to be added to Studio Server:
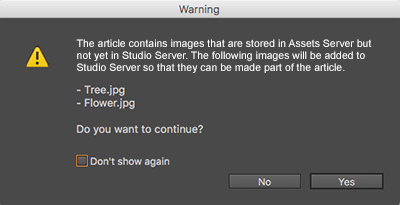
Step 3. Click Yes.
The image is added to Studio Server.
Note: When clicking No, the process is canceled and the article is not created; it is not possible to create an article in Studio Server that contains images stored in Assets Server.
The Check In Article or Create Article dialog box appears.
Step 4. Make any changes, including choosing a Dossier to add the article and image to.
Step 5. Click OK.
Method 5: Open an InDesign layout with a placed image stored in Assets Server
Note: In this scenario, the option to automatically add an image stored in Assets Server to Studio Server is disabled.
|
Info: This requires the following versions of Studio for InDesign:
|
Step 1. Open an InDesign layout that is stored in Studio Server and that already contains a placed image stored in Assets Server.
Step 2. Choose WoodWing Studio > Add Assets Images to Studio.
Adding an image manually
Adding an image manually can be done in the following ways:
Method 1: Using the Create Image command or Add Assets Images to Studio command of Studio for InDesign
Note: In this scenario, the option to automatically add an image stored in Assets Server to Studio Server is disabled.
Step 1. Drag the image from Assets onto an InDesign layout that is stored in Studio Server.
Step 2. Select the image and choose one of the following:
- WoodWing Studio > Create Image
- WoodWing Studio > Add Assets Images to Studio1
1 Requires the following versions of Studio for InDesign:
- Version 16.x for Adobe 2021, or any higher version of Studio for InDesign and InCopy for any higher version of Adobe.
- Version 15.2.0 for Adobe 2020 or any higher version of version 15.2.
The image is added to Studio Server.
Next, the image should typically also be made part of a Dossier. Studio for InDesign tries to do this automatically (see Rules for adding an image to a Dossier). When this is achieved, the process of adding an image is now completed.
When the image cannot be automatically added to a Dossier, a window appears to choose the Dossier from. A default Dossier is automatically selected.
Step 3. From the list, choose a Dossier to which the image should be added and click OK.
Method 2: Including the image in an article on a layout
Note: In this scenario, the option to automatically add an image stored in Assets Server to Studio Server is disabled.
Step 1. In InDesign, check out a placed article on a layout or create text frames to turn into a new article.
Step 2. Drag an image from Assets onto the layout.
Step 3. Select all frames of the article together with the frame holding the image and choose WoodWing Studio > Check In Article... or WoodWing Studio > Create Article... .
Studio Server will detect that an image is included that currently only exists in Assets Server and will ask you if it needs to be added to Studio Server:
Step 4. Click Yes.
The image is added to Studio Server.
Note: When clicking No, the process is canceled and the article is not created; it is not possible to create an article in Studio Server that contains images stored in Assets Server.
The Check In Article or Create Article dialog box appears.
Step 5. Make any changes, including choosing a Dossier to add the article and image to.
Step 6. Click OK.
Rules for adding an image to a Dossier
When adding an image stored in Assets Server to Studio Server, Studio for InDesign tries to automatically add the image to an existing Dossier.
It uses the following rules in the following order:
- When the image is part of an article and the article is added to one Dossier, that Dossier is used.
- When the image is part of an InDesign article and the InDesign article itself is not added to a Dossier but another component of the InDesign article is added to one Dossier, that Dossier is used.
- When the layout is added to one Dossier, that Dossier is used.
Note: The process stops as soon as one or more Dossiers are found for a Rule. Only when no Dossiers are found for a rule is the next rule tried.
In case multiple Dossiers exist
When Studio for InDesign encounters more than one Dossier to which the article could be placed, a window appears in which the Dossier to add the image to should be manually chosen. One of the found Dossiers will be preselected.
Comments
0 comments
Please sign in to leave a comment.