Info: Performing the steps described in this article requires direct server access. Depending upon how your system is hosted and the level of access you have to that system, coordination may be required with your Partner or WoodWing Support team. For a full overview of the steps that need to be done by WoodWing and how to request them, see WoodWing Cloud - Change management.
Studio Server can automatically send out an e-mail to a user when:
- Files are routed to a user or a group of users, as a notification to these users that new files are available in their inbox (only when the 'Send Email Notification' option is set for a user).
Such e-mails also include a hyperlink to log in to Studio. After the user logs in, the routed file can be opened from the Inbox.
- Files are automatically and permanently removed from the Trash Can. (This is controlled by the Auto Purge option on the Brand Maintenance page.)

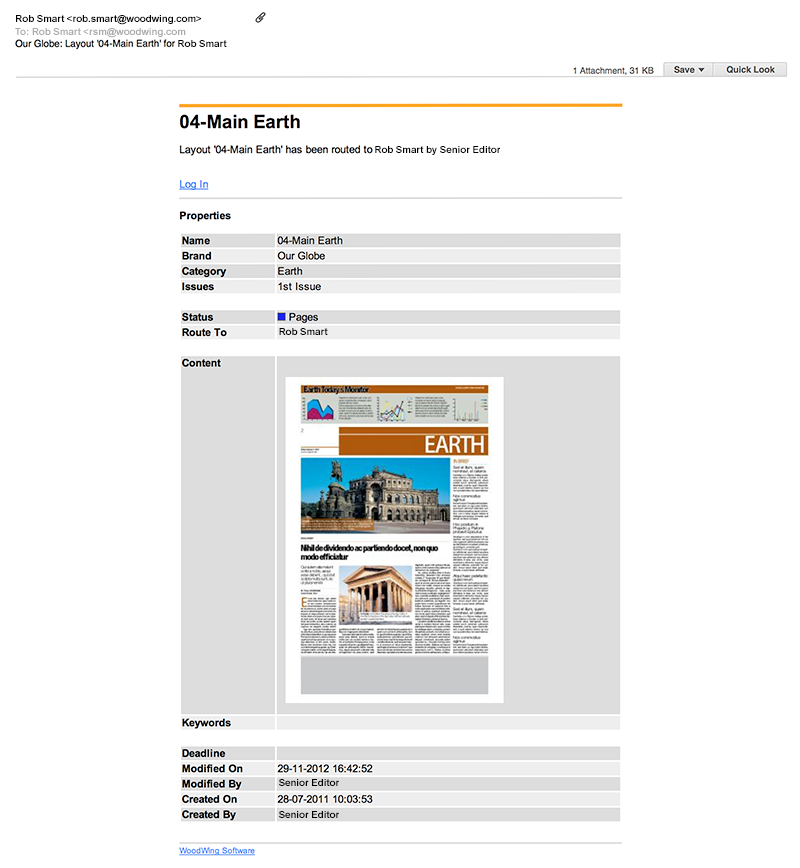
Figure: Example of a default email.
When needed, the look of the email or the default text can be changed.
Changing the e-mail subject
The default text of the e-mail subject is as follows:
<Publication name>: <object type> <file name> for <user name>
Example: xTreme: article 'Find your style' for Rob Smart
The publication name, object type, file name and user name are variables which are automatically loaded by the system.
The text of the e-mail subject is stored in each individual language file of Studio Server.
The files are stored in the following location:
<Studio Server path>/config/resources
The following files are available:
| File name | Language |
|---|---|
| csCZ.xml | Czech |
| deDE.xml | German |
| enUS.xml | English |
| esES.xml | Spanish |
| fiFI.xml | Finnish |
| frFR.xml | French |
| itIT.xml | Italian |
| jaJP.xml | Japanese |
| koKR.xml | Korean |
| nlNL.xml | Dutch |
| plPL.xml | Polish |
| ptBR.xml | Brazilian Portuguese |
| ruRU.xml | Russian |
| zhCN.xml | Chinese (Simplified) |
| zhTW.xml | Chinese (Traditional) |
To change the text of the e-mail subject, follow these steps:
Step 1. Make a backup of the current file.
Step 2. Open the file in a text editor that supports UTF-8 encoding.
Step 3. Locate the key named EMAIL_SUBJECT.
<Term key="EMAIL_SUBJECT">%Publication%: %Type% '%Name%' for %RouteTo%</Term>
Step 4. Make the changes as desired.
Step 5. Save the file.
Changing the e-mail body content
The body content of the e-mail is fed by a HTML file.
A separate template can be created for each object type.
The following e-mail templates are available:
- autopurge_email.htm. Sent out after the Auto Purge action whereby files are automatically and permanently deleted from the Trash Can.
- email_Article.htm. Used for emails about objects of type “article”.
- email_Dossier.htm. Used for emails about objects of type “Dossier”.
- email.htm. (Default template) Used for emails about objects of any type or than “article”, “Dossier”, or “Task”.
- email_Task.htm. Used for emails about objects of type “Task”.
The files are stored in the following location:
<Studio Server path>/config/templates
To change the content of the e-mail, open the file in a HTML editor and make any of the changes as described below.
Changing the intro
The default text of the intro is as follows:
- When a single file is sent:
<Object type> '<File Name>' has been routed to <user name> by <user name>
Example: Article 'Find your style' has been routed to Rob Smart by Senior Editor
- When multiple files are sent:
The following documents have been routed to <user name> by <user name>
Example: The following documents have been routed to Rob Smart by Senior Editor
To change this text, modify the following keys in the same way as modifying the key for the e-mail subject (see above):
- EMAIL_INTRO. Used as the intro when a single file is sent.
<Term key="EMAIL_INTRO">%Type% '%Name%' has been routed to %RouteTo% by %Modifier%</Term>
- EMAIL_HEADER. Used as the intro when multiple files are sent:
<Term key="EMAIL_HEADER">The following documents have been routed to %1 by %2</Term>
Adding additional terms
Add terms from the language resource files by placing them between <!--RES: and --> tags.
|
Example: Here, the ACT_ROUTE_TO term is added:
|
Each added term will be replaced by the appropriate translation when the e-mail is generated.
Adding property items
Add values to the list of properties, such as default properties or custom properties by using the following format:
%propname%
The property will be replaced by its appropriate value when the e-mail is generated.
|
Notes:
|
Additional properties to use:
| Display name | Internal name | Description |
|---|---|---|
| High-res File | HighResFile | Relative file location (to HighResStore feature) of highres advert/image output. |
| preview | Downscaled preview for the object. | |
| Status Color | StateColor | Color of current status of the object. |
| thumb | Thumbnail for the object. |
Adding a Server location
Use the following tag to give users direct access to a location on the Server:
%server_inetroot%
The location is automatically turned into a hyperlink for the user to click.
|
Example: In the screenshot at the top of this article, the Log In link can be used for logging in to Studio. It uses the following code:
|
Comment
Do you have corrections or additional information about this article? Leave a comment! Do you have a question about what is described in this article? Please contact Support.
0 comments
Please sign in to leave a comment.