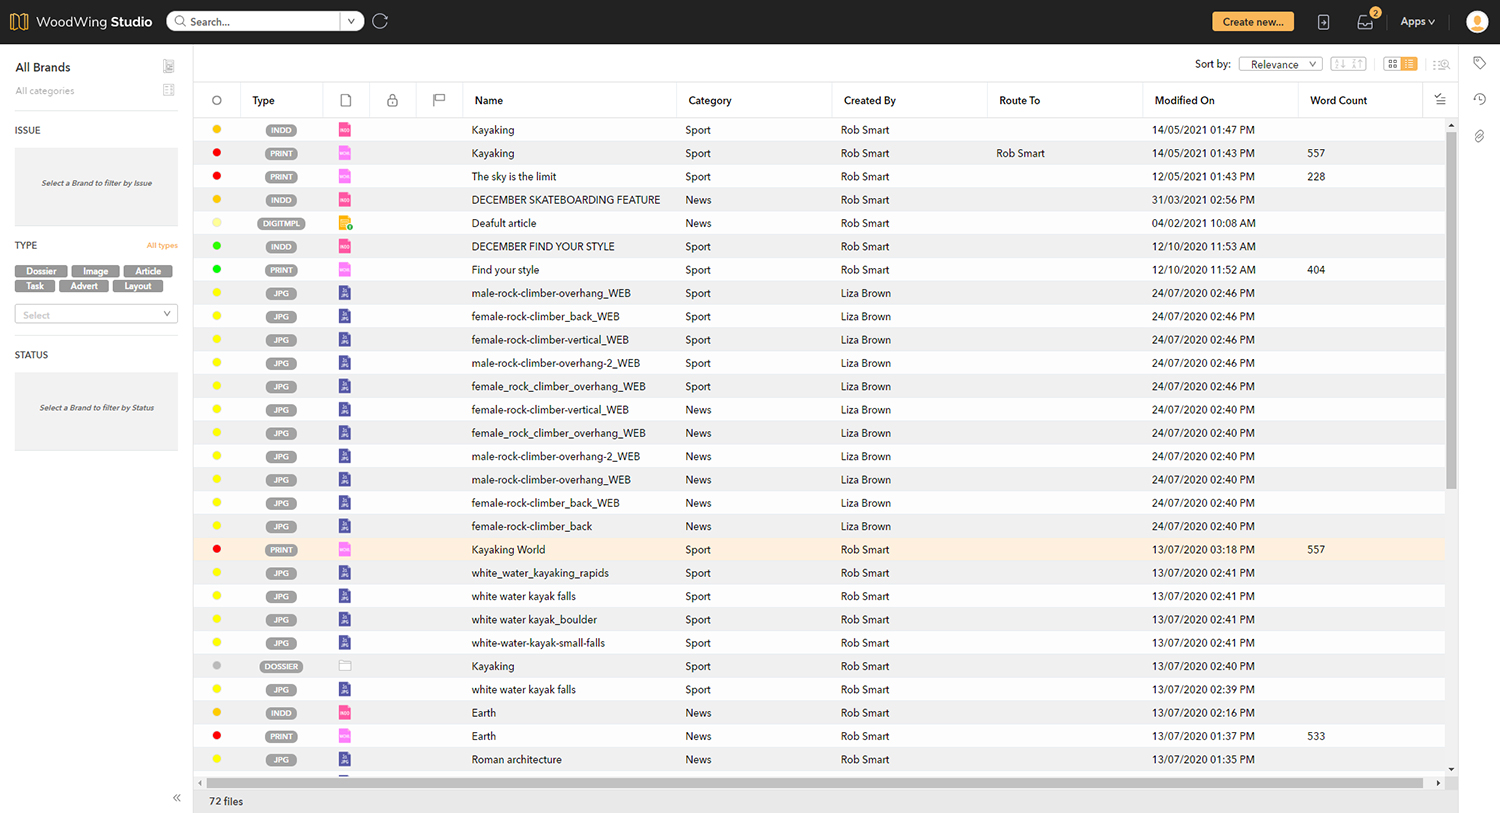
When searching for files or opening a Dossier or Task, one of the ways in which the files that are shown can be viewed is List view mode.
In this view, the files are shown as a list with various columns such as Type, Name, Category, and so on.
This article explains how to work with the List view mode to set it to your needs.
Enabling List view mode
To show the files in List view, click the List view icon in the top-right corner of the screen.
![]()
Showing or hiding columns
The main task that you might want to do when working with the List view mode is to show only the columns that contain the information that you want to work with, and hide all other columns.
This is done separately for the search results, Dossiers, and Tasks.
Step 1. In the search results, a Dossier, or a Task, open the list of available columns by clicking the icon in the top-right corner.
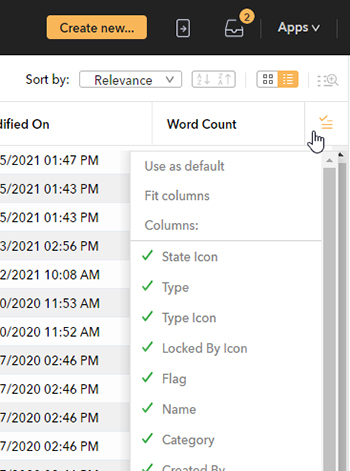
Each column that is currently shown is selected.
Step 2. Select all columns that you want to show, and de-select all columns that you want to hide.
Step 3. To keep the settings permanent, click Use as default at the top of the list.
Adjusting the column view
The shown columns can be adjusted in various ways:
- Rearrange columns. To change the order of the columns, click and hold the header of a column and drag it to its new position.
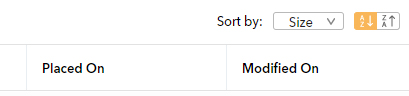
- Sort columns. To sort a column, click its header. Sorting can also be done on columns that are not shown by choosing a column from the Sort by list and clicking the sort ascending or sort descending icons.
Note: Sorting on multiple columns is not supported.
- Filter columns. To filter the content of the columns such as by only showing files of a specific type or files that have a certain workflow status assigned, use the Filter panel on the left of the screen.
- Change row size. To change the spacing between the rows, click the Change row size icon in the top-right corner.
- Fit columns to screen. When the currently shown columns do not fit the current width of the screen, a horizontal slider appears. To quickly reset the columns so that they are all shown, open the column list in the top right-hand corner and click Fit columns.
Note: Depending on where the change is made, you may or may not see this change in other areas of Studio. For example: changing the order in one Dossier changes it for all Dossiers, but fitting the columns in a Dossier is only applied to that Dossier.
File icons
The 'Type icon' column shows an icon of the file to make identifying files easier. For an overview of all icons, see File type icons used in Studio.
Adding columns to the columns list
Controlling which columns to show and hide is done by using the Columns list, as explained in Showing or hiding columns earlier in this article.
The columns that appear in this list can be configured by the system administrator.
Comments
0 comments
Please sign in to leave a comment.