|
Info:
|
This article describes how to install and configure Assets Server on a system (referred to as a 'node') on which Assets Server is not yet installed.
The article can be used for installing Assets Server for the first time, and for installing addition server nodes.
Before you start
Before starting with the actual installation it is important to have a plan of how your setup will look:
- Will you run the full Assets Server environment on a single machine?
- Will you spread the workload across multiple nodes in your cluster by setting up dedicated search nodes and processing nodes?
- What hardware and operating systems will you need?
The answers to these questions will affect how you are going to set up each node in the cluster. The following sections will help you find answers to these questions.
Single-node or cluster-node setup?
Assets Server can take on the role of a search node, a processing node and/or a job runner node or any combination of these roles.
A typical production environment consists of a cluster of at least 3 nodes containing multiple search nodes, processing nodes and job runner nodes. This makes sure that redundancy is achieved: when one machine fails, the cluster itself still functions.
For demo purposes you would use a single machine (such as a laptop) with one Assets Server instance installed that takes on all 3 roles.
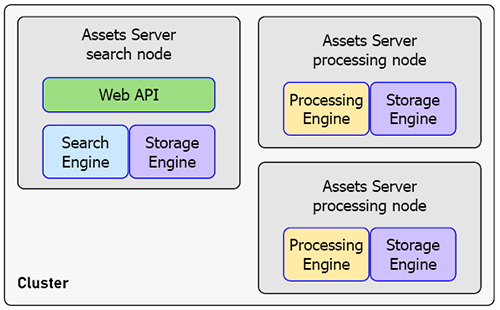
In this cluster, 1 Assets Server installation is used as a Search node while the load of processing files and generating previews is balanced over 2 separate Assets Server installations that act as Processing nodes.
For more information, see The Assets Server structure: clusters and nodes.
System requirements
For detailed information about which hardware and operating systems to use, see the following articles:
Available ports
For information about available ports, see Assets Server network ports.
Network products and RFC compliancy
The clients that connect to Assets Server are run in a Web browser and references to assets and queries are therefore expressed in URLs. These URLs can contain ////-sequences and diacritics such as accented characters.
Please note that the URLs that are generated by Assets Server are compliant with the URI syntax RFC 3986. Make sure that your network environment such as proxies, gateways and firewalls also support this standard so that the URLs can be successfully routed.
(macOS) Setting the maximum file limit
The number of files that can be opened simultaneously on macOS systems is set very conservatively, namely to 256 files. This could potentially lead to socket exceptions or a 'Too many open files' error message. It is recommended therefore to increase this limit.
Step 1. Verify the current file limit by entering the following command in the Terminal:
launchctl limit maxfiles
It will likely state the following, indicating that the default limit of 256 files is set:
maxfiles 256 unlimited
Step 2. Increase the limit for your version of macOS.
Note: The steps to perform can be different for each version. A good place to start for finding the steps you need is to Google on changing the maximum file limit on macOS.
Step 3. Restart the system to implement the changes.
Naming the cluster and its nodes
During the basic configuration of Assets Server you will have to define a name for the cluster and (optionally) a name for each node. Think of some descriptive names to use to easily identify the cluster and each node.
Note: For naming a node, Assets Server can also be configured to automatically set a random name or use the computer name.
Installation steps - main server
Installing Assets Server involves installing the main server and — when using a cluster-node setup — installing the additional nodes.
In this section, the installation of the main server is described. The installation of additional nodes is described later in this article.
The process of installing the main server can be summarized as follows:
- Installing the server
- Basic Server configuration
- Starting the Server
- Activating licenses
- Monitoring the status of the Server
- Setting up the Assets Server environment
- Testing the Server
|
Filter this section to show each step individually: |
1. Installing Assets Server
Installing Assets Server is done by using an installer. Download it from the software download page.
|
Notes:
|
|
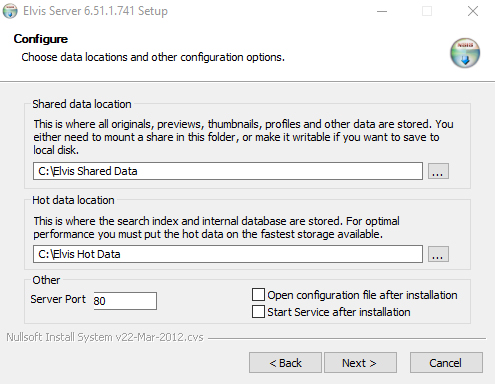
Installation steps for Windows Run the installer and follow the instructions on screen. About setting the data locations
Note: Each Elvis Hot Data folder is unique for a specific node and should not be shared between nodes.
Important: After installation, do not run Assets Server before performing the basic server configuration steps. |
|
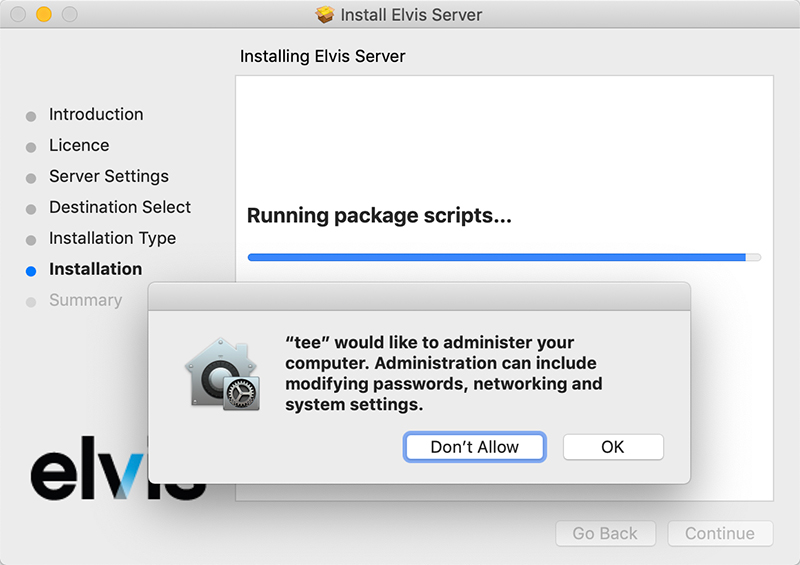
Installation steps for macOS Step 1. Run the installer and in the opening screen double-click the install icon. Follow the steps on-screen.
About setting the data locations
Note: Each Elvis Hot Data folder is unique for a specific node and should not be shared between nodes.
Important: After installation, do not run Assets Server before performing the basic server configuration steps.
|
|
Installation steps for Linux Step 1a. Unzip the installer by using bzip2. Install it by using one of the following commands (depending on your distribution): yum install bzip2 apt-get install bzip2 Step 1b. Extract the Elvis installer. Make sure to replace "x.x.x.x" by the version number, as shown in the file name. #bzip2 -d elvis-x.x.x.x-server-linux.bin.bz2 Step 1c. Run the installer by running the following command (as root). Make sure to replace "x.x.x.x" by the version number, as shown in the file name. # sudo sh ./elvis-x.x.x.x-server-linux.bin -i Step 1d. Follow the instructions on screen. Note: We strongly advice to use the default settings. Important: After installation, do not run Assets Server before performing the basic server configuration steps. Disable scheduled cleanup of var/tmpSome Linux versions may clean the var/tmp folder which may result in server failures. To prevent this, use one of the following methods:
|
2. Basic Server configuration
Note: This section describes the basic server configuration steps that are required to get Assets Server up and running. Additional configuration steps are described later.
How to configure your cluster and each node within the cluster depends on the choices you made in Preparing your setup. At this stage you should know:
- How to name your cluster and each node within the cluster
- How many nodes you will have in your cluster
- Which nodes will take on the role of a Search node, a Processing node, a Job Runner node, or a combination of these roles
- If your file store is on the same node on which Assets Server is installed or placed at a shared location
Basic configuration can be broken down into the following tasks:
- Configuring the settings specific for the cluster
- Configuring the settings specific for an individual node
- Repeating the process on each node
1. Configuring the cluster settings
Note: The cluster-config.properties.txt file needs to be identical for all node configurations. After setting up the first node and configuring subsequent nodes, make sure that any changes to a cluster property are implemented in the cluster-config.properties file for all nodes. See also Changing the Assets Server configuration for a running cluster.
Step 1. Access the <Assets Server location>/Config folder on one of the nodes.
Step 2. Open the cluster-config.properties.txt file and set the following options:
- cluster.nodeCount. Set this to the total number of nodes in your cluster.
|
Example: Here a setup of 5 nodes is used. Therefore "5" is entered: cluster.NodeCount=5 |
- cluster.searchNodeCount. Set this to the number of nodes in your cluster that act as a Search node.
|
Example: Here, 3 nodes will take on the role of Search node. Therefore "3" is entered: cluster.searchNodeCount=3 |
Step 3. Save and close the file.
2. Configuring the node settings
Step 1. In the same folder as where you opened the cluster configuration file (<Assets Server location>/Config), open the node-config.properties.txt file and set the following options (listed in the order in which they appear in the file):
- clusterName. Set this to a unique name for your cluster.
Example: clusterName=AssetsServerDemo
Note: This name needs to be the same on all the nodes.
- nodeName. (Optional) By default, Assets Server generates a random name for the node. To use a more descriptive name, do one of the following:
- Use the computer name by replacing the value with ${computerName}.
- Enter a custom name.
|
Examples: Here, a random name is generated: nodeName=${randomHeroName} Here the computer name is automatically used: nodeName=${computerName} Here a custom name is entered: nodeName=ProcessingNode1 |
- Define how Assets Server should run: as a Search node, a Processing node, a Job Runner node or any combination of these roles. Do this by setting the following options to true or false:
searchDataEnabled=true
processingEnabled=true
jobRunnerEnabled=true
- When the sharedDataLocation is different on each node, make sure that the elasticsearch.backup.location (which references this location by default) is also configured correctly for the cluster. This can be done in the the cluster-config.properties.txt file.
- fileStoreType. When the file store is configured on the same node on which Assets Server is installed, set this option to "local".
Note: This is typical when installing Assets Server on a laptop for demo purposes.
Example: fileStoreType=local
- videoProcessing. Define if the node should be used for processing videos.
- yes. The node processes video and non-video files. Use this setting when videos are processed on occasion.
- no. The node does not process videos. Use this setting when the video processing is offloaded to a dedicated node.
- only. The node only processes videos. Use this setting when the node should be used as a dedicated node for video processing.
Example: videoProcessing=yes
Note: The cluster needs to have at least one node that processes videos (setting 'yes' or 'only'), and at least one that processes non-videos (setting 'yes' or 'no').
- processing.excluded and processing.included. (Requires Assets Server 6.65 or higher) Define if a Processing node should only process files of a specific type by specifying the extension of the file type. Files can be specifically included or specifically excluded on a Processing node. Multiple values are comma-separated.
processing.excluded.types=
processing.included.types=
|
Example: Here, a Processing node is set up to process all types of files except PowerPoint files by adding the pptx extension to the excluded option: processing.excluded.types=pptx |
Use this to set up dedicated processing nodes for files that take a long time to process to speed up the processing and reducing the queue size more quickly.
Example: A large number of Word files in .docx format are uploaded in bulk. Because text is extracted from these files, they take long to process and will potentially stall the processing queue. By setting up a node for which .docx files are excluded (processing.excluded.types=docx), that node is always available to process all other types of files, while all other nodes can pick up .docx files and other files. The process can be sped up even more by setting up a node on which only .docx files are processed (processing.included.types=docx).
|
Notes:
|
Step 2. Save and close the file.
3. Starting Assets Server
Once Assets Server is fully installed and configured, start Assets Server on each node on which it is installed.
|
On macOS
To access this panel: Applications > Elvis Server
|

|
On Windows Do one of the following:
|

|
On Linux Enter sudo service elvis-server start |
The startup process takes a few moments because of various processes that have to start up and have to negotiate and communicate with each other.
Monitor the progress by viewing the log file for that session:
- macOS: double-click /Library/Logs/ElvisServer/<date-timestamp>.stderrout.log to open it in the Console
- macOS: Open the Console and in the Log List, choose the most recent <date-timestamp>.stderrout.log file from ElvisServer
- Windows: open C:\ProgramData\Elvis Server\Logs\<date-timestamp>.stderrout.log (use mTail to open the file)
- Linux: enter tail -f -n 300 /var/log/elvis-server/<datetimestamp>.stderrout.log
Wait until the process is completed and all nodes are ready. The Server will eventually run in "fallback mode" until it is licensed.
4. Licensing Assets Server
Before the Server and the client applications that connect to it can be used, licenses need to be activated.
For detailed instructions, see Activating Assets Server.
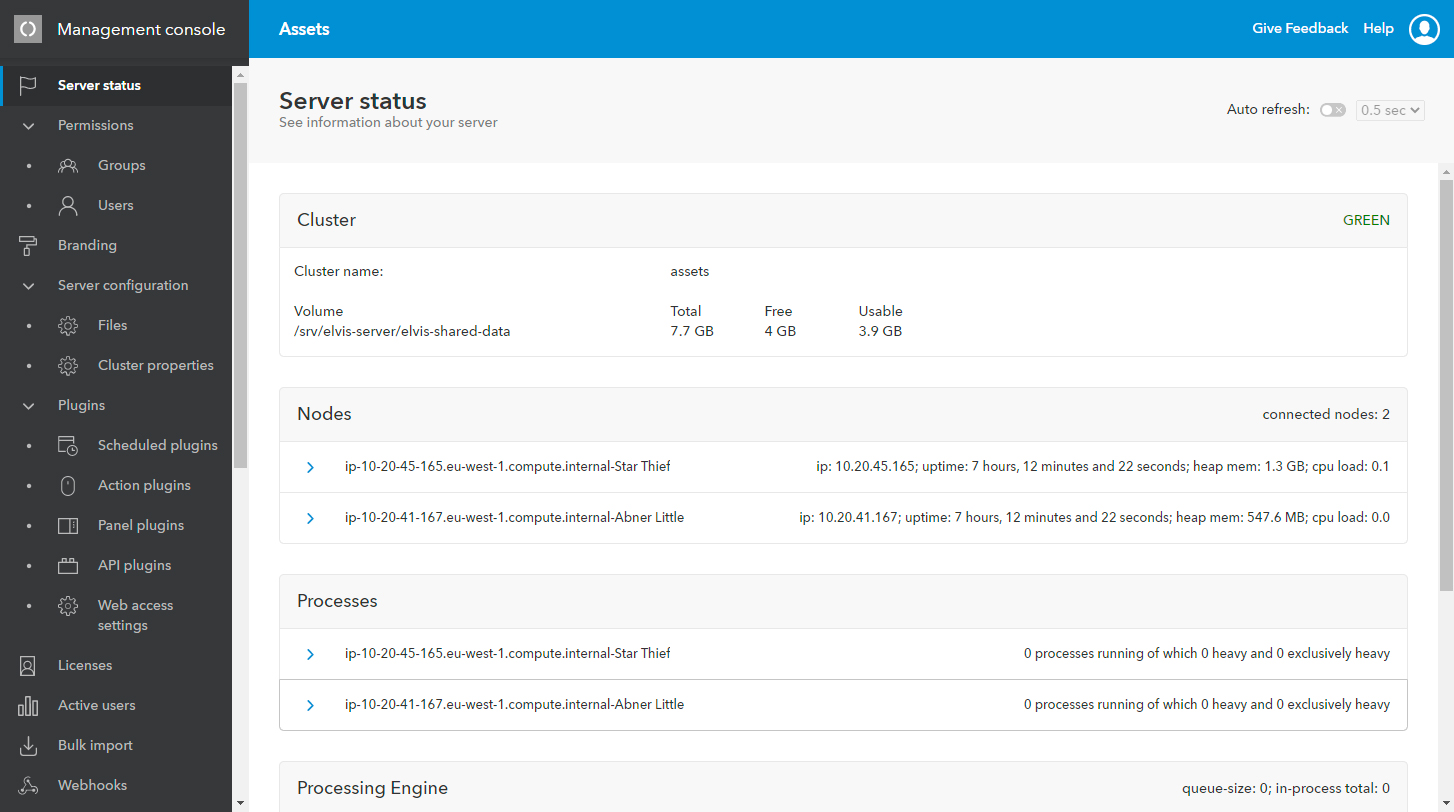
5. Monitoring the state of Assets Server
With the installation process completed, check that Assets Server is running correctly by using the options on the Server Status page.
For more information, see Monitoring the state of Assets Server.
6. Setting up the Assets Server environment
Now that Assets Server is installed it can be further set up for full use. This includes the following:
- Additional configuration
- Implementing security-related features
- Assigning memory
- Setting up users and user groups
- Setting up user permissions
- Setting up taxonomy
- Setting up custom metadata
- Setting up Search Presets
- Setting up Download Presets
- Making the Brand portal and / or Assets available
- Installing Assets for InDesign
- Adding watermarks to images
- Adding features through plug-ins
- Configuring Single Sign On
- Installing demo files
- Adding files in Assets Server in bulk
- Using Amazon CloudFront to speed up connections from remote locations
7. Testing Assets Server
Verify that Assets Server is working properly by using Assets. Perform tasks such as uploading some files, searching for them, downloading or sharing them, or any other tasks that are part of your daily workflow.
Installation steps - additional nodes
When a cluster-node setup is used, the additional nodes can be set up that act as a processing node and/or a job runner node or any combination of these roles.
The process of installing an additional node is very similar to installing the main server, but with fewer steps.
Step 1. Run the installer on each node.
Step 2. Replace the config folder on the node by a copy of the config folder of the node that is already configured. This way, the cluster settings are already correctly set.
Step 3. Open the node-config.properties.txt file and modify the settings where needed. When done, save and close the file. To summarize those settings:
- The clusterName should be the same for all nodes and therefore does not have to be changed here.
Example: clusterName=AssetsServerDemo
- Set nodeName to the computer name, a custom name, or keep the default setting to have a random name generated.
|
Examples: Here, a random name is generated: nodeName=${randomHeroName} Here the computer name is automatically used: nodeName=${computerName} Here a custom name is entered: nodeName=ProcessingNode1 |
- Define if Assets Server should run as a Search node, a Processing node, a Job Runner node or a combination of these roles:
searchDataEnabled=true
processingEnabled=true
jobRunnerEnabled=true
- Set fileStoreType to local when the file store is configured on the same node on which Assets Server is installed.
Example: fileStoreType=local
- processing.excluded and processing.included. (Requires Assets Server 6.65 or higher) When configured on other nodes, set the correct file types that should be included or excluded for the node that is currently being configured.
Step 4. Start the server. For details, see the steps for starting the main server as described earlier in this article.
Step 5. Activate Assets Server.
Step 6. Implement security-related features.
Step 7. Assign memory.
Step 8. Test that the node is working in its intended role.
Comments
0 comments
Please sign in to leave a comment.