One of the ways of downloading images from Assets Server is by making use of a Download Preset: a group of saved settings that otherwise would have to be set manually each time these settings are needed.
This article explains how to create, assign, edit and delete Download Presets.
Requirements
- Creating Download Presets is done by using the Management Console and requires an account with admin credentials.
- Download Presets can only be assigned to user groups, not to individual users. Make sure therefore that user groups have been set up.
Managing Download Presets
Managing Download Presets is done on the User Groups page in the Management Console.
Show me how to access this page
Step 1. Access the Management Console.
Step 2. In the menu on the left side of the page choose Permissions > User Groups.
The Manage User Groups appears.
Step 3. In the menu at the top, select Download Presets.
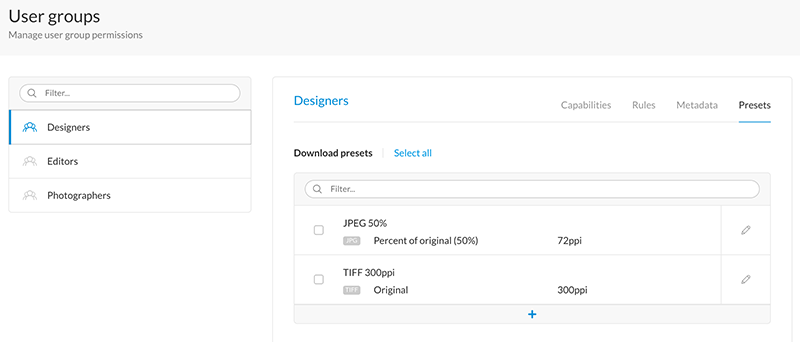
Figure: The page for managing Download Presets in the Management Console.
Creating a Download Preset
Step 1. Access the Download Presets page (see above).
Step 2. At the bottom of the lists of presets, click the + icon.
The Create Preset window appears.
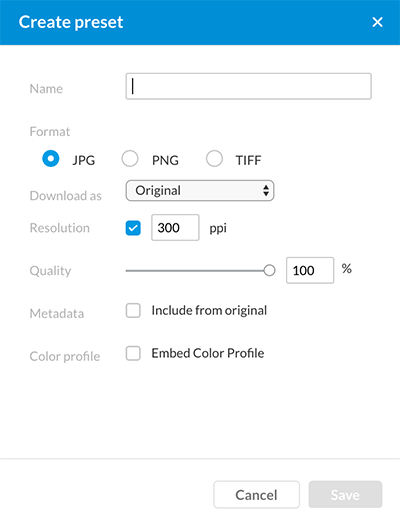
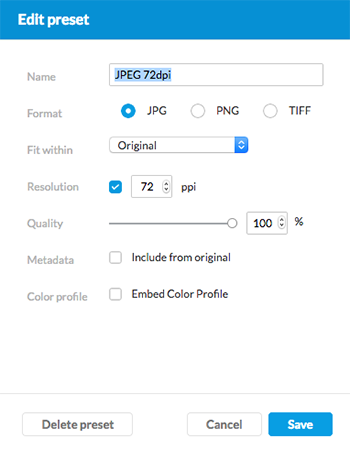
Step 3. Define the settings:
- Name. Add a descriptive name.
Example: 'JPEG, 72ppi, no color profile'
- Format. Choose the format in which the image should be downloaded:
- PNG
- JPG
- TIFF
- Download as. Choose from:
- Original. Download the image in its original size.
- Fit within. Set width and height in pixels
- Percentage of original. Set a percentage.
- Resolution. Specify a resolution.
- Quality. Specify a quality.
- Metadata. Define if the metadata of the original file should be included.
Note: The PNG format does not support embedded metadata and does not support including metadata from the original.
- Color profile. Define if the color profile that was used to generate the preview should be included.
Step 4. Click Save.
The Download Preset is added to the list.
Assigning a Download Preset to a user group
Before a user can use a Download Preset, it needs to be assigned to a user group.
Assigning a Download Preset can be done manually or as part of copying Permissions from an existing user or user group.
Assigning a Download Preset manually
Step 1. Access the Download Presets page (see above).
Step 2. From the list of user groups, select the user group to which the Download Preset needs to be assigned.
Tip: Use the Filter to narrow down the results in the list by typing any part of a name.
Step 3. From the list of presets, select the Download Preset that needs to be assigned to the group.
|
Tips:
|
Copying Permissions
Copying Permissions is an efficient way of quickly assigning an existing set of Permissions to a user or group.
Warning: When copying, all existing Permissions for that user or user group will be replaced.
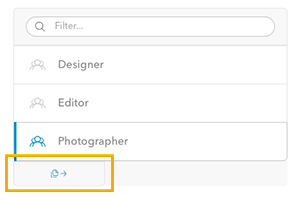
Step 1. From the list of users or user groups, choose the user or group from which you want to copy the assigned Permissions.
Step 2. At the bottom of the list, click the Copy button.
The 'Copy Permissions To' window appears.
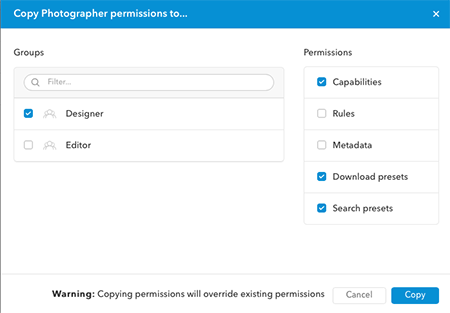
Step 3. From the list of users or groups, choose the user or group to which you want to copy the Permissions.
Step 4. In the list of Permissions, select which type of Permissions should be copied.
Step 5. Click Copy.
The Permissions are copied.
Editing a Download Preset
Step 1. Access the Download Presets page (see above).
Step 2. Hover the mouse over the preset that you want to edit.
The Edit icon appears.
![]()
Step 3. Click the icon and make any changes in the Edit Preset window that appears. Click Save when finished.
Deleting a Download Preset
Step 1. Access the Download Presets page (see above).
Step 2. Hover the mouse over the preset that you want to edit.
The Edit icon appears.
![]()
Step 3. Click the icon.
The Edit Preset window appears.
Step 4. Click Delete and confirm that you want to delete the Download Preset.
Comments
0 comments
Please sign in to leave a comment.