The Digital articles that are created in Studio make use of various resources such as Component Sets, styles, custom swatches, and so on. These resources are stored in a central location in the cloud in a system named WoodWing Cloud Services.
Applications that need to work with these resources therefore need access to them:
- Studio for working with Digital articles in the following ways:
- Using the Digital editor
- Creating a Digital article
- Creating Component sets
- Mapping components
- Saving swatches
- Assets for previewing archived Digital articles
These applications are given access to these resources by connecting Studio Server (for Studio) and Assets Server (for Assets) to WoodWing Cloud Services.
How this is done is explained in this article.
Allowing networks to access WoodWing Cloud Services
Accessing the WoodWing Cloud Services requires unrestricted access from your network.
Make sure that your networks are given access to the following URL, used worldwide for SNS:
https://api-eu-west-1.enterprise-services.woodwing.com
Tenants
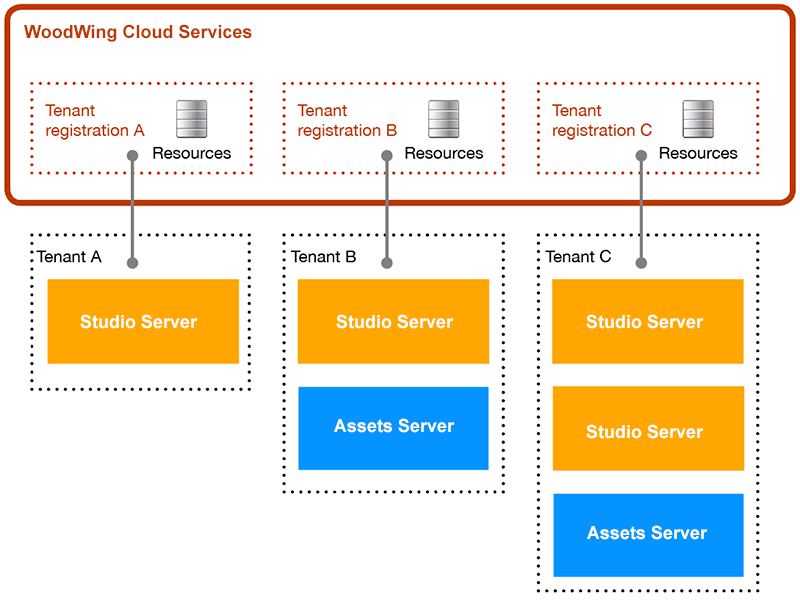
Connecting Studio Server or Assets Server to WoodWing Cloud Services is done by making use of tenants: groups of one or more Studio Server and/or Assets Server installations to which a specific set of resources in WoodWing Cloud Services are shared.
For a typical Studio installation, the tenant will consist of only one Studio Server instance; when Digital articles are archived in Assets Server, the tenant will consist of at least one instance of Studio Server and typically one instance of Assets Server.
Connecting these servers to WoodWing Cloud Services is done via a unique tenant registration for that tenant. This tenant registration keeps track of the resources that are shared within that tenant. Other tenants cannot make use of these resources because they are connected through a different tenant registration.
|
Example:
|
Setting up a tenant
Setting up a tenant is done by registering a single instance of Studio Server or Assets Server to the WoodWing Cloud Services.
This is done by making use of the Tenant Registration pages in Studio Server or in the Management Console of Assets Server.
As soon as a server is registered, other servers (Studio Server or Assets Server) can be made part of the same tenant through any of the already registered servers.
1. Registering the first server instance (creating a new tenant)
In a typical scenario, the first (and sometimes only) server that is connected is Studio Server. Technically it could also be Assets Server, but in the following steps Studio Server will be used.
|
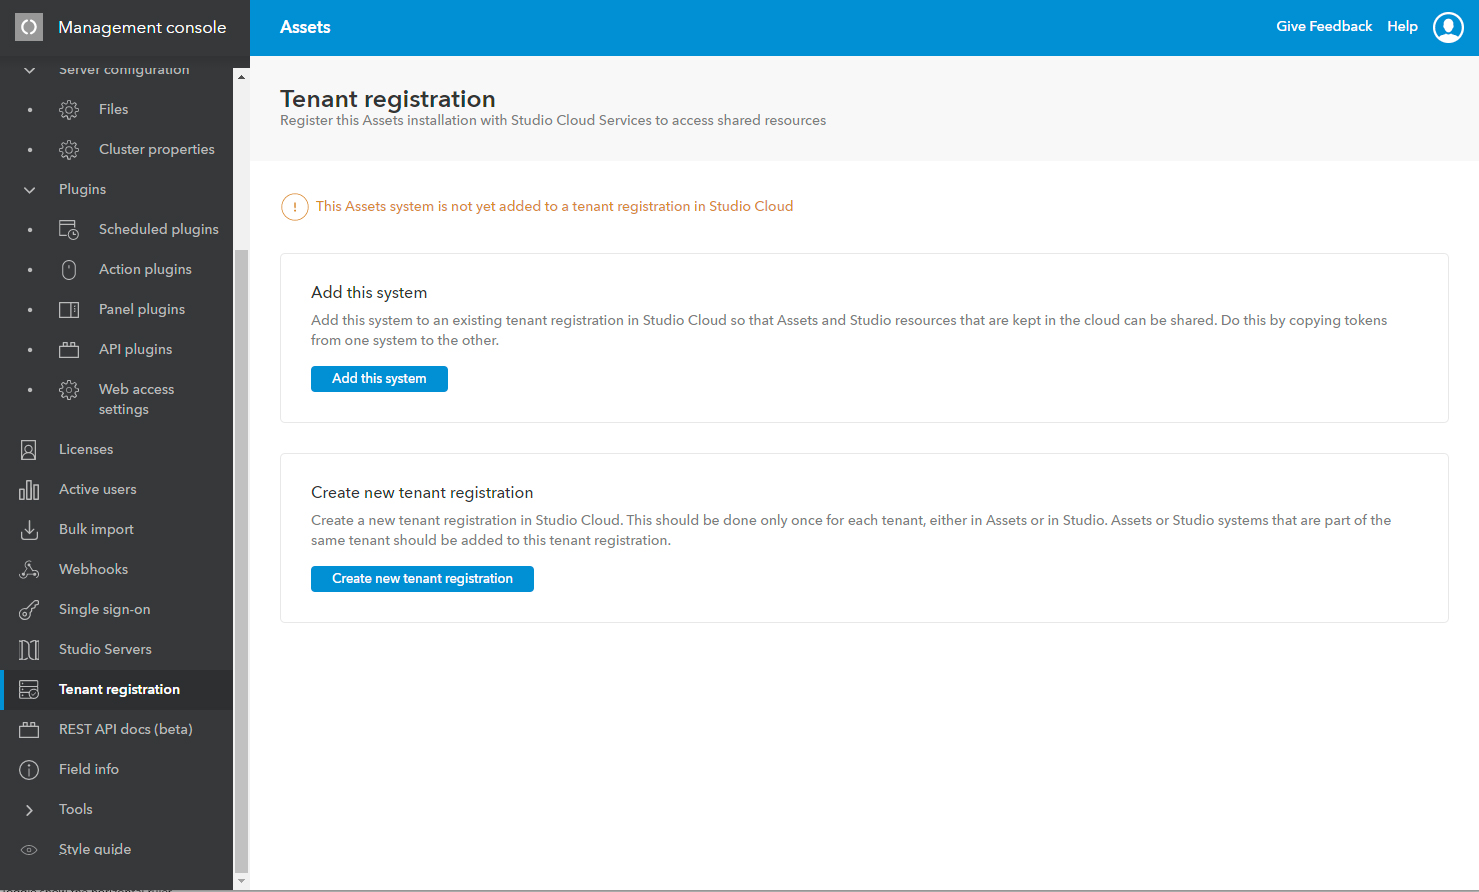
Note: To connect Assets Server, access the Management Console and do the following: Step 1. (Optional, and only needed once) Enable the Tenant registration page: go to Server Configuration > Files and search for the cluster-config.properties.txt file. Add the following option and click Save when done: ecs.enabled=true Step 2. Access the Tenant registration page and follow the same steps as outlined below. The instructions and steps are identical to those shown for Studio Server.
|
Step 1. In Studio Server, access the Integrations > Studio > Tenant Registration page.
A page appears stating that Studio Server is not yet added to a tenant registration in WoodWing Cloud Services.
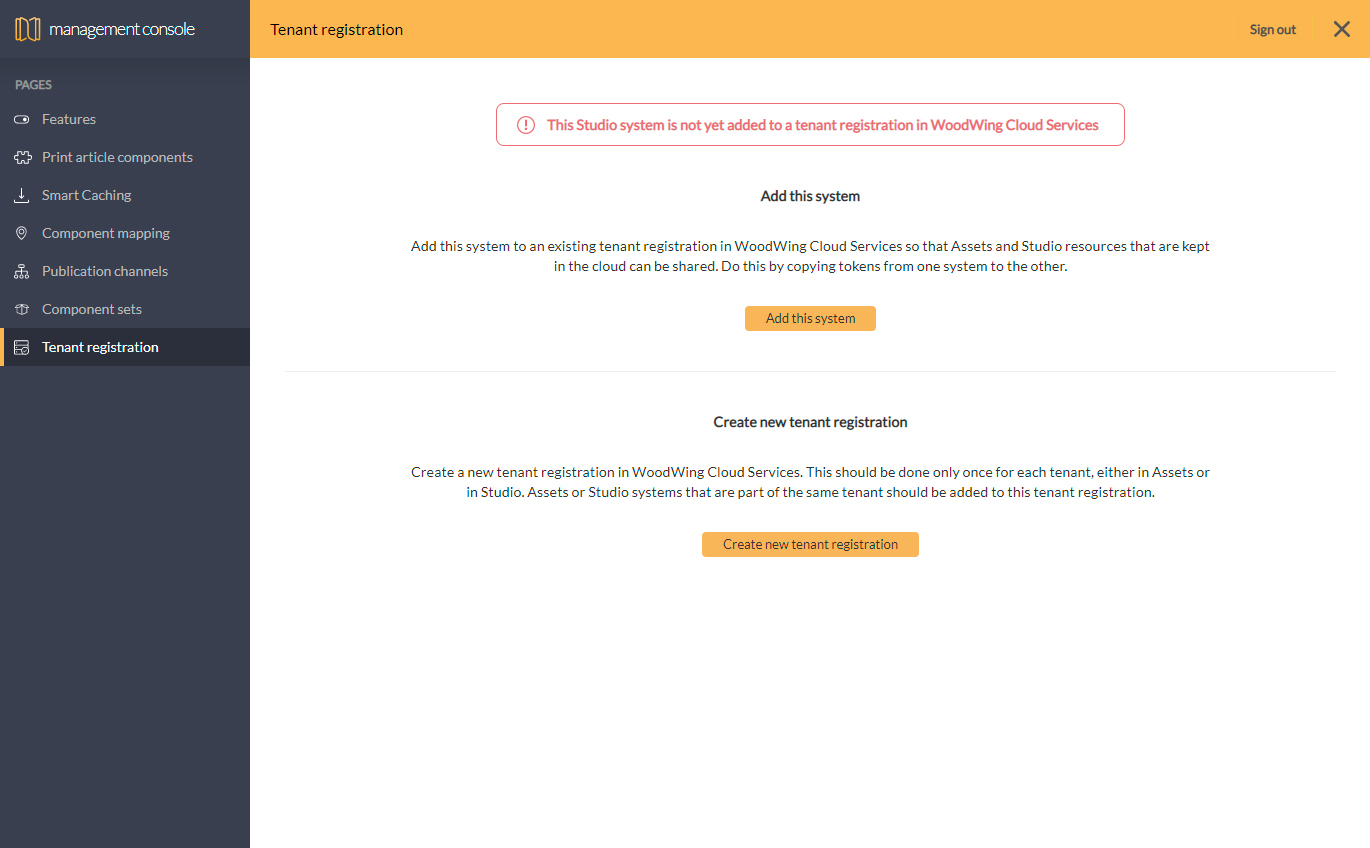
Step 2. Because no tenant registration exists yet to connect to, click Create new tenant registration.
You are asked to confirm the action.
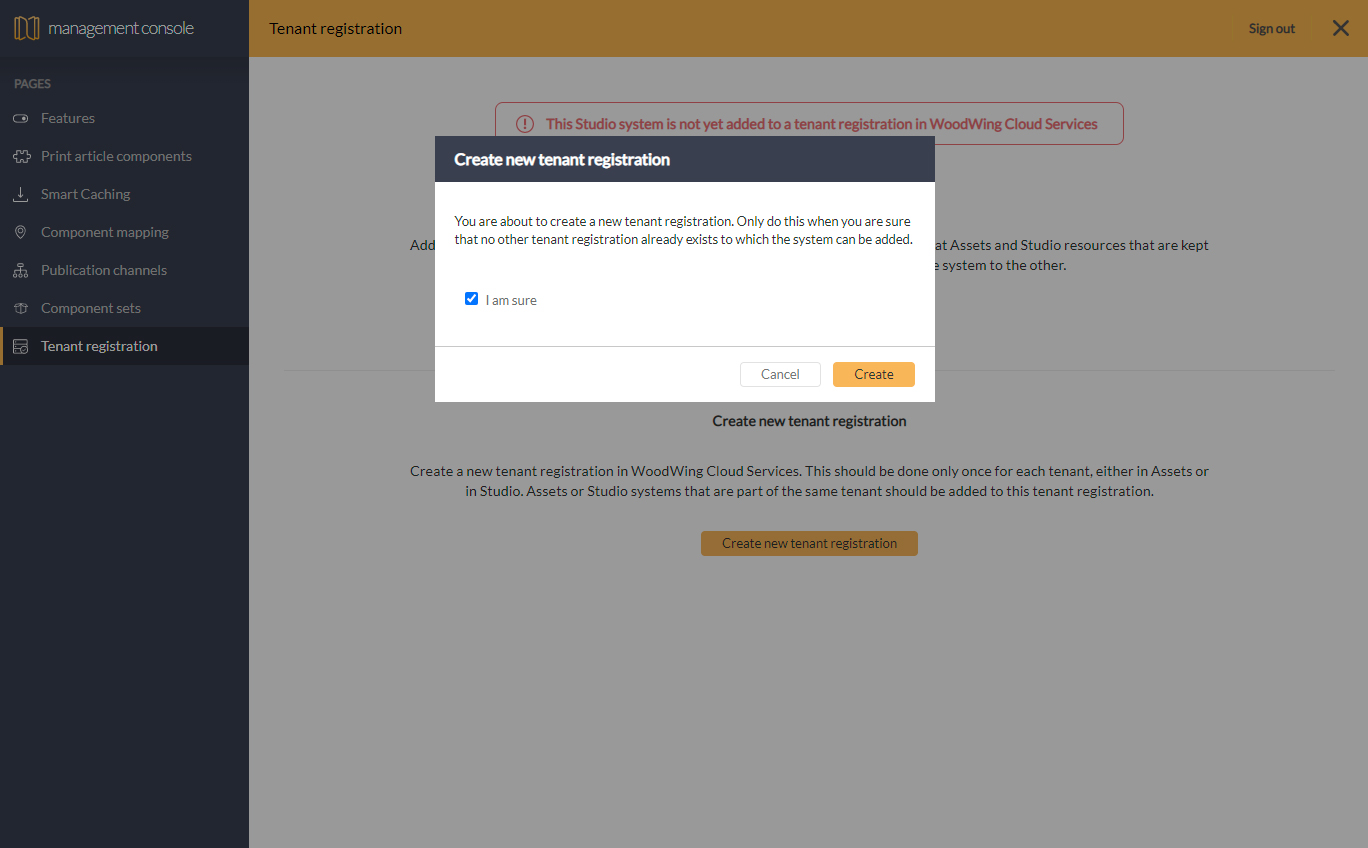
Step 3. Select I am sure and click Create.
A tenant and tenant registration is created and Studio Server is connected to it. If you are only adding a single instance of Studio Server, the process is now complete.

2. Connecting other servers to the tenant registration
When a tenant has been created, other Studio Servers or Assets Servers can be added to it. To make this process secure, tokens are generated and shared between the servers.
Note: In the following steps, Studio Server is used as the server that is already registered, while another Studio Server is used as the server that needs to be added. When Assets Server is connected, access the Management Console > Tenant registration page and follow the same steps as outlined below. The instructions and steps are identical to those shown for Studio Server.
Step 1. Open the Tenant registration page of each server (in different Web browser tabs or windows):
- For the server that is already registered
- For the server that needs to be added to the tenant (and is therefore not yet registered)
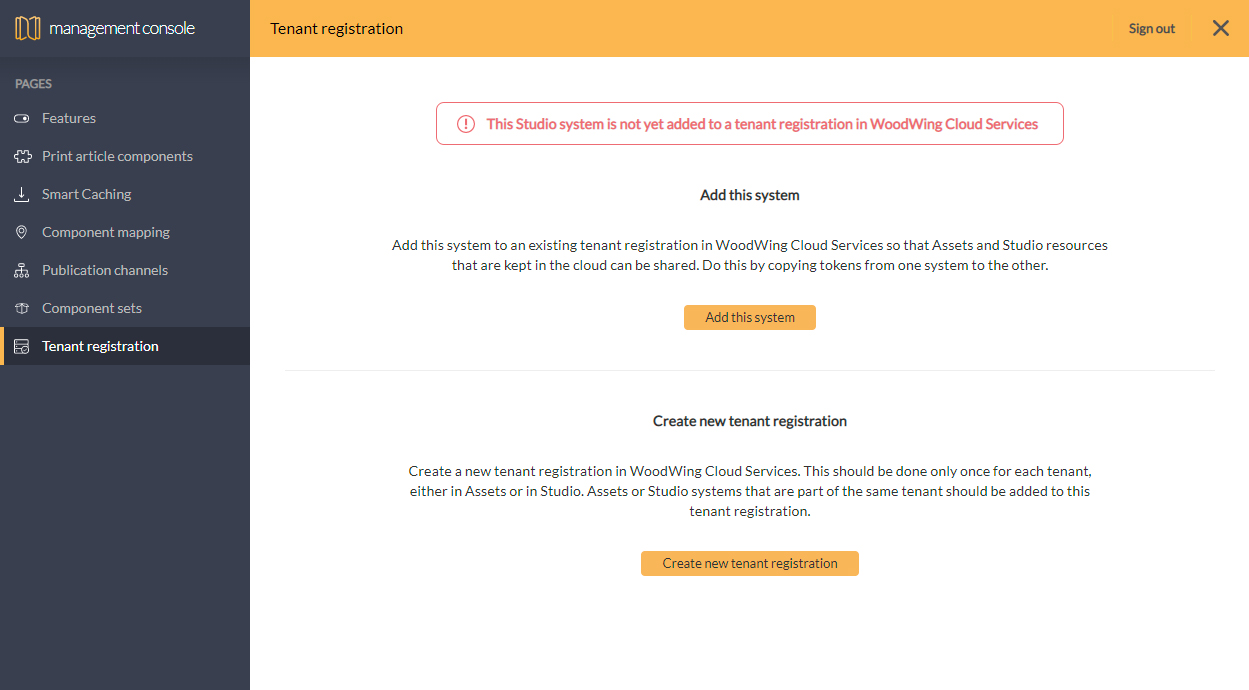
Step 2. Go to the Tenant registration page of the server that needs to be added. The page will show the message 'This Studio Server system is not yet added to a tenant registration in WoodWing Cloud Services'.
Step 3. Click Add this system.
A dialog appears showing a system token.
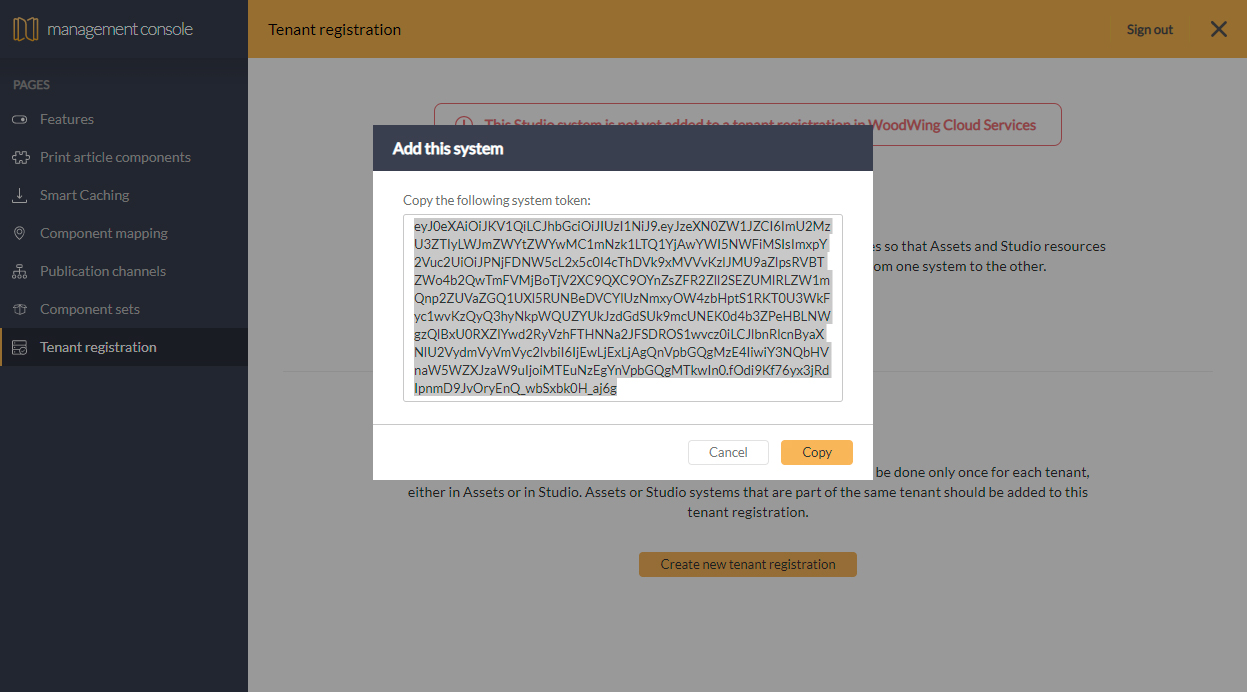
Step 4. Click Copy.
A message with instructions appears.

Step 5. Go to the Tenant registration page of the Studio Server installation which is already registered.
The page will show the message 'This Studio Server system is added to a tenant registration in WoodWing Cloud Services'.
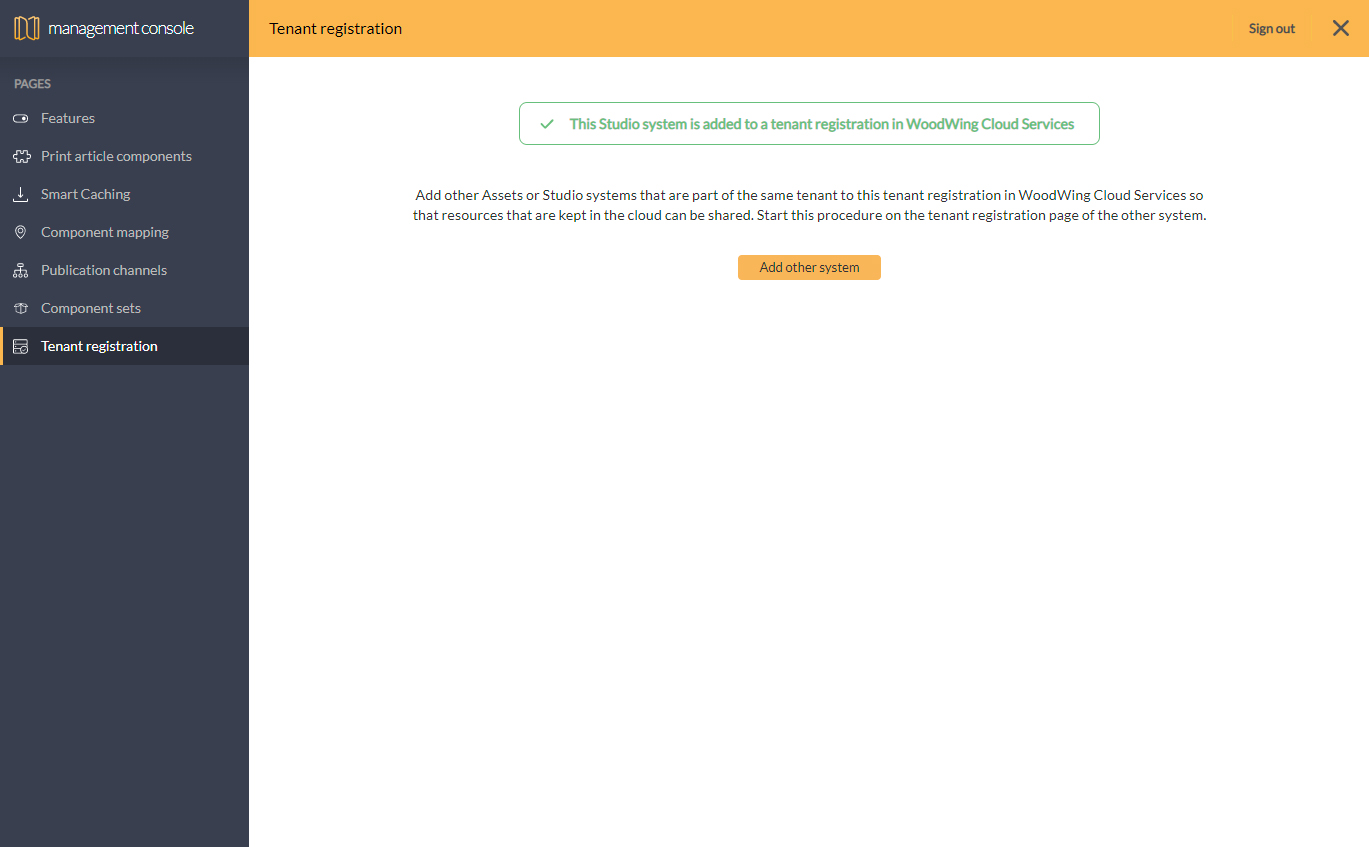
Step 6. Click Add other system.
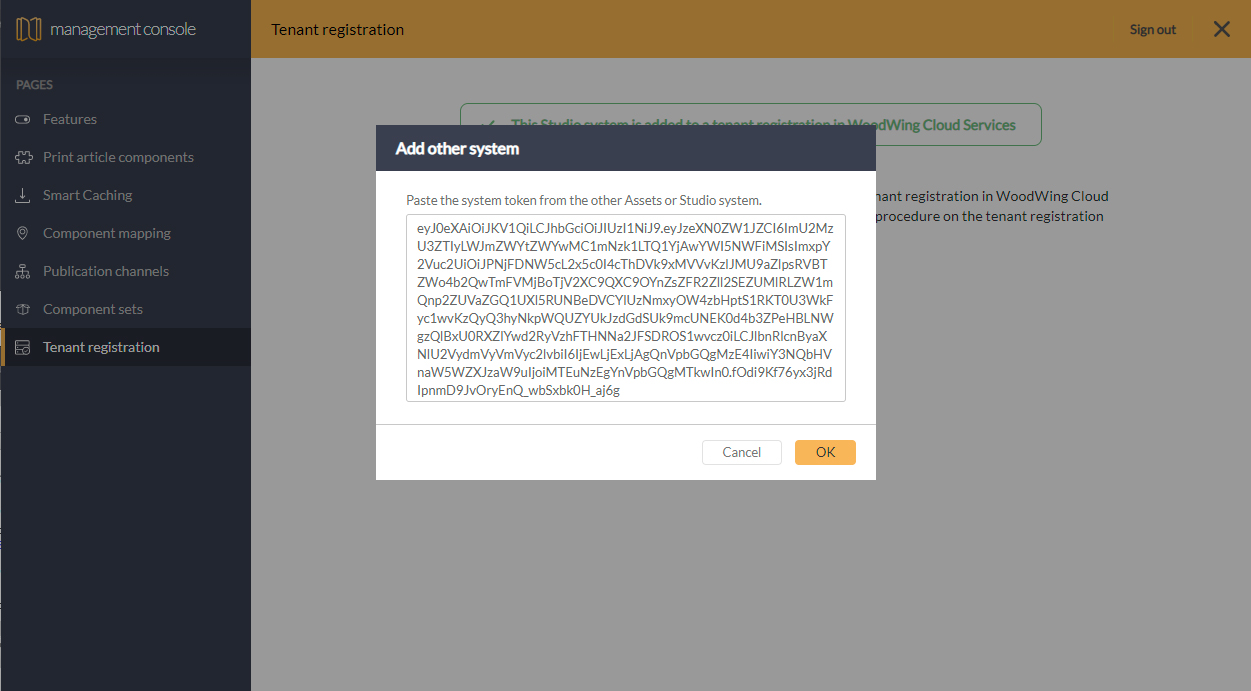
A dialog appears.
Step 7. Paste the copied system token by placing the cursor inside the window and pressing Ctrl+V or Cmd+V. When done, click OK.
A dialog appears in which a generated tenant token is shown.
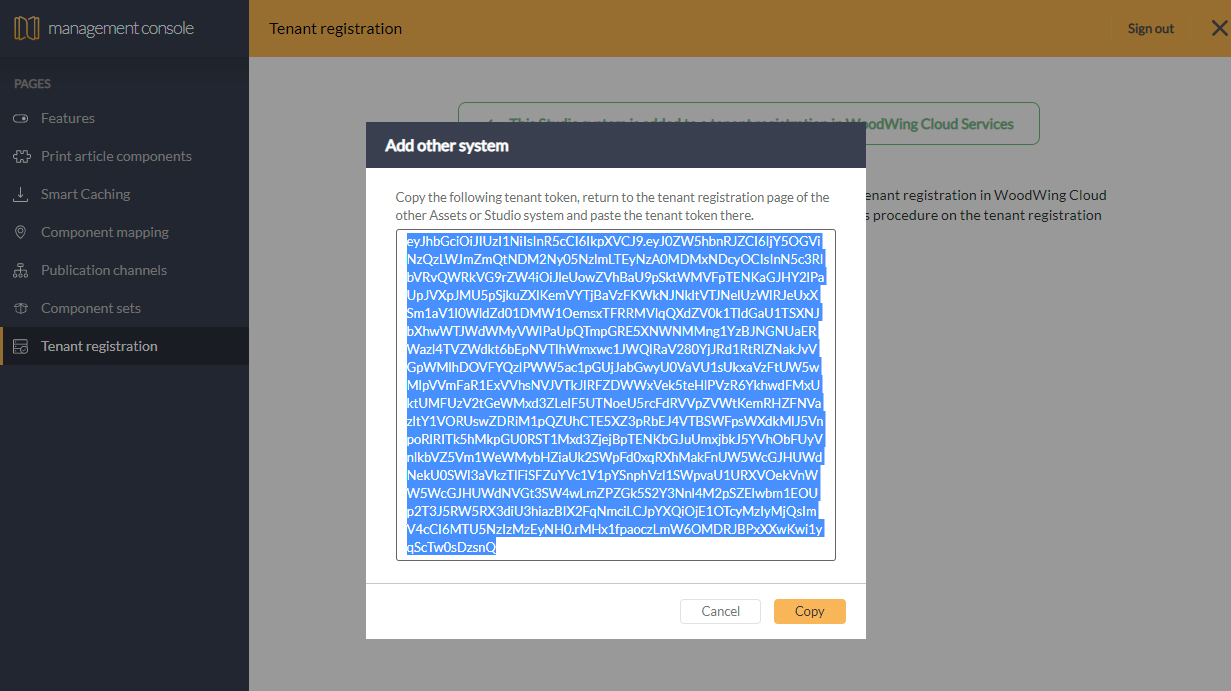
Step 8. Click Copy.
The dialog closes and the Tenant registration page now indicates that the server is registered.
To finalize the process, the copied tenant token needs to be added to the other server.
Step 9. Go to the Tenant registration page of the other Studio Server installation.
This page might still show the instructions after performing the earlier steps.
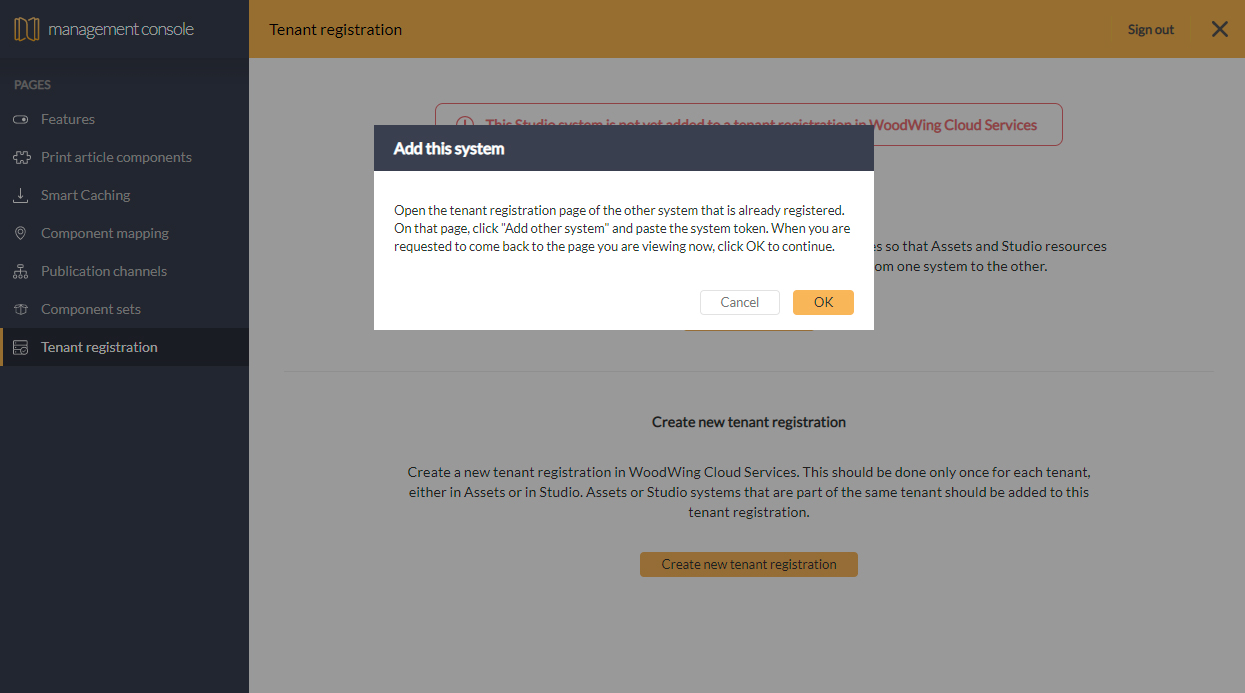
Step 10. When the instructions are still shown, click OK to close the message.
A dialog appears.
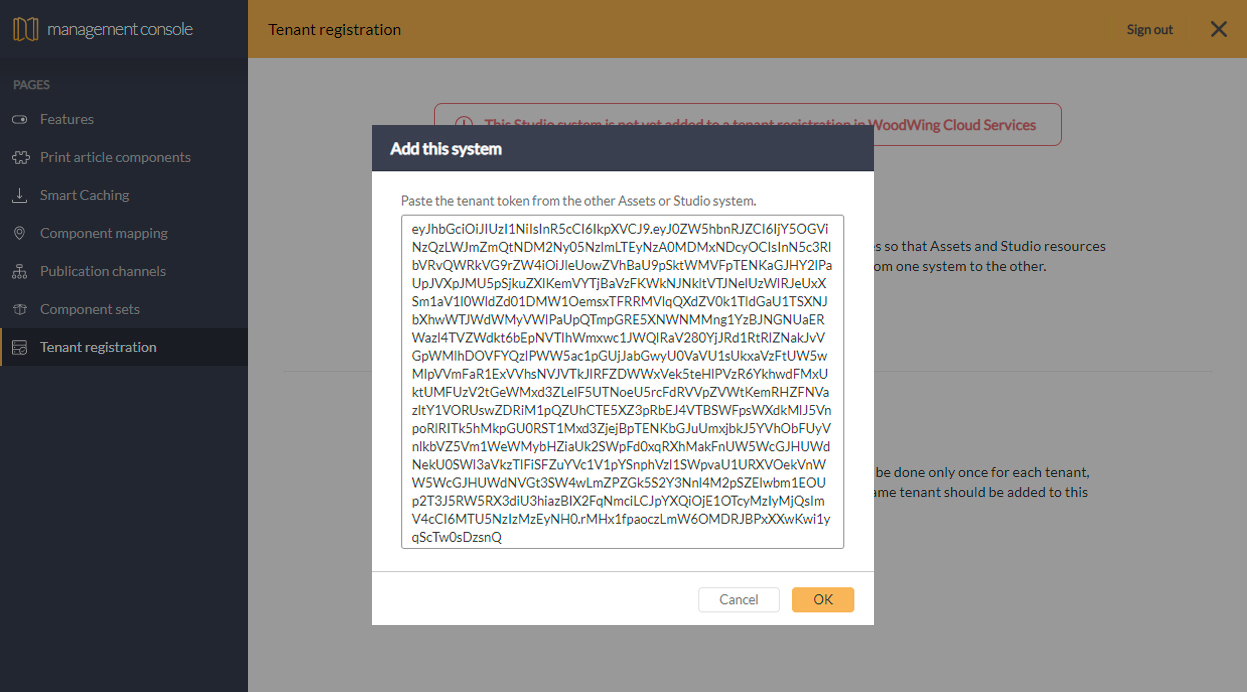
Step 11. Paste the copied tenant token by placing the cursor inside the window and pressing Ctrl+V or Cmd+V. When done, click OK.
The dialog closes and the page now shows that the system is registered.
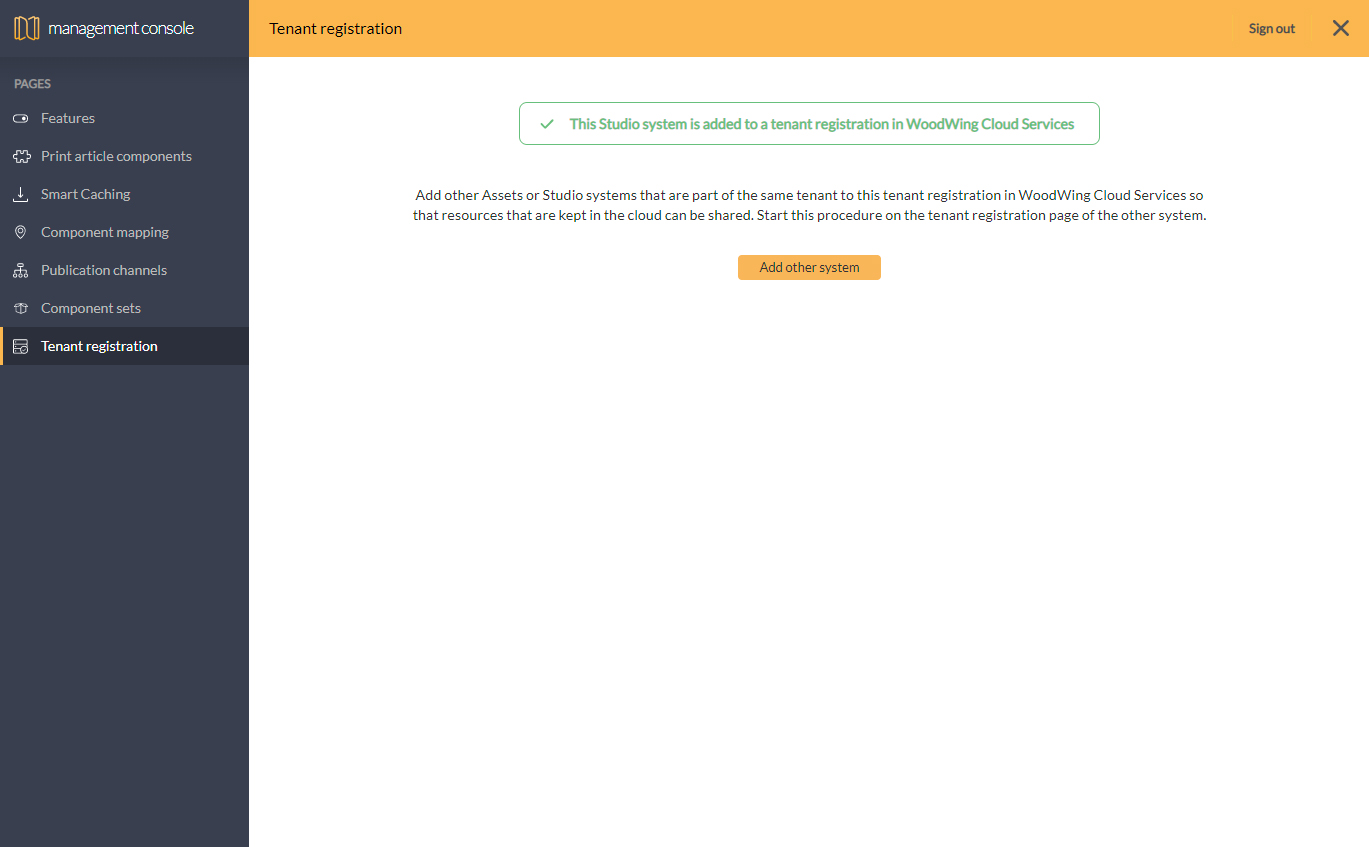
The process is now complete.
Comment
Do you have corrections or additional information about this article? Leave a comment! Do you have a question about what is described in this article? Please contact Support.
0 comments
Please sign in to leave a comment.