With the Smart Caching feature of Studio, a file can be automatically downloaded onto a user's system when the file is routed to that user. Downloading the file takes place in the background while the user continues working with Studio.
As a result, the file is immediately available when the user wants to edit the file which saves the user from having to manually start the download process and then having to wait for it to be completed.
This feature is especially useful when connection speeds are low and/or when files in large sizes need to be downloaded.
By default this feature only works when a file is routed to an individual user but it can also be enabled for user groups of up to 7 users.
This article explains how to configure Smart Caching for Studio. For information about using it, see Automatically downloading a routed file in Studio.
Requirements
Using Smart Caching in Studio requires a Studio Server license (used by the Desktop app for connecting with Studio Server). It is assumed here that all these are in place and fully working.
Note: The Desktop application only works when using Studio in Google Chrome, not in other Web browsers.
Before you start
Please be aware that even when enabling Smart Caching on system level, that each individual user can pause or disable the Smart Caching functionality from within the Desktop application on their system. In other words: enabling Smart Caching on system level does not guarantee that the feature is actually active for each user that is allowed to use it because the user may have paused or disabled it on their system.
Configuration steps
Configuration steps need to take place in Studio Server:
- Enabling Smart Caching on system level
- Allowing the user to use Smart Caching
1. Enabling Smart Caching on system level
The Smart Caching feature first needs to be enabled in Studio Server.
Step 1. In the instance of Studio Server in which Studio is installed, access the Studio Management Console by clicking Integrations > Studio.
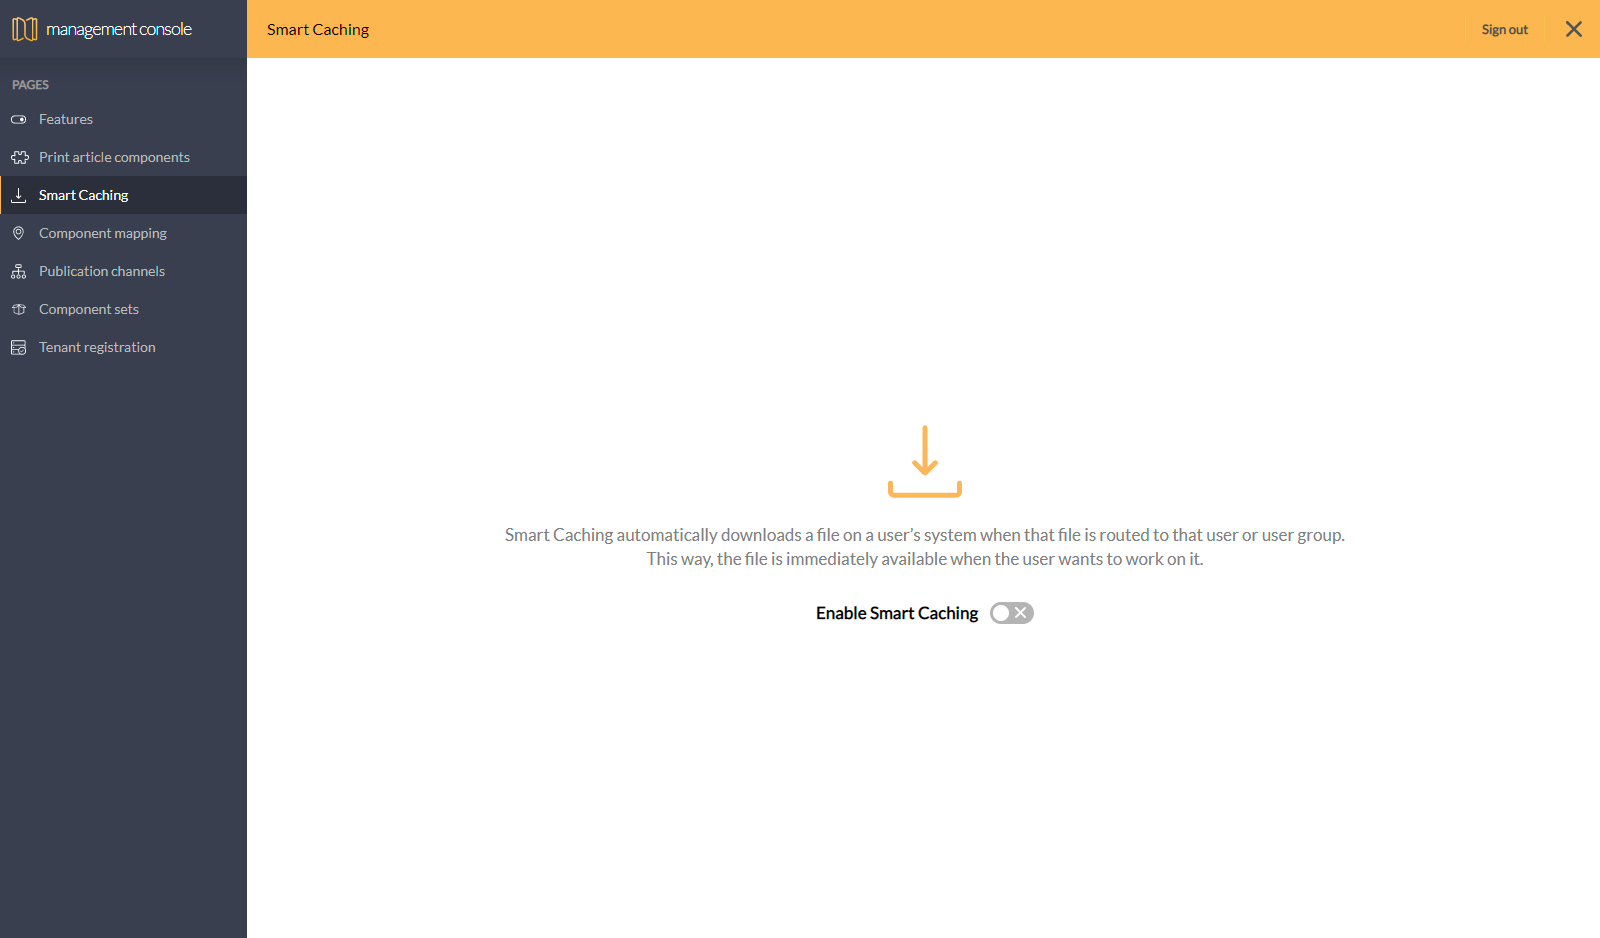
Step 2. In the menu on the left, select Smart Caching.

Step 3. Click Enable Smart Caching.
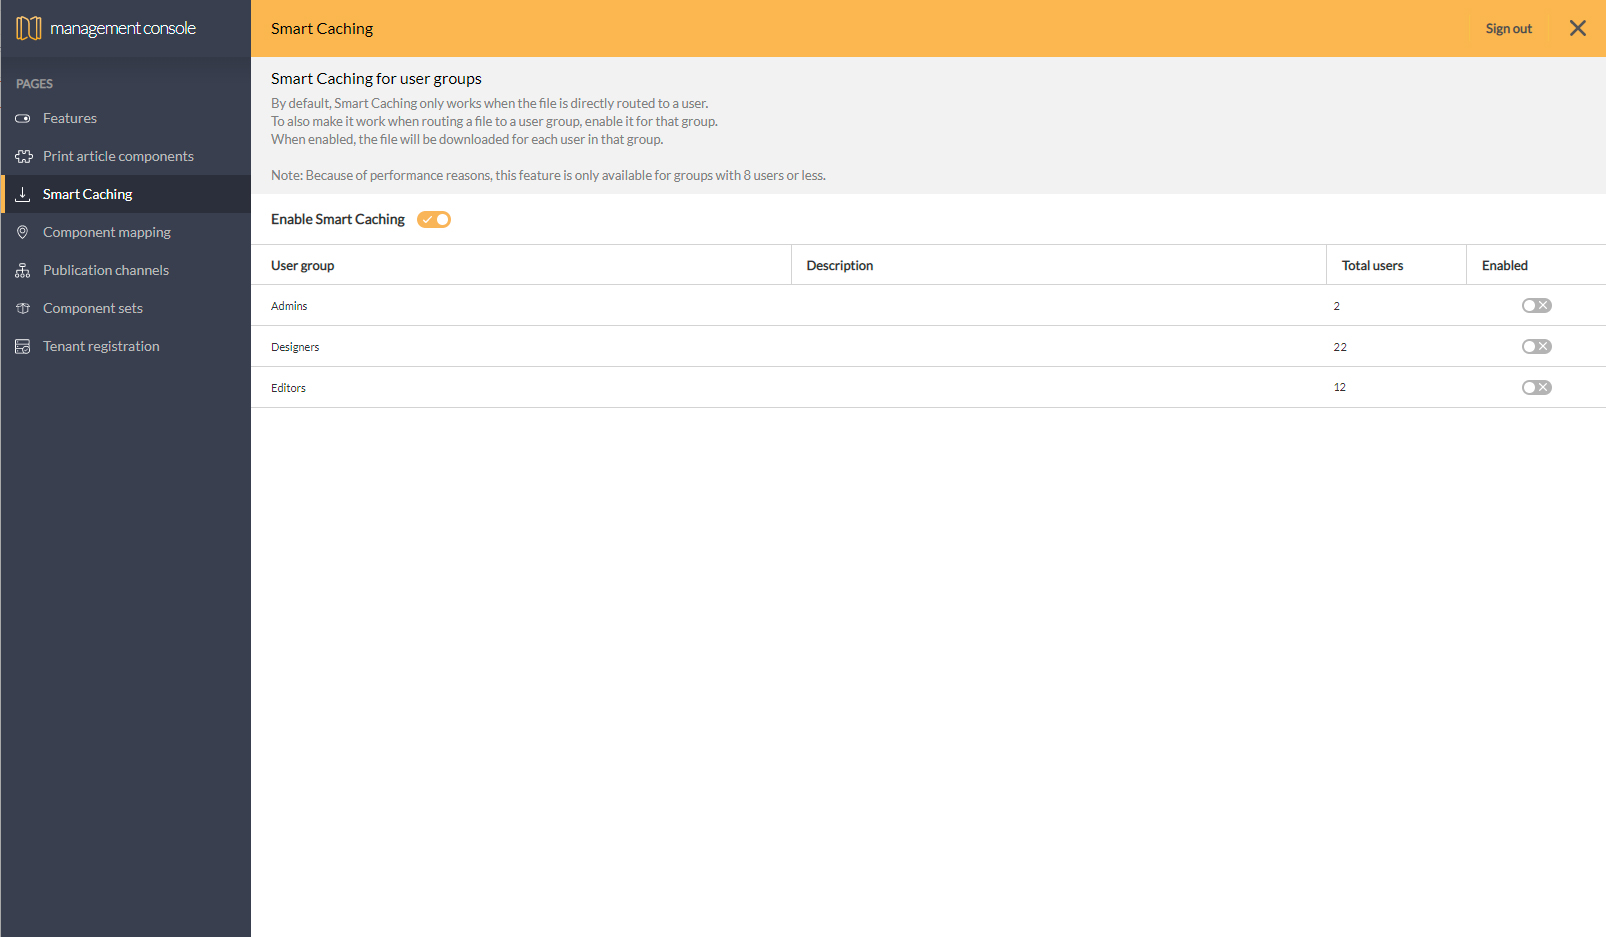
Smart Caching now works when a file is routed to a single user. Making it work for sending a file to a user group requires additional steps.
Note: For performance reasons, this feature is restricted to user groups of no more than 7 users.
Step 4. (Optional) Enable Smart Caching for each user group as needed.

2. Allowing users to use Smart Caching
Users need to be given permission to use Smart Caching by setting the Access Profile for users and user groups.
In Studio Server, set the following Access Right:
Applications > Smart Caching
How users connect to Smart Caching
Even though Smart Caching has been enabled in Studio Server and users have been given permission to use it, the users can influence the working of Smart Caching through the Desktop app in the following ways:
- Whether or not Smart Caching is enabled on their system. When first using Smart Caching for a particular server, the user is asked if Smart Caching needs to be enabled. Should users be on a slow connection, they may decide to disable Smart Caching for performance reasons. Users can also disable Smart Caching at any point through the Desktop app settings.
- Pausing Smart Caching. Smart Caching can at any time be paused.
For more information about using Smart Caching in Studio see Automatically downloading a routed file in Studio.
Comment
Do you have corrections or additional information about this article? Leave a comment! Do you have a question about what is described in this article? Please contact Support.
0 comments
Please sign in to leave a comment.