The default Enterprise installation makes use of the following standard terminology:
- Brand
- Issue
- Category
- Edition
- Status
These may work fine if you are a newspaper publisher, but a books publisher would most likely prefer terminology such as Project, Book, Chapter, and Status instead.
Changing the terminology to your needs can be done in the following ways:
- Making global changes by modifying the configlang.php file
- Making local changes by changing the names of metadata properties
- Making local changes by modifying specific language files
Making global changes by modifying the configlang.php file
By using this method, the terminology for all Brands on one particular Enterprise server is changed.
Note: To set up different Brands using different terminologies, create a separate Enterprise Server installation for each change of terminology.
Step 1. Make a backup of the current configlang.php file.
<Enterprise Server path>/config
Step 2. Open the configlang.php file.
Step 3. Locate the section function getUiTerms().
function getUiTerms()
{
static $terms;
if (!isset($terms)) {
$terms = array();
$terms[] = new Term( 'Publication',   BizResources::localize('PUBLICATION',false) );
$terms[] = new Term( 'Publications',  BizResources::localize('PUBLICATIONS',false) );
$terms[] = new Term( 'Issue',         BizResources::localize('ISSUE',false) );
$terms[] = new Term( 'Issues',        BizResources::localize('ISSUES',false) );
$terms[] = new Term( 'Section',       BizResources::localize('CATEGORY',false) );
$terms[] = new Term( 'Sections',      BizResources::localize('CATEGORIES',false) );
$terms[] = new Term( 'Category',      BizResources::localize('CATEGORY',false) );
$terms[] = new Term( 'Categories',    BizResources::localize('CATEGORIES',false) );
$terms[] = new Term( 'Edition',       BizResources::localize('EDITION',false) );
$terms[] = new Term( 'Editions',      BizResources::localize('EDITIONS',false) );
$terms[] = new Term( 'State',         BizResources::localize('STATE',false) );
$terms[] = new Term( 'States',        BizResources::localize('STATES',false) );
$terms[] = new Term( 'Phase',         BizResources::localize('WORKFLOW_PHASE',false) );
		...
Step 4. Replace each BizResources reference by the new term, using the following format:
Current format:
$terms[] = new Term( '[OLD NAME]', BizResources::localize('[NEW NAME]',false) );
New format:
$terms[] = new Term( '[OLD NAME]', '[NEW NAME]' );
|
Example: Here, the term 'Section' has been replaced by 'Chapter':
|
Note: See the section below about using Unicode characters.
Step 5. Save the file in plain text (ASCII) format.
About using Unicode characters
The following is not supported:
- The use of Unicode format (it is not supported by PHP version 5)
- Accented characters (this might be converted to Unicode by your editor without you being aware of this). When used — and the editor saves a UTF BOM marker at begin of the file — all SOAP clients will stop functioning and all Maintenance pages will show some garbage characters at the top of their page.
|
Example: Here, the accented character ó is used:
This is displayed as a missing character:
|

Using non-ASCII characters in the configlang.php file
Step 1. Visit http://www.fileformat.info/info/unicode/char/search.htm.
Step 2. Type the character you want to use.
Example: ó.
Step 3. Click Search.
Step 4. Click on the character that is found.
Example: When searching for ó, U+00F3 is found.
Step 5. Scroll down to the Encodings list and search for UTF-8 (hex).
Step 6. Copy the displayed value.
Example: The UTF-8 (hex) value for 00F3 is 0xC3 0xB3.
Step 7. Paste the numbers to the chr function in the term definition as follows:
$terms[] = new Term( 'Publication','Publicaci'.chr(0xC3).chr(0xB3).'n' );
Step 8. Save the file.
The accented character has now been written as a multi-byte UTF-8 character, but the configlang.php file is still in ASCII format.
Making local changes by changing the names of metadata properties
Terminology can also be changed by modifying the static metadata properties that are stored in the Enterprise database.
Note: This modification will affect all Brands within the Enterprise Server. To set up different Brands using different terminologies, create a separate Enterprise Server installation for each change of terminology.
Step 1. Access the Metadata page.
In Enterprise Server, click Metadata in the Maintenance menu or on the Home page.
The Metadata page appears.
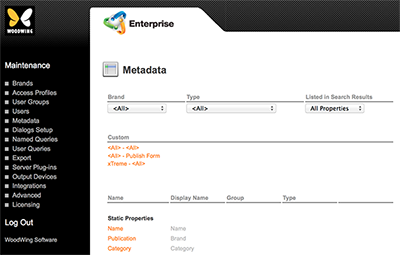
Step 2. In the the Static Properties section, click the name of the Static Property that needs to be changed.
The Static Property page appears.
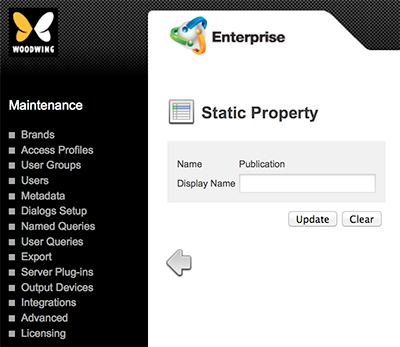
Step 3. In the Display Name field, enter the name that you want to use.
Step 4. Click Update.
You are returned to the Metadata page.
Step 5. Repeat Steps 2–4 for all Properties that need to be changed.
Making local changes by modifying specific language files
The terminology can also be changed on a per-language basis by modifying each individual language file of Enterprise Server.
The files are stored in the following location:
<Enterprise Server path>/config/resources
| File name | Language |
|---|---|
| csCZ.xml | Czech |
| deDE.xml | German |
| enUS.xml | English |
| esES.xml | Spanish |
| fiFI.xml | Finnish |
| frFR.xml | French |
| itIT.xml | Italian |
| jaJP.xml | Japanese |
| koKR.xml | Korean |
| nlNL.xml | Dutch |
| plPL.xml | Polish |
| ptBR.xml | Brazilian Portuguese |
| ruRU.xml | Russian |
| zhCN.xml | Chinese (Simplified) |
| zhTW.xml | Chinese (Traditional) |
Step 1. Make a backup of the current file.
Step 2. Open the file in a text editor that supports UTF-8 encoding.
The top section of the file contains the terminology keys:
<LocalizationMap language="enUS">
  <Term key="ISSUE">Issue</Term>
  <Term key="ISSUES">Issues</Term>
  <Term key="PUBLICATION">Brand</Term>
  <Term key="PUBLICATIONS">Brands</Term>
  <Term key="CHANNEL">Publication Channel</Term>
  <Term key="CHANNELS">Publication Channels</Term>
  <Term key="SECTION">Section</Term>
  <Term key="SECTIONS">Sections</Term>
  <Term key="DESK">Desk</Term>
  <Term key="DESKS">Desks</Term>
  <Term key="EDITION">Edition</Term>
  <Term key="EDITIONS">Editions</Term>
  <Term key="STATE">Status</Term>
  <Term key="STATES">Statuses</Term>
  <Term key="DOSSIER">Dossier</Term>
  <Term key="DOSSIERS">Dossiers</Term>
  <Term key="CATEGORY">Category</Term>
  <Term key="CATEGORIES">Categories</Term>
Step 3. Edit the terminology as required.
|
Example: Here, the term 'Issue' has been changed to 'Book' in the English language file:
|
Step 4. Save the file.
Comments
0 comments
Please sign in to leave a comment.