When editing the content of a Print article in Studio, tables are represented by an icon.
![]()
Figure: The table icon represents a table in a Print article.
Working with tables can be done by performing the following actions:
- Previewing a table
- Editing a table
Previewing a table
Previewing the styling and content of a table is possible when the Print article is placed on a layout. When this is the case, the article can be previewed in the Preview panel by clicking the Preview icon in the toolbar.
Editing a table
Editing a table is possible by changing the text. Actions that are not supported include:
- Changing the styling of the table
- Adding or removing rows or columns
- Merging cells
- Editing a table that is part of another object such as a table or a footnote
- Manipulate the text using the Print editor text SDK
Actions that are supported may require a specific version of Studio, as shown in the following table:
| Action | Notes |
|---|---|
| Applying character styles | Only available when the selected text does not span multiple paragraphs. |
| Applying paragraph styles | |
| Showing hidden characters | |
| Working with inline notes | |
| Working with footnotes | |
| Applying the next paragraph style |
Tip: How to check the version of Studio that is installed.
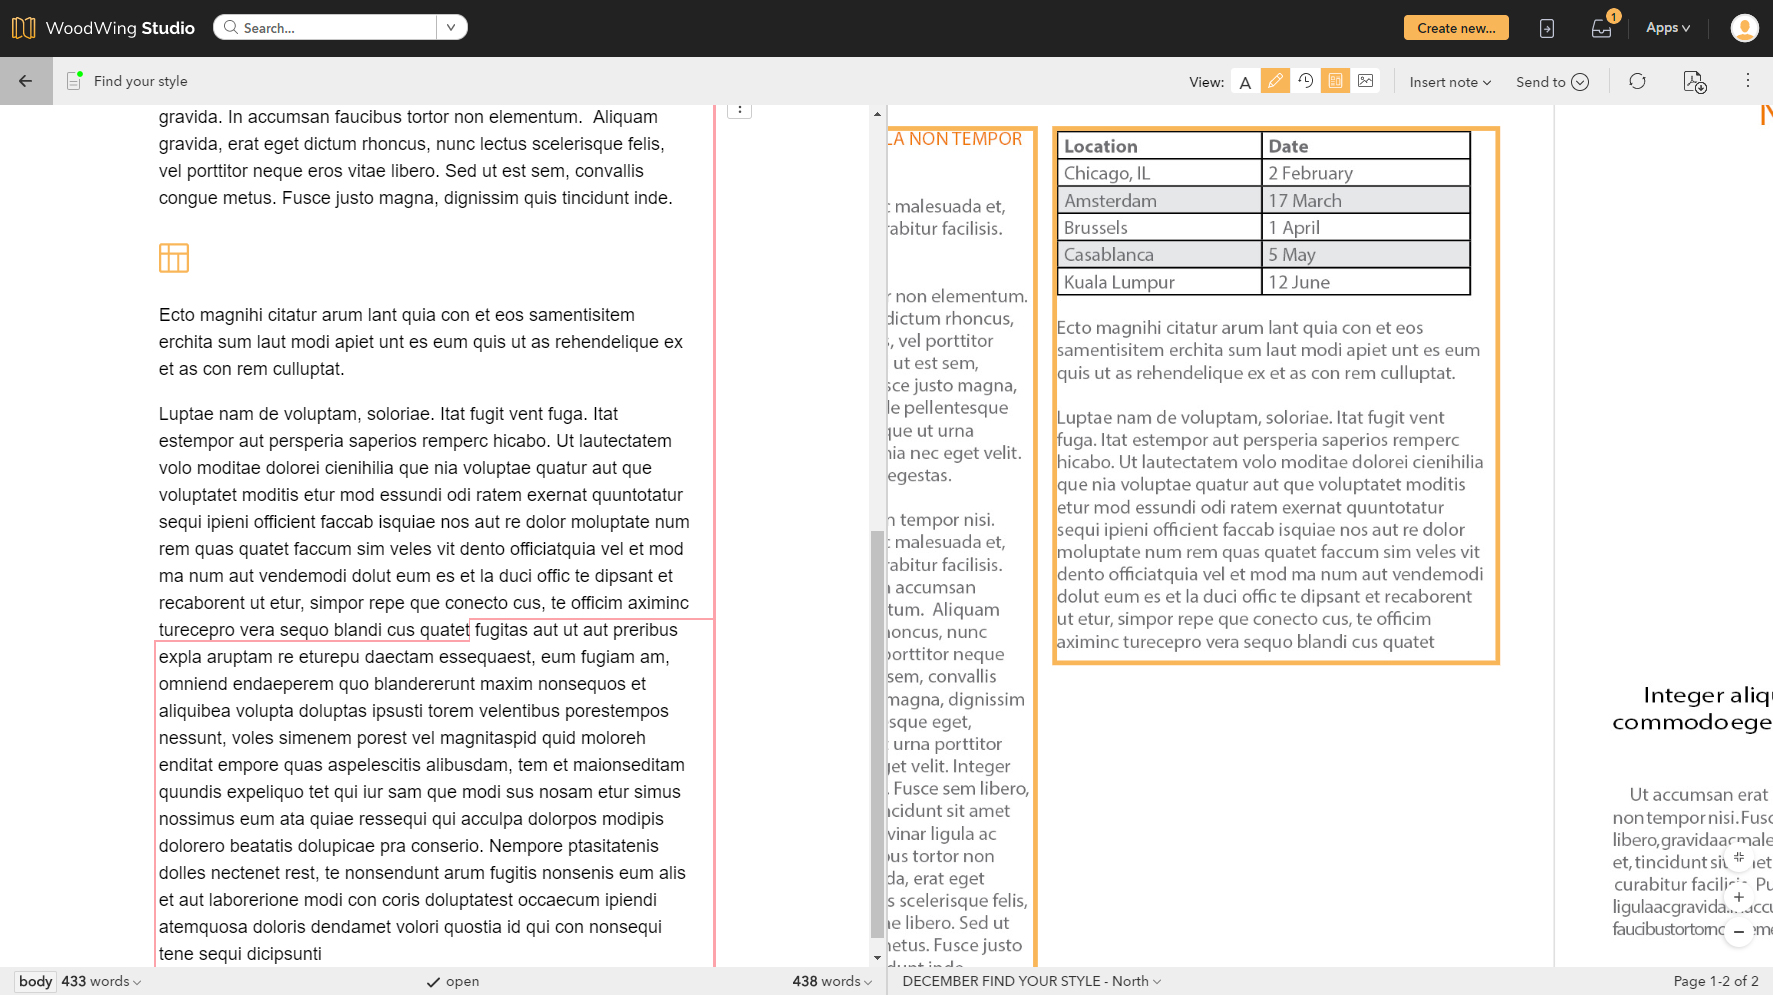
Step 1. Double-click the table icon.
The table is displayed as an overlay or the editor.
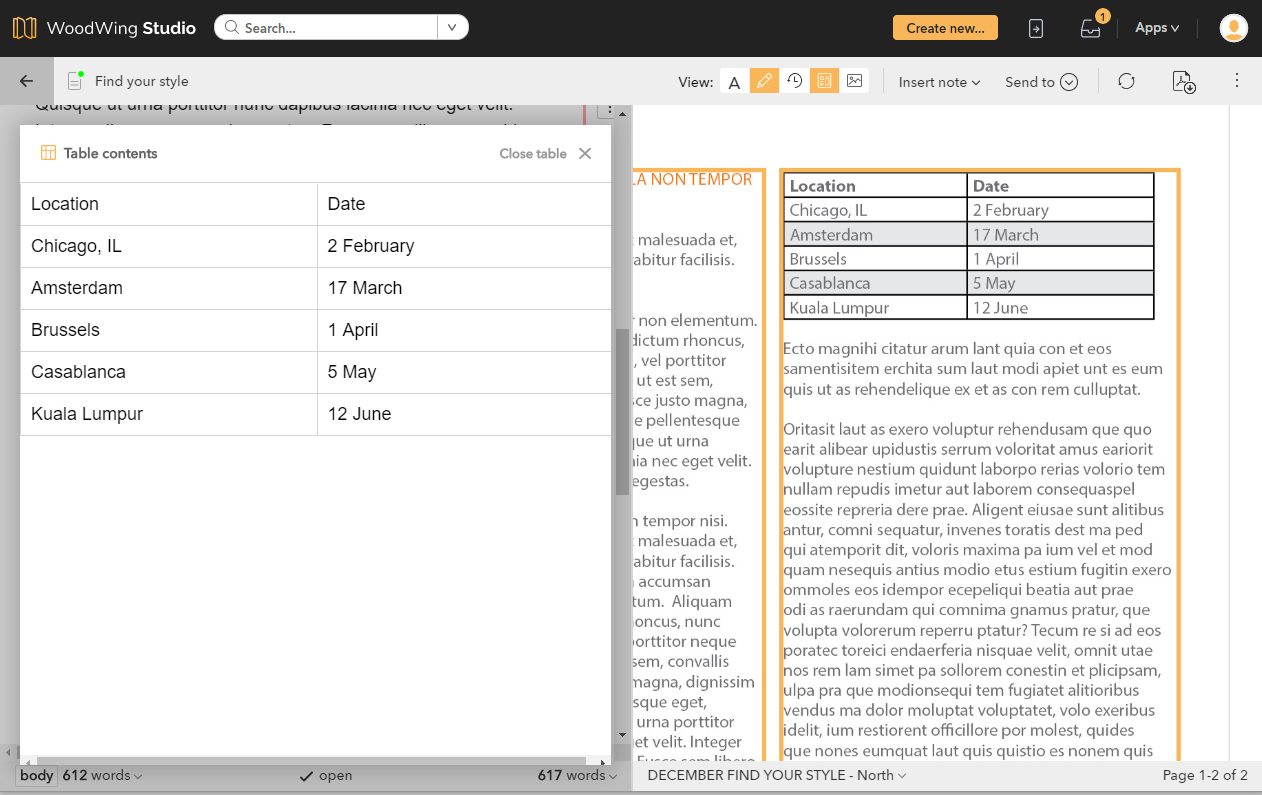
Note: Depending on the width of the table, the number of columns and the number of panels that are open, the horizontal scrollbar may have to be used to see parts of the table.
Step 2. Make the necessary changes by changing the text.
|
Tips:
|
Step 3. When done, click Close table.
Comments
0 comments
Please sign in to leave a comment.