When users want to use Studio, Studio for InDesign and InCopy, or any other application that is connects to Studio Server, they need to be added to at least one Brand that is set up on that server.
Adding a user to a Brand is done by making that user part of a user group and assigning that group to the Brand.
This article describes how to manage user groups in Studio Server.
|
Notes:
|
Creating a user group
Step 1. Access the Overview of User Groups page by clicking User Groups in the Maintenance menu or on the Home page.
A page showing all created user groups appears.
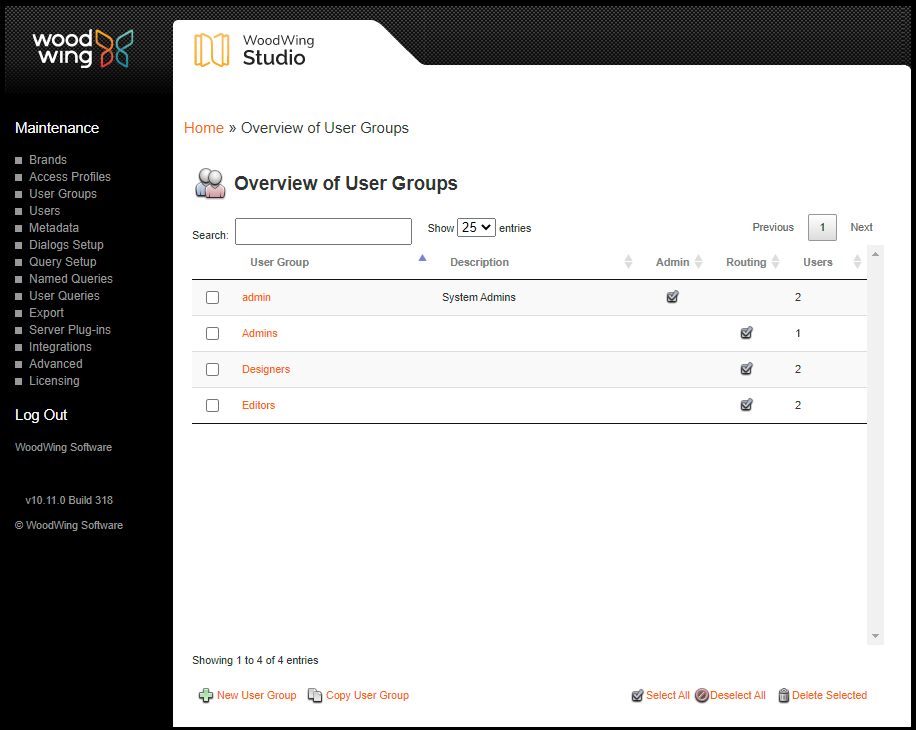
Figure: The Overview of User Groups page shows all created user groups.
Step 2. Click New User Group.
The User Group Maintenance page appears.
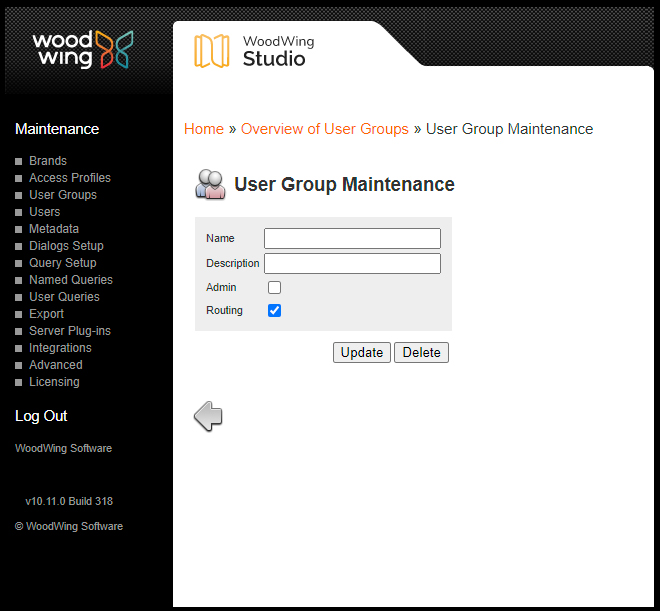
Figure: The User Group Maintenance page is used for setting up the user group.
Step 3. Fill out the details:
- Name. Name of the user group. Must be unique with respect to other groups and user names.
Note: User group names can be up to 63 characters long (including special characters — for example numerals or other non-alphabetical ASCII characters such as hyphens, dots, and underscores).
- Description. A description of the group. This will appear on the Overview of User Groups page and will help you in identifying the purpose of the group.
- Admin. Select this if the users in this group need to access the Maintenance applications to control users, user groups, and Brands, as well as view files that are set to the Personal state.
- Routing. Set this if it should be possible for users to route files to the group.
Step 4. Click Update.
The user group is added to the system and a section appears at the bottom of the page for adding users to the group.
See Adding a user to a group below.
Copying a user group
When you need to create a new user group with settings that are identical to an already existing group you can create a copy of that group to use as a starting point.
Step 1. Access the Overview of User Groups page by clicking User Groups in the Maintenance menu or on the Home page.
A page showing all created user groups appears.
Step 2. Click Copy User Group. The Copy User Group page appears.

Figure: The Copy User Group page is used for creating a new group based on settings of an existing group.
Step 2. From the Source User Group list, choose the group that needs to be copied.
Step 3. In the New User Group Name box, enter a name for the new user group.
Step 4. (Optional) In the Description box, enter a description. This will appear on the Overview of User Groups page and will help you in identifying the purpose of the group.
Step 5. Click Copy User Group. The User Group Maintenance page for the new group appears.
Updating a user group
Step 1. Access the Overview of User Groups page by clicking User Groups in the Maintenance menu or on the Home page.
Step 2. Click on the name of the user group in the User Group column.
The User Group Maintenance page for that group appears.
Step 3. Make the necessary changes.
Step 4. Click Update.
Adding a user account to a user group
Adding a user account to a user group can be done from the user account or from the user group account.
Adding a user to a group from the user account
Step 1. Access the Overview of Users page by clicking User Groups in the Maintenance menu or on the Home page.
Step 2. Click on the name of the user in the User column.
The User Maintenance page for that user appears.
Step 3. In the User Groups section, click Add.
A page appears with a list containing all groups to which the user does not yet belong.
Step 4. Select one or more user groups.
Step 5. Click Add.
The user is added to the user group(s) and the User Maintenance page appears again, with the added user groups included in the User Groups list.
Adding a user to a group from the user group account
Step 1. Access the Overview of User Groups page by clicking User Groups in the Maintenance menu or on the Home page.
Step 2. Click on the name of the user group in the User Group column.
The User Group Maintenance page for that group appears.
Step 3. In the Users section, click Add User.
A page appears with a list containing all users which do not yet belong to the group.
Step 4. Select one or more users.
Step 5. Click Add.
The user is added to the user group and the User Group Maintenance page appears again, with the added user(s) included in the Users list.
Removing a user account from a user group
Step 1. Access the Overview of User Groups page by clicking User Groups in the Maintenance menu or on the Home page.
A page showing all created user groups appears.
Step 2. In the User Group column, click on the name of the user group from which a user account needs to be removed.
The User Group Maintenance page for that group appears.
Step 2. In the Users section, click Delete next to the User Name of the user that needs to be removed.
A message appears asking to confirm the action.
Step 3. Click OK to remove the user from the user group.
Deleting a user group
User groups can be deleted by doing one of the following:
- On the Overview of User Groups page: select one or more user groups and click Delete Selected.
- On the User Group Maintenance page: click Delete.
|
Notes :
When trying to delete such a user group, a message is shown on the page. When multiple user groups are selected and at least one user group cannot be deleted, none of the user groups are deleted. To resolve this, make sure that the affected user groups do not have any objects routed to them. |
Comments
0 comments
Please sign in to leave a comment.