Info: Performing the steps described in this article requires direct server access. Depending upon how your system is hosted and the level of access you have to that system, coordination may be required with your Partner or WoodWing Support team. For a full overview of the steps that need to be done by WoodWing and how to request them, see WoodWing Cloud - Change management.
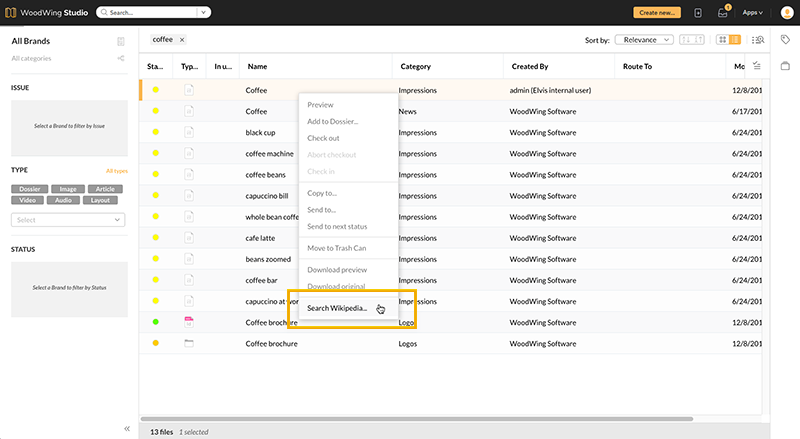
One of the ways of adding custom functionality to Studio is by adding commands to the context menu of a file. These commands can be linked to specific actions.
Example: You can add functionality such as printing a file, downloading a custom contact sheet in PDF format, and so on.
Note: The context menu is accessed by right-clicking a file.

Figure: In this example a file named 'Coffee' is referenced on Wikipedia.

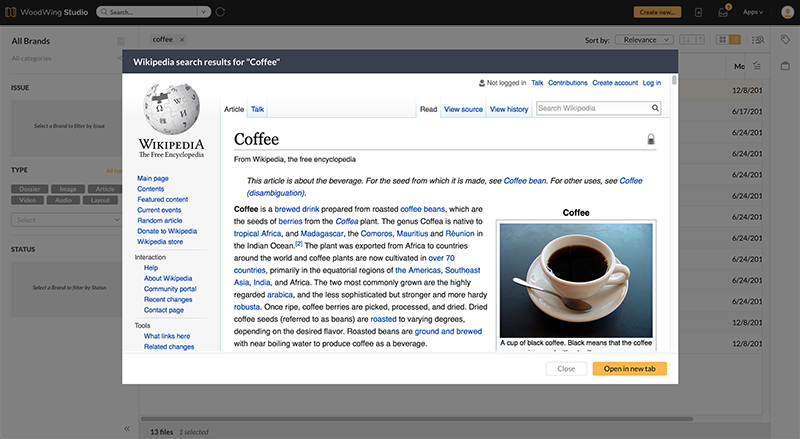
Figure: The result is displayed in a window and can optionally be opened in a new tab.
Areas to add commands to
Custom context menu commands can be added to the following areas in Studio:
- Files that are shown in the search results
How actions are provided
The action that is performed should be provided in the form of a javascript plug-in.
Where to get the actions from
The actions need to be created or obtained yourself; they are not provided by WoodWing.
Creating a plug-in
To help you create your own plug-ins, an SDK and sample files are available in the following location:
- Content Station folder > sdk
It contains the following files and folders:
- content-station-11-sdk.md. The SDK describing the available options that can be implemented.
- plugins.md. Sample code showing how to enable plug-ins in Studio
- samples. Folder containing some example plug-ins. See the SDK for more information.
The process
The process of creating and adding a plug-in is as follows:
Step 1. Create the plug-in by following the instructions in the SDK.
Step 2. Place the plug-in in the following folder (optionally in a subfolder of this folder):
- Content Station folder > sdk
Step 3. Link the plug-in to Studio by configuring the config.js file of Studio as explained in Managing plug-ins in Studio.
Step 4. Save the file.
Step 5. Log in to Studio — or refresh the page when you are already logged in — and test the working of your plug-in.
Comments
0 comments
Please sign in to leave a comment.