Working with external agencies and press associations typically involves placing files under embargo up to a specific date after which these users are allowed to see and use them in the Brand portal.
This article explains how this is done in Swivle.
The process consists of 2 steps:
- Defining the embargo period.
- Assigning an Access Rule to the folder.
1. Defining the embargo period
In this step, the embargo period is defined during which the files are allowed to be accessible.
Step 1. Find the files for which you want to set an embargo period and select them.
Step 2. Open the Metadata panel and locate the following field:
- License start
Note: This field is part of the Rights metadata fields. If it is not shown, add it to the panel as explained in Working with metadata in Swivle.
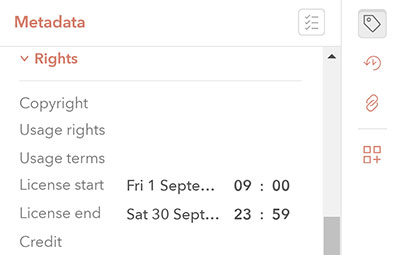
Step 3. Set the date and time from which the files are allowed to be accessed. (In other words: up until the specified date and time, the files are not allowed to be accessed.)
Step 4. Define an end date after which the files should no longer be available (and are placed under embargo again), by using the following field:
- License end
2. Assigning an Access Rule
Info: This action uses the Management Console which can only be accessed with administrator rights.
Typically, all embargo files are placed in one folder. An access right can then be set to that folder which controls the accessibility to the files.
In the Management Console, create an Access Rule to a folder with a metadata query based on the licenseStartDate field and optionally the licenseEndDate.
|
Example 1: In the following metadata query, the embargo is lifted on 1 May 2023:
Example 2: In the following metadata query, the embargo is lifted on 1 May 2023 and active again after May 10:
|
Comments
0 comments
Please sign in to leave a comment.