InDesign libraries make it possible to store, reuse, and share often used objects such as graphics and text. This ensures that such objects are easily and quickly available and that their content and styling is consistent.
Note: For more information about InDesign libraries, see Adobe Help. It is assumed here that you are familiar with the working of InDesign libraries.

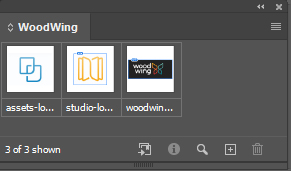
Figure: An InDesign library.
Using Studio for InDesign, InDesign libraries can be stored in Studio Server where they behave in the same way as other files in Studio Server. This means that:
- They can be added to a Dossier. Create libraries containing objects (icons, styled tables, and so on) that are specific to a particular Brand, story, or project and make them easily available by adding them to a Dossier. This way, the correct objects (with the correct content and styling) are used.
- They can have a Workflow Status and Access Rights assigned. Use Workflow Statuses such as 'Draft', 'Production', and so on to indicate their state. Assign Access Rights to deny or allow a user to perform particular actions such as opening the library for editing (check-out).
- They can be shared with and routed to other users. Because the libraries are stored within Studio Server, they are accessible to multiple users. Use the Route To feature to send the file to other users.
- Versions can be saved. This makes it possible to roll back changes that were made to a library.
Tip: Using libraries becomes even more powerful in combination with WoodWing’s Smart Styles.
The check-out and check-in process
It is important that when one person works on a file that another person is not able to also open that file and make changes. To prevent this from happening, a library that is stored in Studio Server can only be opened for editing by one person at a time (similar to any other file that is stored in Studio Server). This process is referred to as 'checking-out a file'.
As long as a user has a file checked out, others cannot make changes to the content of that file. Only when the user saves the file back to Studio Server (a process referred to as 'checking-in a file') can another user open that file for editing.
Tip: Users can be prevented from checking-out a file when a file has a certain Workflow Status assigned. This is done through the use of Access Rights. When the content of (some) libraries needs to be regulated, use Access Rights to allow only power users to edit libraries and thereby preventing all other users from doing the same.
Working with libraries
Working with InDesign libraries within a Studio environment is very similar to working with other files such as articles and layouts. These actions are therefore not explained in detail here.
In the following sections, the actions to take note of in relation to InDesign libraries are described.
Creating a new library
Choose File > New > Library.
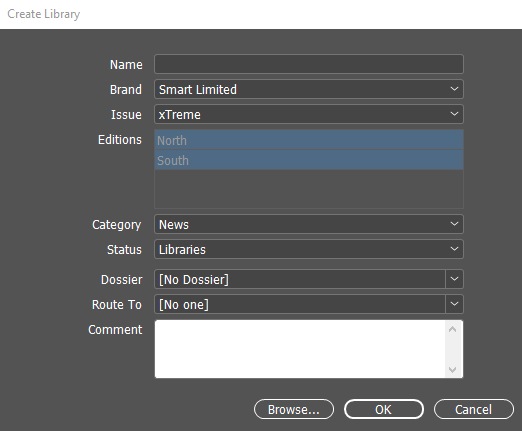
As long as you are logged in to Studio Server, the Create Library dialog box appears for storing the Library in Studio Server.
Fill out the fields as needed.
|
Notes:
|

Storing a library from your local system to Studio Server
Step 1. Open the library in InDesign and from the Library panel menu, choose Check In....
The Check In dialog appears, identical to the Create Library dialog shown above.
Step 2. Fill out the fields as needed.
Note: Libraries cannot have Editions assigned; when Editions have been set up for a Brand, the options in the Editions list cannot be changed.
Opening a library
To open a library, locate it in the Studio panel and double-click it.
When opening a library this way, it is checked-in. This means that the objects can be dragged from the library onto the layout but that the objects in the library cannot be edited.
To check-out a library so that its objects can be edited, do one of the following:
Note: Depending on your access rights, you may not be allowed to open a library for editing.
- For a library that is not yet opened: double-click it in the Studio panel while holding the Alt key (Windows) or Option key (macOS).
- For a library file that is already opened: choose Check Out from the Library panel menu.
Canceling the check-out
When you have checked-out a library and you come to the realization that it was not necessary to check it out, the library can be closed without saving any changes that were made.
To do this, choose Abort Check Out from the Library panel menu.
The library will be restored to the original state it was in at the time that it was opened.
Updating a library
When opening a library, the latest version of that library is opened. Studio for InDesign will automatically detect when the content of the library changes — for example when another user has changed the content of the library by adding or removing items.
To update the library, choose Update from the Library panel menu.
Other actions
The following actions are also available to library files and work in the same way as for other files that are stored in Studio Server. These actions are available in the Library panel and / or the context menu that appears when right-clicking a library in the Studio panel.
Note: Some of these actions are only available when the library is checked out.
- Actions in the Library panel menu:
- Save Version. Saves a version of the library.
- Check In. Checks-in a checked-out library.
- Abort Check Out. Cancels the check-out of a library.
- Actions in the context menu:
- Open Read-Only. Opens the library in read-only mode.
- Show Versions. Opens a dialog showing all versions of a library.
- Send to Next. Sends the library to the next workflow status.
- Send To. Opens a dialog for sending the library to another user.
- Copy To. Opens a dialog for creating a copy of the library.
- Move to Trash Can. Moves the library to the Trash Can.
- Show Dossiers. Opens the Dossier panel showing all Dossiers of which the library is part.
- Create Dossier. Opens a dialog for creating a new Dossier; the library is automatically added to it.
- Properties. Shows the properties of the library.
Comments
0 comments
Please sign in to leave a comment.