Using the Print editor of Studio, footnotes in a Print article can be created, edited or removed.
Footnotes appear as an icon in the editor. When the icon is clicked, the content appears in a pop-up window. Footnotes also appear in the layout preview (when available).
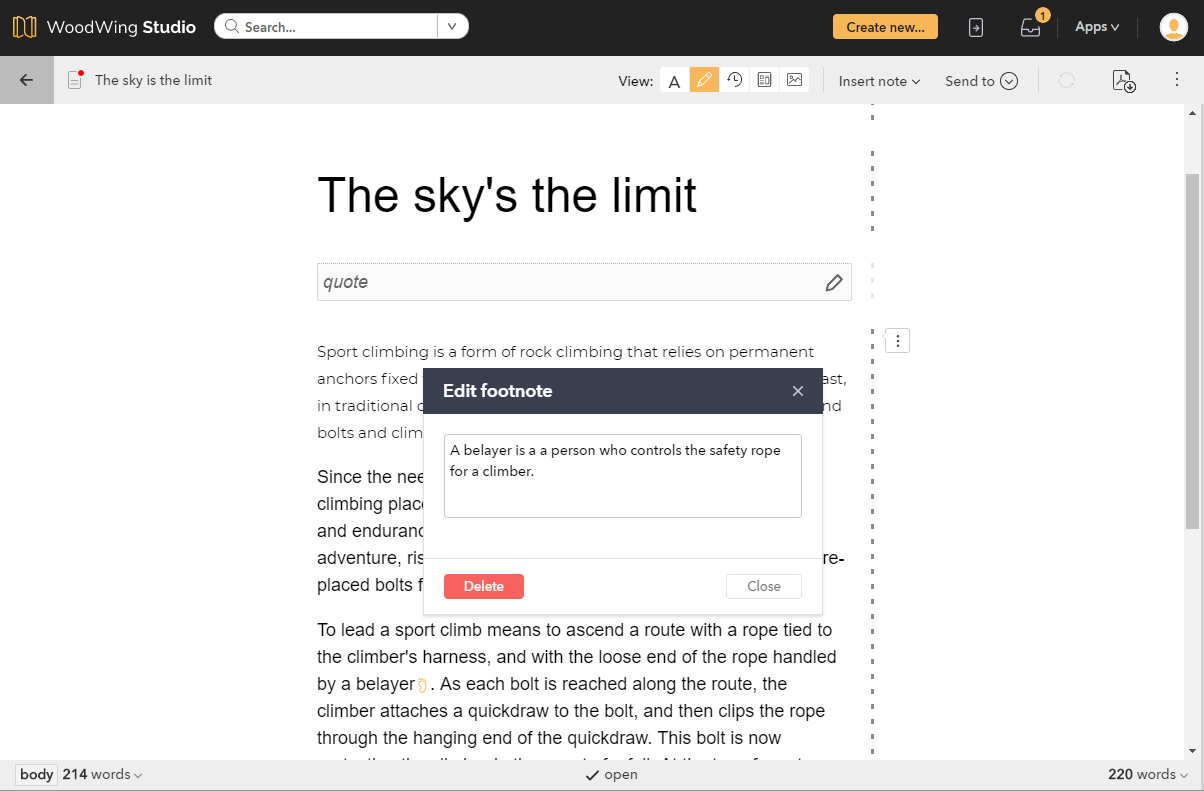
Figure: Footnotes appear as an icon in the text. When clicking the icon, the content appears in a pop-up window.
|
Notes:
|
This article describes how to work with footnotes in Studio:
- Recognizing footnotes
- Opening a footnote
- Closing a footnote
- Saving changes
- Creating a footnote
- Deleting a footnote
Recognizing footnotes
Footnotes in a Print article can be recognized by the footnote icon in the editor.
![]()
Figure: The footnote icon.
Opening a footnote
To open a footnote, click the icon in the text. The footnote will open in a pop-up window.

Closing a footnote
To close a footnote, click anywhere outside of it, click the Close button, or click the X-button in the top right corner.
Saving changes
Changes that are made to the text in the footnote are automatically saved.
Creating a footnote
Step 1. Place the text cursor at the position in the text where you want to add the footnote.
Step 2. In the toolbar, click Insert Note and from the menu that appears, choose Insert footnote.

Figure: To create a footnote, click the Insert note button (A) and from the menu choose 'Insert footnote' (B).
The footnote is created and the layout preview is updated.
Step 3. Open the footnote by clicking its icon. Add the text for the footnote.
Note: The footnote is automatically numbered.
Deleting a footnote
To delete a footnote, do one of the following:
- Place the text cursor after the icon in the text and press Backspace.
- Open the footnote and click Delete.
Comments
0 comments
Please sign in to leave a comment.