Images that are added to a Digital article in the Digital editor can be of a file type or a file size that makes them unsuitable for publishing to a digital channel.
Example: Images in Photoshop format, images in a very high resolution or file size, and so on.
To optimize such images as much as possible, an automatic process takes place when the article is published. Images can optionally also be cropped in the Digital editor.
Making this work requires a particular setup and configuration steps. These are explained in this article.
How it works
Optimizing images is done in the following ways:
- By automatically converting the images when the article is published
- By manually cropping an image in the Digital editor
Image conversion
When an article is published, any images it contains are automatically optimized to the following characteristics:
- Format: JPG
- Image quality: 90%
- Dimension: A maximum of 2500 x 2500 pixels
|
Notes:
|
Image cropping
When only part of a large image is required, cropping the image helps in making sure that the image fits best in its frame. This can be done by using the cropping tool in the Digital editor.
|
Notes:
|
How to use the cropping tool is explained in Creating and publishing channel-neutral content in Studio.
Requirements
This feature requires the following:
- Image cropping:
- Assets or higher running on Linux or Windows
|
Notes:
|
Configuration
The following can be configured:
- The image dimension to which the images are automatically converted to
- Enabling or disabling the cropping tool in the Digital editor
Image dimension
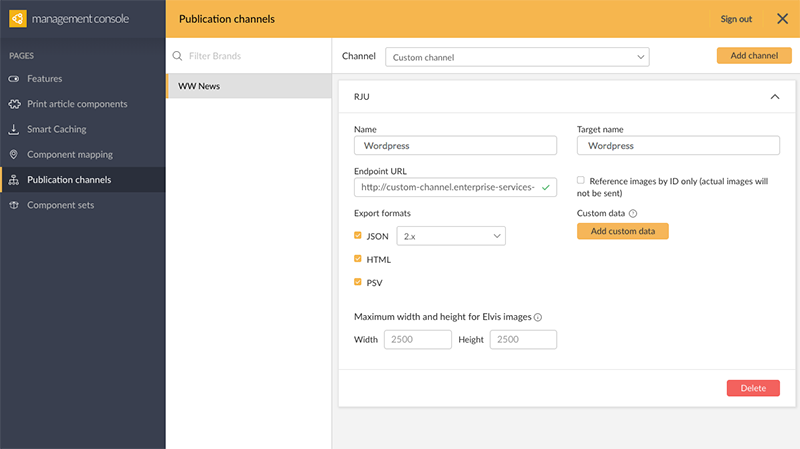
By default, any images that are bigger than 2500 by 2500 pixels are automatically down-sized to that format.
When needed, this format can be manually set to a custom setting.
Note: This can be done for each Publication Channel individually.
Do this by navigating to the Management Console > Publication Channels > Your channel and setting the required values.

Enabling or disabling image cropping
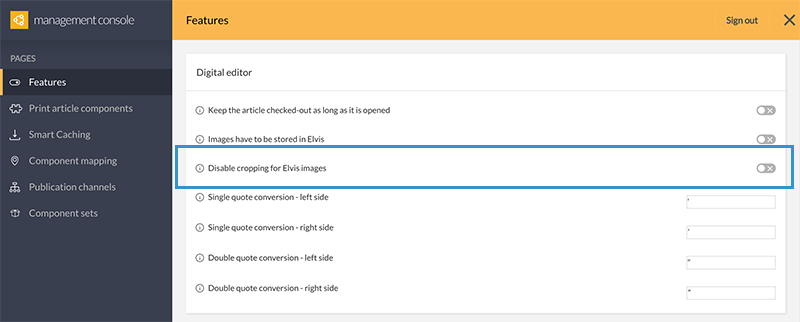
The Image cropping tool of the Digital editor is enabled by default. To disable it, enable the option Disable cropping for Assets images on the Management Console > Features page.
Note: Image cropping needs to be disabled when Assets Server is installed on macOS; this feature is not supported on that operating system.

Comments
0 comments
Please sign in to leave a comment.