Smart Styles not only lets you quickly format a table but also allows you to sort the data or insert formulas into cells, turning your static tables into dynamic spreadsheets.
Sorting data and using formulas is also functional in InCopy (when in Layout view mode).
How to format tables and how to use the sorting and formula features of Smart Styles is explained in this article.
Table element properties
The following properties can be used to style a Smart Styles table element, either separately or combined:
- Table Options:
- Table border
- Table spacing
- Row strokes
- Column strokes and fills
- Headers and footers
- Cell Options:
- Cell inset
- Vertical justification
- First baseline settings
- Clipping
- Rotation
- Cell strokes
- Cell fills
- Row height
- Column width
- Keep options
- Diagonal lines
- Text Style: for each cell, Smart Styles will use its full text styling capabilities. (For more information, see Setting up a text element in Smart Styles.)
Creating a new Smart Styles table element
To create a new Smart Styles table element for a table, do the following:
Step 1. Create a text frame containing a table.
Step 2. Format the table using any of the InDesign’s formatting features.
Step 3. Select the text frame and add it to the Library using any of the methods described in Working with Smart Styles elements.
How sequences are recognized
All attributes of a table are set automatically by Smart Styles. When applying a table element, the system analyzes the sequence of formatting in both horizontal and vertical directions. This allows specific formatting for the first row (or series of rows), an “every other row” rhythm style after the first row, and again a different style for the last row (or series of rows).
Because Smart Styles analyzes this for both the rows and columns, you can set up a very powerful Smart Styles table element to simplify the process of formatting numerous tables consistently.
The concept of sequencing is as simple as 1,2,3:
- Equals the start sequence.
- Equals the in-between sequence.
- Equals the ending sequence.
The start and end sequences can each contain any number of rows with different formatting applied to each row. The in-between sequence can also contain any number of repeating rows. Your formatting will reflect how these in-between rows are set.
To explain this concept, review the following examples.
Example 1
|
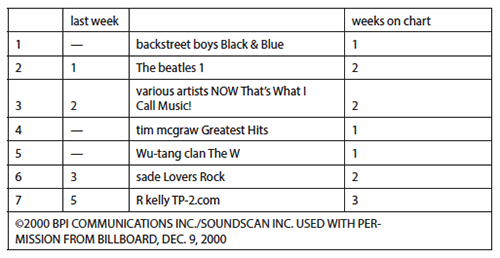
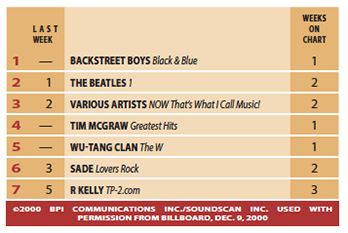
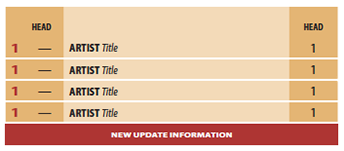
In example 1, compare the unformatted Table 1a with the formatted Table 1b to see the results of applying the Smart Styles table element shown in Table 1c.
Figure 1a. An unformatted table.
Figure 1b. The table formatted with the Smart Styles element shown in 1c.
Figure 1c. The Smart Styles table sequencing pattern used to format table 1b. In formatted Table 1b, the first and second rows are styled differently. Smart Styles recognizes this as a two-row start sequence. The in-between rows are formatted identically, and are recognized as a repeated pattern. The last row is formatted differently, defining it as an end sequence. In this example, the repeating sequence consists of a single style, but it could be any number of repeated styles. If you have two different rows of a repeating style, you must duplicate those two rows exactly in your initial setup so that Smart Styles can determine which rows belong to the repeating in-between sequence. Once this table is formatted properly and dropped into the Smart Styles Library, it will work to format a table consisting of any number of rows. The same sequencing concept applies to columns. In table 1b, there are four columns: a start sequence (the first two columns), an in-between sequence (the third column) and an end sequence (the fourth column).
|
Example 2
|
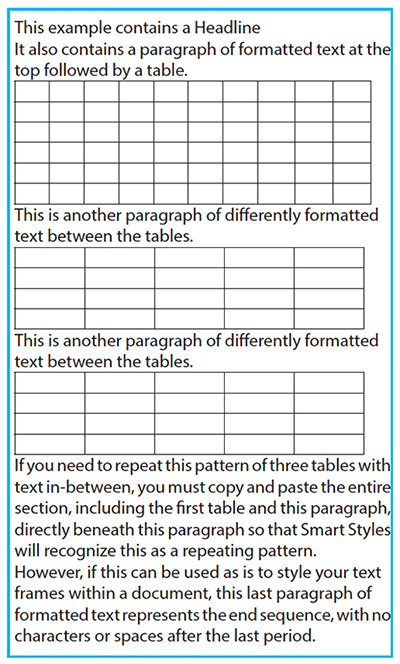
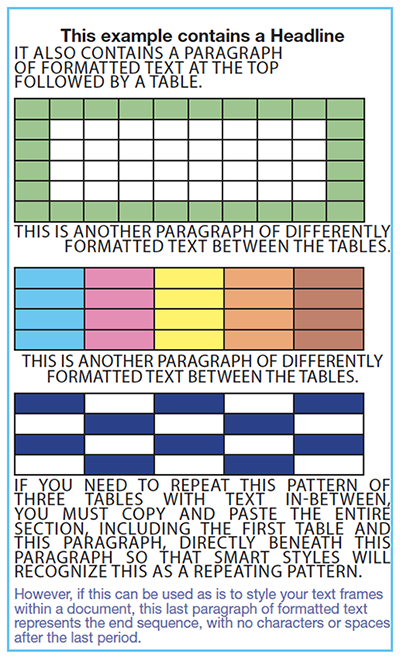
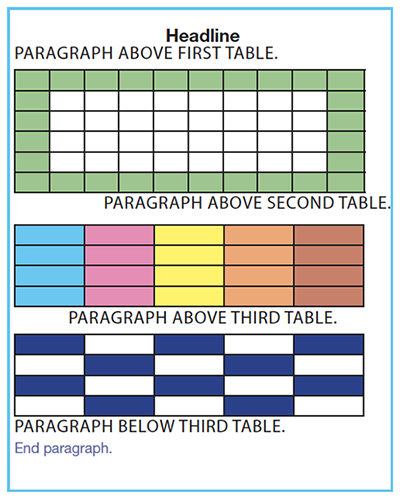
Example 2 illustrates the ability to set up entire text frames of formatting, including tables and text.
Figure 2a. A text frame containing text and three tables before formatting.
Figure 2b The text frame with differently formatted tables after applying the Smart Styles element shown in table 2c.
Figure 2c The formatted Smart Styles element. In this case, Smart Styles table element 2c is dragged onto the text frame, outside any tables. If this is applied directly to a table within the text frame, only that one table is formatted with the first table format in the element (the green table). Note: The text in table 2b also provides further information on creating the Smart Styles table element shown in table 2c. |
Using formulas
Smart Styles allows you to make calculations by applying formulas to the contents of cells, very much like working with a spreadsheet application.
This feature is also functional in InCopy.
Note: This functionality does not leave a ‘footprint’ in the document. Documents that contain tables with formulas applied can easily be opened with versions of InDesign or InCopy that do not have Smart Styles installed. The values of the formulas are displayed as regular text and can be edited as normal.
Formula basics
A formula performs a calculation on one or more cells in a table, based on the input by the user. This could be a simple addition, subtraction, division or a more complicated calculation.
A basic formula looks as follows:
=(A1-12)+(B2-B1)
Here, the static value 12 is subtracted from the value in cell A1 and the outcome is added to the result of subtracting the value in cell B1 from the value in cell B2.
Note: In Smart Styles, the formula itself is never displayed in the cell, only the outcome of the calculation. To add or edit a formula to a cell in InDesign or InCopy using Smart Styles, the Formula dialog box needs to be used (see below).
A formula always starts with an equal sign (=). The actual equation that follows it is called the syntax and needs to follow specific rules, otherwise the formula will not work.

Figure: The construction of a formula: (A) cell reference (B) Subtraction operator (C) Numeric constant (D) Function (E) Range reference.
- Cell references. The numbering of cells is identical to the one used in regular spreadsheet applications: the top cell in the first column is cell A1, the one below cell A2, the top cell in the second column is B1, and so on.
To refer to individual cells, separate them by a comma.
Example: (A1, A5). Here, the values in cell A1 and cell A5 are referenced.
To specify a range of cells, separate them by a colon.
Example: (A1:A10). Here, cell A1 up to and including cell A10 are referenced.
Header and footer cells cannot be included in the calculation. When referenced, #error will display as the formula value in the cell.
- Function. A function is used to perform a particular action on a range of cells.
|
Examples of functions: Function: ABS() Syntax: =abs(a1) Remarks: Absolute (number without its sign). Example: =ABS(-2) output: 2 Function: Average() Syntax: =Average(number1,number2) Remarks: Average of range of numbers. Example: =AVERAGE(3,6) output: 4,5 Function: Int() Syntax: INT(number) Remarks: Integer. Rounds a number down to the nearest integer. Example: =INT(8.9) output: 8 Function: Product() Syntax: =product(number1,number2) Remarks: Product. Multiplies all the numbers given as arguments. Example: =product(4,5) output: 20 Function: Round() Syntax: =ROUND(number, number_of_digits)) Remarks: Rounds a number to a specified number of digits. Example: =ROUND(8.35, 1) output: 8,4 Function: Sum() Syntax: =sum(A2:A4) Remarks: Sum (adds all the numbers in a range of cells). Example: =sum(4:5) output: 9 |
Inserting formulas
Step 1. Place the text cursor in the cell in which the formula needs to be inserted.
Step 2. Do one of the following:
- From the Table menu, choose Formula > Insert.
- Right-click on the cell or table and choose Formula > Insert.
The Formula dialog box appears.
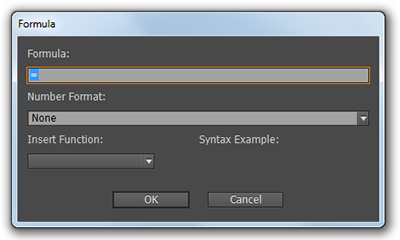
Step 3. Manually enter a formula (see also Step 5).
Step 4. (Optional) From the Number Format list, select one of the default formats, or enter your own format.
Step 5. (Optional) From the Insert Function list, select a function to be added to the formula in the Formula box. The function is inserted at the point where the cursor is placed in the Formula box.
The following default functions are available in the list (other functions are supported as well):
- ABS(). Absolute
- Avarage(). Avarage
- Int(). Integer
- Product(). Product
- Round(). Round
- Sum(). Sum
Note: After selecting a function from the list, the Syntax Example area shows an example of the syntax that needs to be used for the chosen function.
Step 6. Click OK to insert the formula.
|
Notes:
This highlighting can be switched on or off by choosing Show Fields/Hide Fields from the Formula submenu in the Table menu or the context menu. |
Editing formulas
To edit an entered formula, place the cursor in the formula value and do one of the following:
- From the Table menu, choose Formula > Insert.
- Right-click on the cell or table and choose Formula > Insert.
The Formula dialog box appears in which the changes can be made.
Updating formulas
Whenever values of cells that are referenced by one or more formulas are changed, the formulas need to be updated to reflect these changes.
Tip: Update the formulas regularly or at least as the final step when finished working on the table so that the correct values are displayed.
Note: When updating formulas, any manually applied number formatting will be replaced by the formatting rules as set in the Formula dialog box (if any).
Formulas can be updated individually, by range or by document.
Updating formulas individually
In the cell that holds the formula, place the text cursor in the formula value (highlighted in orange by default) and do one of the following:
- From the Table menu, choose Formula > Update.
- Right-click on the cell or table and choose Formula > Update.
Updating formulas by range
Select a range of cells that hold formulas and do one of the following:
- From the Table menu, choose Formula > Update.
- Right-click on the cell or table and choose Formula > Update.
Updating formulas by document
To update all formulas in a document, choose Table > Formula > Update.
Note: t is not necessary to first place the text cursor in a table or make any kind of selections.
Copying formulas
Formulas can be copied from one cell to another cell, just as any other regular text.
The syntax of the pasted formula will be adjusted to its new location.
Example: When copying the formula =SUM(A1+A3) from cell A5 to cell B5, the pasted formula will now be =SUM(B1+B3).
Sorting tables
Smart Styles allows you to sort tables by text, numbers, range, and case sensitivity. Because each language has got its own specific sorting rules, the language rules that the sorting engine needs to follow can also be selected. Of course tables can also be sorted in ascending or descending order.
This feature is also functional in InCopy (when in Layout view mode).
Sorting a table is done by using the Sort dialog. Accessed this by placing the text cursor in the table and doing one of the following:
- Choose Table > Sort.
- Right-click the table and choose Table > Sort from the context menu.
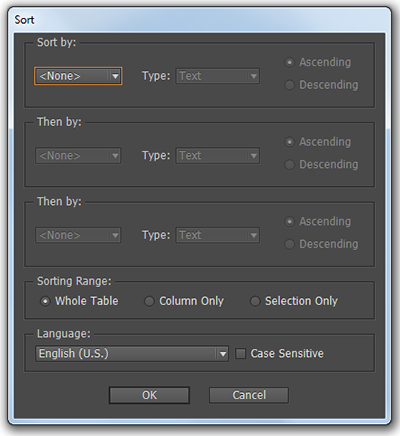
Use any of the options to sort the table.

Comment
Do you have corrections or additional information about this article? Leave a comment! Do you have a question about what is described in this article? Please contact Support.
0 comments
Please sign in to leave a comment.