When Enterprise Server Jobs enter the Server Job queue, they will stay there indefinitely.
When the queue holds too many Jobs though, the performance of database queries can be negatively affected and the overview of Jobs in the Job Queue becomes difficult to manage.
It is therefore important to clean up the queue on a regular basis.This can be done either manually or automatically.

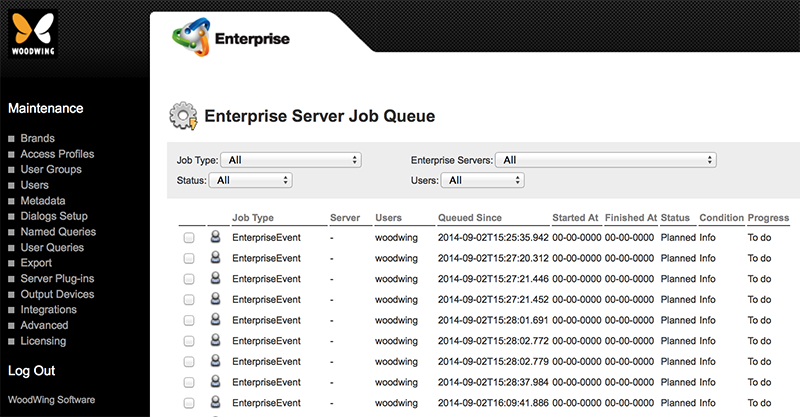
Figure: The Enterprise Server Job Queue page with multiple Server Jobs listed.
Deleting Jobs manually
Step 1. In Enterprise Server, access the Enterprise Server Job Queue page.
Step 1a. Click Integrations in the Maintenance menu or on the Home page.
Step 1b. In the Enterprise Server Jobs section, click Job Queue. The Enterprise Server Job Queue page appears.
Step 2. Select the check box in front of one or more Server Jobs that need to be deleted.
Tip: To select all Jobs on the page, click Select All at the bottom of the page.
Step 3. At the bottom of the page click Delete Selected and confirm the action.
The selected Jobs are deleted.
Deleting Jobs automatically
Enterprise Server Jobs can be automatically and periodically cleaned up by Enterprise Server. This is done by configuring the Enterprise Server Job named "AutoCleanServerJobs".
Step 1. Access the Enterprise Server Job Config page.
Step 1a. In Enterprise Server, click Integrations in the Maintenance menu or on the Home page.
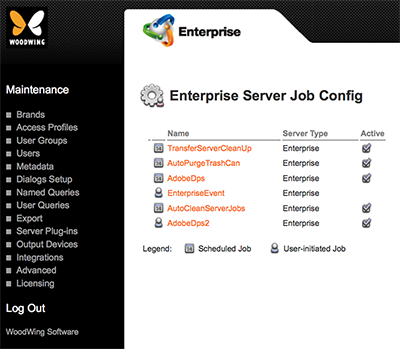
Step 1b. In the Enterprise Server Jobs section, click Job Configurations. The Enterprise Server Job Config page appears.

Step 2. Click AutoCleanServerJobs.
The configuration page for that Job appears.

Step 3. Set its options:
- Attempts: Enter a number which specifies how many attempts should be made to re-try the job until running the job should be canceled.
- Username: Choose a user with system admin privileges.
- Active: Select to activate this job.
Step 4. Click Update.
Step 5. Configure after how many days the Job should run and (optionally) which Jobs should be deleted by doing the following:
Step 5a. In the configserver.php file for Enterprise Server, locate the Enterprise Server Job Auto Cleanup section.
Tip: (For Enterprise Server 10.1 or higher only) Easily manage and configure settings of all configuration files by adding them to a single configuration file.
<Enterprise Server path>/config
// ----------------------------------------------------------------------
// Enterprise Server Job Auto Cleanup
// ----------------------------------------------------------------------

// Automatically deletes Enterprise Server Jobs of a particular status
// when they become older than a specified number of days.

// AUTOCLEAN_SERVERJOBS_COMPLETED:
//    Deletes Enterprise Server Jobs of status 'Completed'.
//    Default value is 14 days, which means all completed jobs in the
//    queue that are older than 14 days will be deleted.
//    When set to zero (0), this feature is disabled.
define( 'AUTOCLEAN_SERVERJOBS_COMPLETED', 14 );

// AUTOCLEAN_SERVERJOBS_UNFINISHED:
//    Deletes Enterprise Server Jobs that have a status other than
//    'Completed'. Default value is 30 days, which means all jobs
//    in the queue that were never picked up, failed or not completed
//    for some reason, and that are older than 30 days will be deleted.
//    When set to zero (0), this feature is disabled.
define( 'AUTOCLEAN_SERVERJOBS_UNFINISHED', 30 );
Step 5b. Do one of the following:
- To delete Enterprise Server jobs of all statuses (such as "Completed", or "Planned"), configure the time interval (in days) for
'AUTOCLEAN_SERVERJOBS_COMPLETED'and'AUTOCLEAN_SERVERJOBS_UNFINISHED'. - To only delete Enterprise Server jobs that have a "Completed" status, configure the time interval (in days) for
'AUTOCLEAN_SERVERJOBS_COMPLETED'. - To only delete Enterprise Server jobs that have a status other than "Completed", configure the time interval (in days) for
'AUTOCLEAN_SERVERJOBS_UNFINISHED'.
Tip: Set either option to 0 (zero) to disable it.
Step 6. Make sure that an Enterprise Server instance is set up to handle the AutoCleanServerJobs Server Job.
Step 6a. Access the Enterprise Server Maintenance page for the Enterprise Server instance.
Step 1. Click Integrations in the Maintenance menu or on the Home page.
Step 2. In the Enterprise Server Jobs section, click Enterprise Servers. The Enterprise Servers page appears.
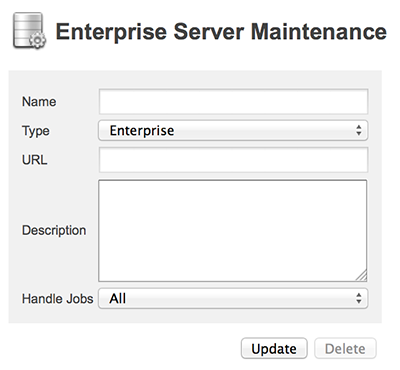
Step 3. Create a new instance or click an existing one. The Enterprise Server Maintenance page appears.

Step 6b. Set the "Handle Jobs" option to All or choose Specified and choose AutoCleanServerJobs from the list.
Note: For more information about setting up Enterprise Server instances, see Working with Enterprise Server Jobs in Enterprise Server 10.
Step 7. Set up a recurring Job schedule as explained in Working with Enterprise Server Jobs in Enterprise Server 10. Make sure to use the following cURL argument: "http://127.0.0.1/Enterprise/jobindex.php?createrecurringjob=AutoCleanServerJobs".
Example: To create an AutoCleanServerJobs job in the Enterprise Server Jobs queue at 23:00h on weekdays only, to be picked up by any of the listed servers, use the following time schedule: Hours: 23, Minutes: 0, Days of the week: 1,2,3,4,5, Months: *, Days of the month: *.
Step 8. Run the Server Jobs test on the Health Check page for Enterprise Server.
Step 8a. Click Advanced in the Maintenance menu or on the Home page.
Step 8b. Click Health Check.
The Health Check page appears.
Step 8c. At the bottom of the page, click Clear All.
Step 8c. Only select the test named Server Jobs and click Test.
Comment
Do you have corrections or additional information about this article? Leave a comment! Do you have a question about what is described in this article? Please contact Support.
0 comments
Please sign in to leave a comment.