Step 1. Access the Publication Channel Maintenance page for the Publication Channel for which Issues need to be set up.
Step 1a. In the Maintenance menu or on the Home page, click Brands.
A page showing all created Brands appears.
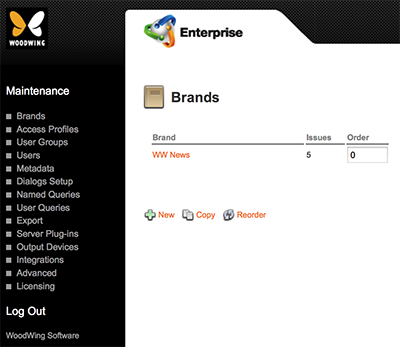
Figure: The Brands page.
Step 1b. Click the name of the Brand in which an Issue needs to be created.
The Brand Maintenance page appears.
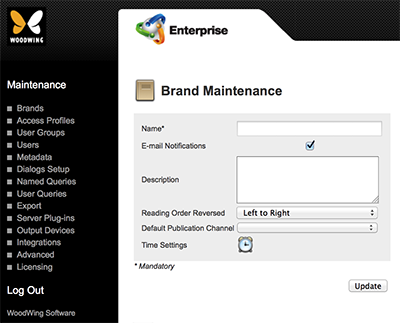
Figure: The Brand Maintenance page.
Step 1c. Locate the Publication Channel options.
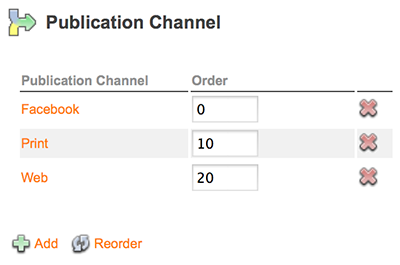
Step 1d. Click the name of the Publication Channel in which an Issue needs to be created.
The Publication Channel Maintenance page appears.
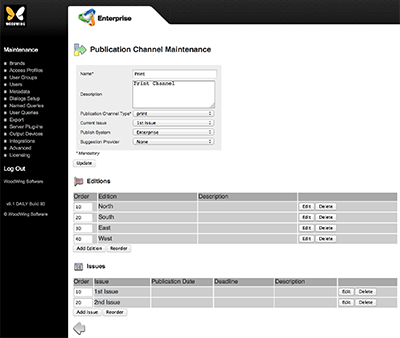
Step 2. In the Issues section, click Add Issue.
The Issue Maintenance page appears.
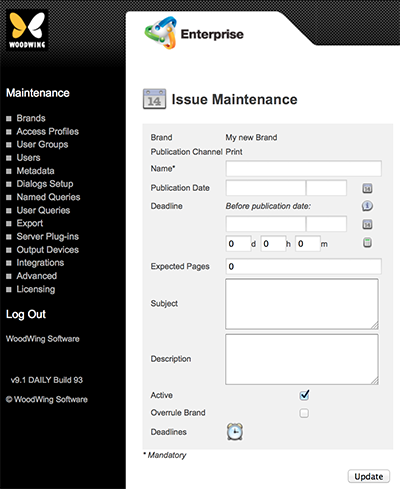
Figure: The Issue Maintenance page for a print channel.
The settings that can be set for an Issue vary per type:

- Name. Name of the Issue.
- Publication Date. Date (and time, if required) when the Issue needs to be published by.
- Deadline. Date (and time, if required) when the Issue needs to be finished by.
Tip: Instead of entering a date, enter the number of days, hours, and/or minutes before the publication date should be reached and click the Recalculate icon. This will automatically calculate the Deadline based on the entered Publication Date.
- Expected Pages. Number of expected pages.
- Subject. This feature is currently not functional.
- Description. The description of the issue; appears in the Library of the Content Viewer.
- Publication title. The title that will appear at the top of each issue in the Library and in the top Navigation bar of the Content Viewer.
Tip: For best results, use no more than 35 characters.
- DPS Product ID. The unique ID of the product.
|
Notes:
|
Tip: For best results, use the com.publisher.publication.issue format (such as com.adobepress.dps_tips.july2013) to specify the Product ID.
- Page orientation. Defines which page orientation is to be used in the Content Viewer:
- Landscape only
- Portrait only
- Landscape and portrait.
Note: The Content Viewer uses this setting to show the issue in the set orientation; this allows having issues with different orientation settings within the same Reader App.
- Page navigation. Defines how the pages are navigated:
- Horizontal: all pages of all stories are placed next to each other.
- Horizontal and vertical: stories are placed next to each other while their pages are placed above each other.
- Reading direction. Specifies if the reading direction should be left-to-right or right-to-left.
- Volume number. The volume number of the publication. Appears in the Navigation top bar of the Adobe Content Viewer.
- DPS Filter. For assigning a filter value to an Issue. This allows users of the Adobe Content Viewer to filter the issues by this value in the Store and Library (such as by language or product.)
- DPS Viewer Version. For setting the minimum version of the Content Viewer that the user needs to have installed in order to view the issue. Set to blank if no minimum installed version should be forced.
- Active. Use to deactivate the Issue. This will hide the Issue and all objects assigned to the Issue from the users without actually removing the Issue from the system.
- Overrule Brand. Use to determine if the new Issue should have its own Categories, Workflow, and User Authorization definitions. After selecting this option, click the Update button to display the options for setting the Categories, Workflow, and Authorizations for this Issue.
Note: When used, make sure to enable Overruled Issues in Content Station.
- Reading Direction. Only available when Overrule Brand is active (and after clicking Update). Determines whether the pages in the Issue are displayed left to right or right to left (reversed) when viewed in the Publication Overview of Content Station.
- Activate Relative Deadlines. (Since Enterprise 9.2) Only available when Overrule Brand is active (and after clicking Update). Activates the functionality for assigning deadlines to Categories and Workflow Statuses. When selected, the 'Time Settings' icon appears.
- Time Settings. Only available when Overrule Brand is active (and after clicking Update), and (since Enterprise 9.2) after clicking 'Activate Relative Deadlines'. Displays the Relative Deadline page.
- Deadlines. (Since Enterprise 9.2 this option only appears when 'Activate Relative Deadlines' is selected on the Brand Maintenance page.) Displays the Issue Deadlines page.
- Time Settings. Only available when Overrule Brand is active (and after clicking Update). Displays the Relative Deadline page.
- Deadlines. Displays the Issue Deadlines page.
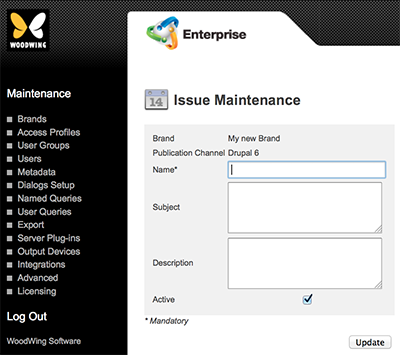
- Name. Name of the Issue.
- Subject. This feature is currently not functional.
- Description. Description of the Issue.
- Active. Use to deactivate the Issue. This will hide the Issue and all objects assigned to the Issue from the users without actually removing the Issue from the system
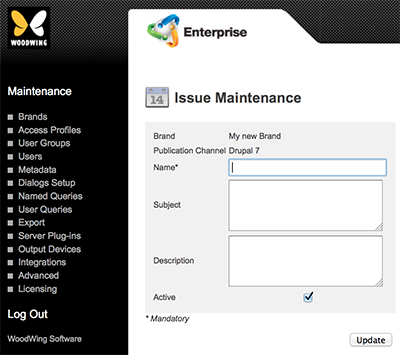
- Name. Name of the Issue.
- Subject. This feature is currently not functional.
- Description. Description of the Issue.
- Active. Use to deactivate the Issue. This will hide the Issue and all objects assigned to the Issue from the users without actually removing the Issue from the system
Info: This feature requires Enterprise Server version 9.1 or higher.
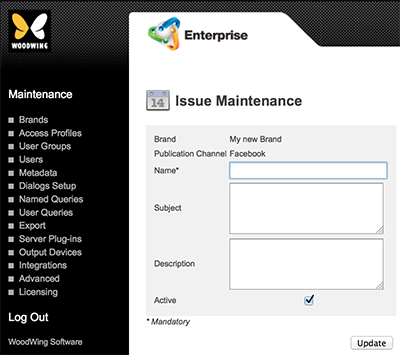
- Name. Name of the Issue.
- Subject. This feature is currently not functional.
- Description. Description of the Issue.
- Active. Use to deactivate the Issue. This will hide the Issue and all objects assigned to the Issue from the users without actually removing the Issue from the system

- Name. Name of the Issue.
- Publication Date. Date (and time, if required) when the Issue needs to be published by.
- Deadline. Date (and time, if required) when the Issue needs to be finished by.
Tip: Instead of entering a date, enter the number of days, hours, and/or minutes before the publication date is reached and click the Recalculate icon. This will automatically calculate the Deadline based on the entered Publication Date.
- Expected Pages. Number of expected pages.
- Subject. This feature is currently not functional.
- Description. Description of the Issue.
- Active. Use to deactivate the Issue. This will hide the Issue and all objects assigned to the Issue from the users without actually removing the Issue from the system.
- Overrule Brand. Use to determine if the new Issue should have its own Categories, Workflow, and User Authorization definitions. After selecting this option, click the Update button to display the options for setting the Categories, Workflow, and Authorizations for this Issue.
Note: When using this option, make sure to enable Overruled Issues in Content Station.
- Reading Direction. Only available when Overrule Brand is active (and after clicking Update). Determines whether the pages in the Issue are displayed left to right or right to left (reversed) when viewed in the Publication Overview of Content Station.
- Activate Relative Deadlines. (Since Enterprise 9.2 or higher. Only appears when 'Overrule Brand' is active (and after clicking Update). Activates the functionality for assigning deadlines to Categories and Workflow Statuses. When selected, the 'Time Settings' icon appears.
- Time Settings. Only available when Overrule Brand is active (and after clicking Update), and (since Enterprise 9.2) after clicking 'Activate Relative Deadlines'. Displays the Relative Deadline page.
- Deadlines. (Since Enterprise 9.2 this option only appears when 'Activate Relative Deadlines' is selected on the Brand Maintenance page.) Displays the Issue Deadlines page.
Info: This feature requires Enterprise Server version 9.1 or higher.
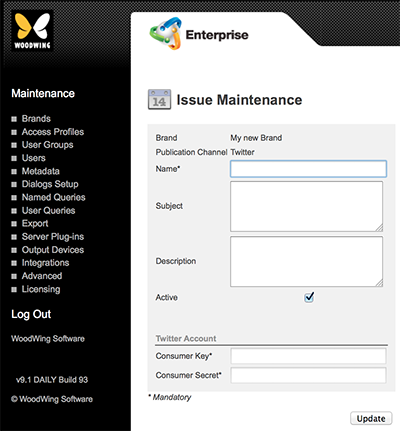
- Name. Name of the Issue.
- Subject. This feature is currently not functional.
- Description. Description of the Issue.
- Active. Use to deactivate the Issue. This will hide the Issue and all objects assigned to the Issue from the users without actually removing the Issue from the system.
- Consumer Key: Obtain this from the Application Details page for your app on https://dev.twitter.com.
- Consumer Secret: Obtain this from the Application Details page for your app on https://dev.twitter.com.
Info: This feature requires Enterprise Server version 9.2 or higher.
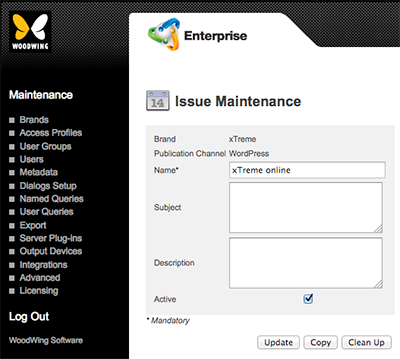
- Name. Name of the Issue.
- Subject. This feature is currently not functional.
- Description. Description of the Issue.
- Active. Use to deactivate the Issue. This will hide the Issue and all objects assigned to the Issue from the users without actually removing the Issue from the system
Step 3. Enter the details.
Step 4. Click Update.
The Publication Channel Maintenance page appears with the newly created Issue added to the Issues section.
Related Information
The Issue Maintenance page in Enterprise Server 9
Related Tasks
Deleting an Issue in Enterprise Server 9
Reference Materials
Comment
Do you have corrections or additional information about this article? Leave a comment! Do you have a question about what is described in this article? Please contact Support.
0 comments
Please sign in to leave a comment.