Working on files in Swivle begins with first finding the files you need.
This article describes the various ways in which files can be located using Swivle. Use the summary to quickly learn about the possible methods; more detailed information can be found in the 'In depth' section.
Summary
Searching for files can be done by:
- Entering a search term in the Search box. When doing so, a list appears below the box.
- The top section of the list contains a reference to the entered search term. Click it to search on that term or simply press Enter.
- The bottom section of the list contains an overview of folders that have been found which names contain the currently entered search term. Click a folder to show its content in the search results.

- Selecting a folder in the Folder browser. Use this method when you know where the files are stored.
- Using the Filter to narrow down the search results, such as by file type, tag, status, and so on.
- Bookmarking an often used search for re-use. The following is stored:
- The search query
- The selected folder
- Selected filters and applied filter values
- Metadata fields shown in various panels and thumbnail tiles
- Selected view mode and zoom levels
|
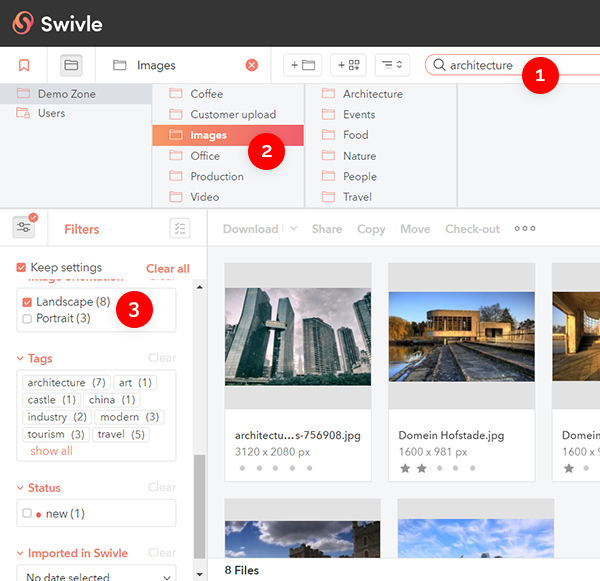
Example: Here, 3 methods are used: a search term "architecture" is entered in the Search box (A), an images folder is selected (B) and the search results are filtered to show images in landscape orientation only (C).
|
In depth
This section explains the methods of searching for files more in depth.
|
Info: Use the filter to only show information for one method:
|
Entering a search term in the Search box
Enter a search term in the Search box to find any files with that phrase in their file name, description, tags, and so on.
Take note of the following:
- After entering the search term, press Enter to perform the search.
- To find all files within a location, press Enter while leaving the Search box empty or click the 'x' on the right side of the search box.
- When browsing the folder structure (see below) while a search term is entered, the search looks for all files that contain the search term and that are stored in the chosen location.
- Complex searches can be constructed by using queries.
- The use of the following characters in a search term is not supported:
! ^ ( ) { } [ ] - + ~
- The behavior of the list of found folders in the Folder browser is as follows:
- For the first 3 terms entered, the folders appear in the list when the terms are present in the folder name in any order.
- For 4 or more terms entered, the folders only appear in the list when the order of the terms is the same as the order in the folder name.
|
Example: Consider a folder with the name one two three four five. The following table shows the results when searching for that folder by using specific search terms:
|
Browsing the folder structure
Use the Folder browser to search within a particular folder only.

- To show or hide the Folder browser, click the Folder browser icon.
![]()
- Browse to the folder in which you want to search.
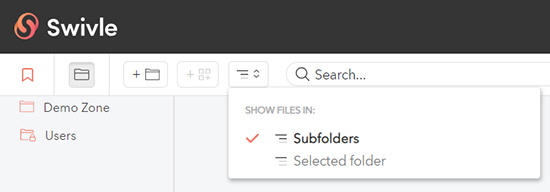
- By default, the search includes all sub folders. To search in the selected folder only, choose Selected folder from the Action menu in the toolbar:
- Subfolders. When selected, all files are shown that are in the selected folder as well as all files in any subfolders of that folder.
- Selected folder. When selected, only files in the selected folder are shown. Any files that are in a subfolder of that folder are not shown.
- The search result shows all files within the selected folder. If a search term is entered (see above) and/or the Filter is used (see below), the search result takes these into account.
- The currently selected folder is shown to the right of the Folder browser icon. When the Folder browser is closed, this shows you in which folder you are currently searching.
- To return to the top (root) folder, click 'x' next to the folder name or click the empty space in the first column.
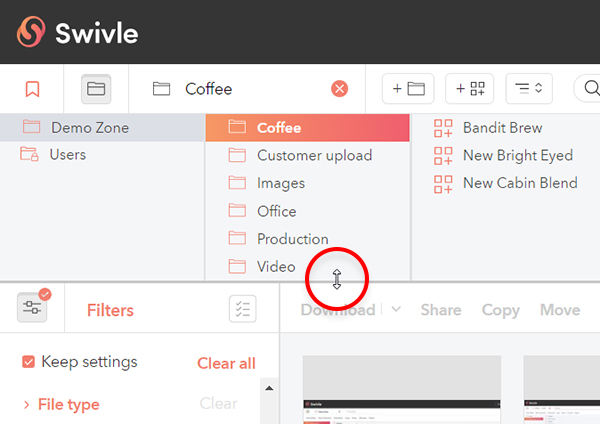
- Adjust the height of the Folder browser by dragging the divider at the bottom up or down.
Filtering the search results
Use the Filter to further narrow down the search results.
- The Filter can be hidden and shown by clicking the Filter icon.
![]()
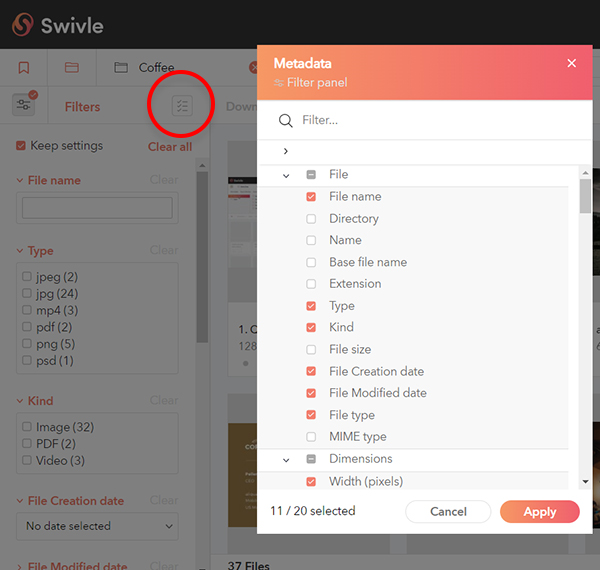
- Add or remove Filter options by clicking the Configure Filters icon and selecting/de-selecting options from the list. Up to 20 options at a time can be used (the total number of selected options is shown at the bottom of the panel). Use the Search box to quickly find an option. When done, click Apply to save the changes.
- Use a Filter option by:
- Typing some text and pressing Enter.
- Selecting or clearing a check box.
- Choosing an option from a list.
- Clicking a tag.
- Clear a Filter option by clicking its Clear label or click Clear All to clear all Filter options.
- To keep the Filter options active while using the Search box and/or Folder Browser, select Keep settings.
Using Bookmarks
Some files are searched for on a regular basis, such as those in a particular location, with a particular status, and so on.
Such searches can be saved as Bookmarks for easy re-use.
Bookmarks can be accessed via the Bookmark menu in the top left-hand corner.
Any Bookmark that is created can be shared with other users by a system administrator; these Bookmarks can be recognized by the users icon next to their name in the Bookmark menu.
Often used Bookmarks can be pinned to the top of the menu.
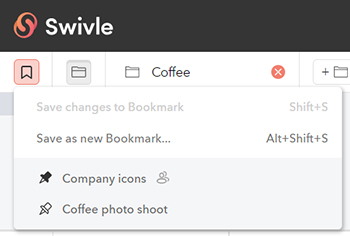
Figure: The Bookmarks menu showing Bookmarks that are pinned and Bookmarks that are shared between users.
The following is stored in a Bookmark:
- The search query
- The selected folder
- Selected filters and the applied filter values
- Metadata fields shown in various panels and thumbnail tiles
- The selected view mode and zoom levels
Use Bookmarks as follows:
- Create a Bookmark by performing your search, clicking on the Bookmark icon in the top left corner and choosing Save as new Bookmark... . Enter a name and press Enter to save it.
- Update a Bookmark by opening an existing Bookmark, performing your search, clicking on the Bookmark icon in the top left corner and choosing Save as new Bookmark... from the main Bookmark menu or Apply current settings from the context menu of a Bookmark. Confirm that you want to make the changes.
Note: Be careful making (large) changes to Bookmarks that are shared; other users might expect to see different results.
- Manage your Bookmarks by using the commands in the context menu such as deleting or renaming a Bookmark, or opening it in a new tab.
Note: Bookmarks that are shared and which have not been created by yourself cannot be edited or deleted. If you want to make changes to such a Bookmark, turn it into a new Bookmark for yourself.
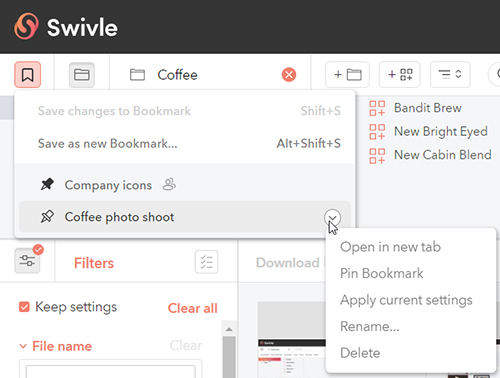
- Pin or unpin a Bookmark by clicking its Pin icon or by choosing Pin Bookmark or Unpin Bookmark from the context menu.
- Close an active Bookmark by clicking its x-icon next to its name. The search is shown that was active before the Bookmark was selected.
- Use any of the following keyboard shortcuts:
| Keyboard shortcut | Action |
|---|---|
| Alt+O | Open or close the Bookmark panel. |
| Alt+Shift+O | Close the Bookmark. |
| Shift+S | Create a new Bookmark when no Bookmark is active or save changes to the currently active Bookmark. |
| Shift+Alt+S | Save as a new Bookmark. |
Comments
0 comments
Please sign in to leave a comment.